Thursday 29 December 2022

West Coast IPA - Tasting Results & Review


Although we're quite happy with how this one turned out, unfortunately we've missed the mark a little in terms of brewing strictly to the West Coast IPA style. There's certainly a little too much residual sweetness from the malt, so it hasn't got that hop-focused, dry finish that is expected with a West Coast IPA. As an American IPA however, it is very good, though we'd still knock back a little bit of the toffee and crystal malts to dial back the sweetness - it's just a little cloying and distracts somewhat from the hop character.

In terms of colour, it's spot on with a beautiful golden, honey like colour. Comparing it once again strictly to the style and it is a little bit hazy, though we made no effort to clear it at all, since crystal clear beer isn't a particularly high priority for us at this point. It is something we'll look at correcting for future brews though, especially when we start delving into the world of lagers and pilseners that really benefit from some clarifying.

The hop schedule was pretty good, with a fairly restrained bitterness considering the level of IBU's that are in it. The combination of hops was good too, centennial really seems to dominate in terms of the flavour though. 

So if you're looking to brew this one yourself, we'd reduce both the toffee and crystal malts to 200g each to instill a bit more balance, but would keep just about everything else the same.


Related Articles

West Coast IPA - Recipe (All Grain)

West Coast IPA - BrewZilla Brew Day

West Coast IPA - Recipe Creation Guide

Tuesday 20 December 2022

Beginner FAQ: How to tell if my beer has started fermenting?

So you've prepared your wort in your fermenter, pitched the yeast, and you've anxiously waited hours or possibly even a day (or more) for some sort of indication that fermentation has started. It's not always easy to tell, but here are some signs to look for or things to check as indicators that your beer is fermentation has begun.

Air Lock Activity

Probably the most obvious one, bubbles in your air lock are a tell-tale sign that your beer is actively fermenting. As the yeast ferment your wort and consume the sugars contained within it, they produce carbon dioxide gas (amongst other things) as a byproduct of fermentation. The escaping of this gas through the air lock creates a bubbling effect as it passes through the liquid contained in the air lock. If you're seeing bubbles, then carbon dioxide gas is being created so fermentation is definitely underway.

An example of an air lock

However, it's worth pointing out that if you don't see air lock activity, this doesn't necessarily mean fermenation isn't under way. If there is any kind of leak in the seal of the fermenter lid, then the gas will escape through there rather than the air lock, so check for other signs of fermentation before declaring your fermentation isn't underway.

Pressure Build Up in Fermenter Headspace

Similar to what was mentioned above with air lock activity, if you are using a pressure fermenter then any increase in pressure of the head space is a sure sign that things are underway, since the gas will build up and create pressure within the fermenter rather than escaping straight out of the air lock.

Any positive pressure on the spunding valve gauge is a sure sign that fermentation has started

As soon as the pressure gauge on your spunding valve starts to move from 0, then it's a sign that fermentation is underway.

Visual Signs - Bubbles and Krausen

Within several hours of pitching your yeast, you may start to see small bubbles forming on the surface of your wort. This is generally an indication of yeast activity and a good sign that fermentation is slowly beginning and ramping up.

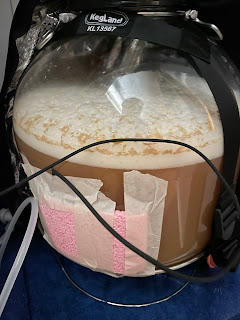
An example of Krausen in a fermenter

As fermentation progresses, a krausen will develop on the top of the fermenting wort which is a sure sign that things are well and truly underway and progressing as expected. Krausen can come in many different colours and textures, but it's generally a foamy like substance, kind of like "mousse" with any colour or colours ranging from white to brown.

Unfortunately if you don't have a clear or translucent fermenter then visual signs may not be achievable (unless you open the lid of your fermenter and look inside), in which cause other methods of checking may be preferable.

Reduction in Gravity

The most reliable way to know that fermentation is underway is a change (reduction) in the gravity reading of your wort. Gravity refers to the amount of sugar in the wort, and as the yeast begin to consume the sugar in the wort, the gravity will begin to decrease.

Gravity readings using a floating hydrometer remove any doubt as to whether or not fermenation has begun

Along with being able to determine the alcohol contained in your beer, this is another reason to measure the starting gravity of your wort prior to pitching the yeast. If the gravity has reduced from your starting gravity then this is a guarantee that fermentation has begun.

Gravity is measured using a hydrometer - floating hydrometers are the most common and popular, but require a sample to be drawn from the fermenter in order to take a reading. There are also Wi-Fi capable hydrometers (like the RAPT Pill) that remain floating in your wort during fermentation that report real-time gravity readings which give a great insight into the state and progress of fermentation.


Monday 19 December 2022

The Importance of Oxygenating Wort when Brewing Beer

Why Do Yeast Need Oxygen?

At every stage of the beer creation process after fermentation, oxygen is the number one enemy as it can rapidly deteriorate the appearance, aroma and most importantly the flavour of your beer in a process known as oxidation.

Prior to fermentation, however, oxygen is a critical component that is often overlooked by homebrewers. For whatever reason it just doesn't get the same attention and appreciation as other things like fermentation temperature control. 

Yeast require oxygen to be present in the wort prior to and during the initial stages of fermentation for cell growth and reproduction. Yeast produce fatty acids and sterols, known as lipids which are important components of the cell membrane which influence the ability of the cells to grow and reproduce, which happens shortly after the yeast is pitched into the wort. Think of it as the preparation phase that yeast go through to prior to feasting on the sugars contained in the wort.
When wort is boiled as part of the brewing process, it drives off many undesirable compounds and makes the wort sanitary in preparation for yeast to do their thing, but it also removes most of the oxygen from the wort.

Failure to replenish the wort with sufficient oxygen prior to pitching yeast can lead to poor yeast health, which can in turn cause substandard fermentation performance and outcomes. Things like reduced attenuation (not reaching the expected final gravity), long lag times or fermentations becoming stuck or taking too long are all classic symptoms of insufficient oxygen in the wort. Poor yeast health will often mean off flavours and other undesirable compounds will end up in the finished beer. The end result - your finished beer just won't taste as good as it could.

How much Oxygen is Required?

There are many factors that determine how much oxygen is required by yeast - such as the variety of yeast strain, the amount of yeast that have been pitched (pitch rate), starting gravity of the wort and the amount of trub present in the wort.

The ability for wort to absorb oxygen is dependent on factors such as gravity (the amount of sugar present) as well as temperature. The higher the gravity or the temperature of the wort, the less oxygen is able to be readily absorbed by it.

The generally accepted amount of oxygen required in wort prior to fermentation is 8-10 parts per million (ppm) with 5ppm being considered the bare minimum. It is possible to achieve 8ppm using regular atmospheric air, but levels above this will require the use of pure oxygen.

10ppm is considered the ideal amount for most fermentations, and when it comes to oxygen levels, too much is better than not enough. Yeast will typically consume all the available oxygen within 3-9 hours of being pitched into the wort, and some oxygen will also come out of solution during this time.

Oxygenation vs Aeration

When it comes to oxygenating wort, you'll often hear the terms "oxygenation" and "aeration" being used. So what's the difference?

Oxygenation is the process of adding pure oxygen to a solution.

Aeration is the process of adding regular air to a solution.

Obviously from a brewing perspective, the "solution" we're referring to is our wort, and both methods are employed after the wort has been chilled to yeast pitching temperature after boiling.

Aeration Methods

Arguably easier and more accessible for homebrewers is the aeration method. There are several ways that wort can be aerated such as;

  • Vigorously stirring the wort with a mash paddle, whisk or other utensil
  • Using a paint stirring attachment on an electric drill
  • Covering and shaking the fermenter or carboy
  • Pouring the wort between two fermenters or carboys (can be repeated several times)
  • Creating a splashing effect when transferring to fermenter by using a mesh strainer or something similar
  • Using a pond or other pump connected to a diffusion stone submersed in the wort
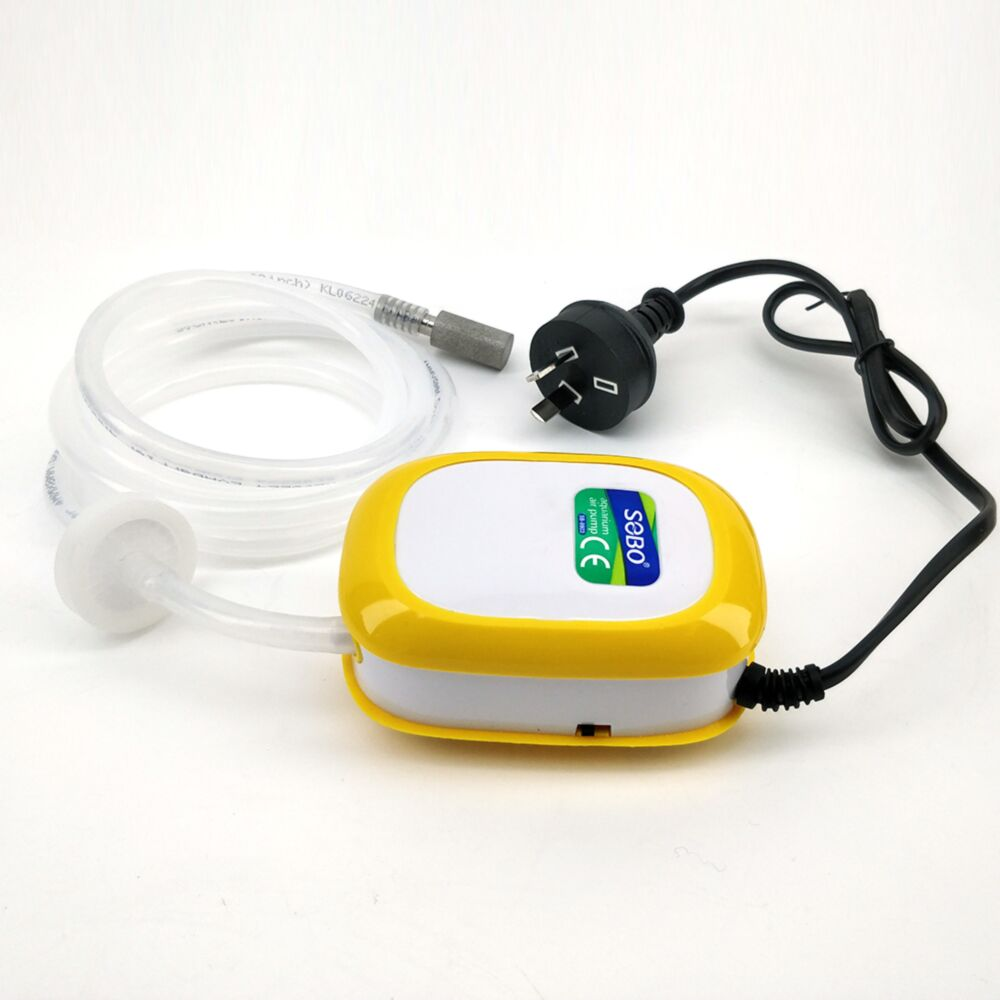
An example of a pump for wort aeration

From the list above you can see that aeration methods are typically quite manual and labour intensive. Since you're adding air, which is comprised of roughly 21% oxygen, it can take as long as 15-20 minutes to get the required amount of oxygen into the wort, and even then you won't get any more than 8ppm using aeration.

It's also difficult to know exactly how much air or oxygen is being added to your wort using these methods.

Finally, the risk of contaminants being introduced into your wort is arguably higher when using aeration methods since you're adding air from the atmosphere that may contain other microbes and particulates that may or may not lead to an infection occurring.

Oxygenation Methods

More effective and efficient that aeration, oxygenation involves adding pure oxygen directly into the wort. A source of pure oxygen (usually a tank) is required, as well as some other specialised equipment. Some common oxygenation methods are;

  • A diffusion stone submersed in the wort 
  • Inline oxygenation that infuses oxygen into the wort as it passes from the kettle to the fermenter

Equipment such as a pressure regulator, tubing and a diffusion stone will be required to perform either method outlined above, but since you're working with pure oxygen, the process is much faster, efficient and arguably less risky than aeration, since it's incredibly unlikely any microbes or other organisms could survive in an environment of pure oxygen.

Since you're adding pure oxygen in a form of controlled dose, it's also easier to determine (albeit roughly) how much oxygen you are adding into your wort.

Using pure oxygen you are also able to reach the desired level of 10-12ppm of dissolved oxygen in your wort and aren't limited to 8ppm like you are by using aeration methods previously described.

Conclusion

There are many factors to consider when brewing a beer - water chemistry, pH level, fermentation temperature are just a few critical elements that require the attention of brewers in order to achieve the best outcomes. It makes sense then that the health of yeast is also critical, after all - brewers create wort, and yeast create beer.

On it's own, it's unlikely that oxygenating will solely provide significant gains - especially if some of the factors we mentioned earlier aren't also addressed. Brewing an excellent beer is the culmination of getting many small things right which is all part of the journey of becoming a better brewer.

It's definitely worth taking notice of advice that is repeated as often as the professional advice around wort oxygenation. When yeast manufacturers themselves who have all the science knowledge, research and testing to back up their claims advise that this is the way to go to get best results, it's best to pay attention. 

Oxygenating wort is something we're going to start focusing more on in our own brewing journey in order to try and improve the quality of the beers we make. 

We've recently reviewed Spike Brewing's Oxygenation Kit which is a great piece of gear to help easily and accurately oxygenate your wort. Click the link above to see the article.


Monday 12 December 2022

All Inn Brewing Co - Mutiny Red IPA - Fresh Wort Kit Beer Review

Review Date: 9/12/22
Brewery Name: All Inn Brewing Co
Beer Name: Mutiny Red IPA

"A redshifted IPA with malt richness in overdrive and a gang of four powerful new world hop varieties to boldly go further."

General

Alcohol By Volume (ABV): Unknown

Label/Design: 7/10

Serving Style: Draft/Tap

Region of Origin: Pacific (Australia, New Zealand)

Style Family: IPA

Malts/Adjuncts: Ale, Munich, Aromatic, Shepherds Delight

Hops: Columbus, Citra, Mosaic, Simcoe (dry hops Citra, Azacca, Mosaic, Amarillo, Centennial)

IBU's: 70

Appearance

Colour: Brown

Clarity

Brilliant Clear Slight Haze Hazy

Collar of Foam & Head Retention

None 

Poor
(Up to 15 secs)

Moderate
(15 - 60 secs) 

Good
(more than 60 secs)


Foam Texture

N/A Thin Fluffy Mousse-Like

Carbonation (Visible)

None Slow Medium Fast-Rising Bubbles

Alcohol Aroma

Not Detectable Mild Noticeable Strong Harsh

Aroma & Flavour

Esters Aroma: None
Phenols: None


Alcohol Taste:

Not Detectable Mild Noticeable Strong Harsh

Hop Pungency:

Mild Moderate Strong Extreme

Hop Bitterness:

Restrained Moderate Aggressive Harsh

Malt Sweetness:

Low Medium High Cloying
(Excessive)

Astringency: 

Low Medium High

Palate/Mouthfeel: 

Light Bodied
(Thin/Watery)
Medium Bodied
(Light + Full)
Full Bodied
(Round, Rich & Creamy)

Palate Carbonation: 

Low Medium High

Length/Finish:

Short
(Up to 15 seconds)
Medium
(15 to 60 seconds)
Long
(More than 60 seconds)


Oxidative/Aged Qualities: None

All Inn Brewing Co - Mutiny Red IPA Fresh Wort Kit in the Craftd Freddy glass

Overall

Drinkability: 6/10

Overall Impression: 6.5/10

Notes

Straight off the bat, we've always thought from the very first sip of this beer that it was a little too bitter for our taste. The undiluted fresh wort kit comes in at 70 IBU's which is fairly high, and we only diluted it without about 3L instead of the recommended 5L to try and keep the ABV a little higher.

We threw the kitchen sink at it with dry hops, using a whole heap of spare, random hops we had left over with a total of just under 150g. Since they weren't particularly fresh we don't feel we got the full dry hopping effect we would have normally liked which could help offset some of the bitterness. If we did it again we'd dry hop it with at least 150g, possibly more of fresh hops.

There's a fair amount of residual sweetness from the malt to try and offset the bitterness but still we found the bitterness dominated, up front as well as at the finish - the balance just wasn't quite there with this one.

Others who tasted it said they quite liked it, we'd say it's not bad but not quite to our taste.


Related Articles

All Inn Brewing Co - Kissaki Japanese Lager (FWK) - Review