Thursday 29 December 2022

West Coast IPA - Tasting Results & Review


Although we're quite happy with how this one turned out, unfortunately we've missed the mark a little in terms of brewing strictly to the West Coast IPA style. There's certainly a little too much residual sweetness from the malt, so it hasn't got that hop-focused, dry finish that is expected with a West Coast IPA. As an American IPA however, it is very good, though we'd still knock back a little bit of the toffee and crystal malts to dial back the sweetness - it's just a little cloying and distracts somewhat from the hop character.

In terms of colour, it's spot on with a beautiful golden, honey like colour. Comparing it once again strictly to the style and it is a little bit hazy, though we made no effort to clear it at all, since crystal clear beer isn't a particularly high priority for us at this point. It is something we'll look at correcting for future brews though, especially when we start delving into the world of lagers and pilseners that really benefit from some clarifying.

The hop schedule was pretty good, with a fairly restrained bitterness considering the level of IBU's that are in it. The combination of hops was good too, centennial really seems to dominate in terms of the flavour though. 

So if you're looking to brew this one yourself, we'd reduce both the toffee and crystal malts to 200g each to instill a bit more balance, but would keep just about everything else the same.


Related Articles

West Coast IPA - Recipe (All Grain)

West Coast IPA - BrewZilla Brew Day

West Coast IPA - Recipe Creation Guide

Tuesday 20 December 2022

Beginner FAQ: How to tell if my beer has started fermenting?

So you've prepared your wort in your fermenter, pitched the yeast, and you've anxiously waited hours or possibly even a day (or more) for some sort of indication that fermentation has started. It's not always easy to tell, but here are some signs to look for or things to check as indicators that your beer is fermentation has begun.

Air Lock Activity

Probably the most obvious one, bubbles in your air lock are a tell-tale sign that your beer is actively fermenting. As the yeast ferment your wort and consume the sugars contained within it, they produce carbon dioxide gas (amongst other things) as a byproduct of fermentation. The escaping of this gas through the air lock creates a bubbling effect as it passes through the liquid contained in the air lock. If you're seeing bubbles, then carbon dioxide gas is being created so fermentation is definitely underway.

An example of an air lock

However, it's worth pointing out that if you don't see air lock activity, this doesn't necessarily mean fermenation isn't under way. If there is any kind of leak in the seal of the fermenter lid, then the gas will escape through there rather than the air lock, so check for other signs of fermentation before declaring your fermentation isn't underway.

Pressure Build Up in Fermenter Headspace

Similar to what was mentioned above with air lock activity, if you are using a pressure fermenter then any increase in pressure of the head space is a sure sign that things are underway, since the gas will build up and create pressure within the fermenter rather than escaping straight out of the air lock.

Any positive pressure on the spunding valve gauge is a sure sign that fermentation has started

As soon as the pressure gauge on your spunding valve starts to move from 0, then it's a sign that fermentation is underway.

Visual Signs - Bubbles and Krausen

Within several hours of pitching your yeast, you may start to see small bubbles forming on the surface of your wort. This is generally an indication of yeast activity and a good sign that fermentation is slowly beginning and ramping up.

An example of Krausen in a fermenter

As fermentation progresses, a krausen will develop on the top of the fermenting wort which is a sure sign that things are well and truly underway and progressing as expected. Krausen can come in many different colours and textures, but it's generally a foamy like substance, kind of like "mousse" with any colour or colours ranging from white to brown.

Unfortunately if you don't have a clear or translucent fermenter then visual signs may not be achievable (unless you open the lid of your fermenter and look inside), in which cause other methods of checking may be preferable.

Reduction in Gravity

The most reliable way to know that fermentation is underway is a change (reduction) in the gravity reading of your wort. Gravity refers to the amount of sugar in the wort, and as the yeast begin to consume the sugar in the wort, the gravity will begin to decrease.

Gravity readings using a floating hydrometer remove any doubt as to whether or not fermenation has begun

Along with being able to determine the alcohol contained in your beer, this is another reason to measure the starting gravity of your wort prior to pitching the yeast. If the gravity has reduced from your starting gravity then this is a guarantee that fermentation has begun.

Gravity is measured using a hydrometer - floating hydrometers are the most common and popular, but require a sample to be drawn from the fermenter in order to take a reading. There are also Wi-Fi capable hydrometers (like the RAPT Pill) that remain floating in your wort during fermentation that report real-time gravity readings which give a great insight into the state and progress of fermentation.


Monday 19 December 2022

The Importance of Oxygenating Wort when Brewing Beer

Why Do Yeast Need Oxygen?

At every stage of the beer creation process after fermentation, oxygen is the number one enemy as it can rapidly deteriorate the appearance, aroma and most importantly the flavour of your beer in a process known as oxidation.

Prior to fermentation, however, oxygen is a critical component that is often overlooked by homebrewers. For whatever reason it just doesn't get the same attention and appreciation as other things like fermentation temperature control. 

Yeast require oxygen to be present in the wort prior to and during the initial stages of fermentation for cell growth and reproduction. Yeast produce fatty acids and sterols, known as lipids which are important components of the cell membrane which influence the ability of the cells to grow and reproduce, which happens shortly after the yeast is pitched into the wort. Think of it as the preparation phase that yeast go through to prior to feasting on the sugars contained in the wort.

When wort is boiled as part of the brewing process, it drives off many undesirable compounds and makes the wort sanitary in preparation for yeast to do their thing, but it also removes most of the oxygen from the wort.

Failure to replenish the wort with sufficient oxygen prior to pitching yeast can lead to poor yeast health, which can in turn cause substandard fermentation performance and outcomes. Things like reduced attenuation (not reaching the expected final gravity), long lag times or fermentations becoming stuck or taking too long are all classic symptoms of insufficient oxygen in the wort. Poor yeast health will often mean off flavours and other undesirable compounds will end up in the finished beer. The end result - your finished beer just won't taste as good as it could.

How much Oxygen is Required?

There are many factors that determine how much oxygen is required by yeast - such as the variety of yeast strain, the amount of yeast that have been pitched (pitch rate), starting gravity of the wort and the amount of trub present in the wort.

The ability for wort to absorb oxygen is dependent on factors such as gravity (the amount of sugar present) as well as temperature. The higher the gravity or the temperature of the wort, the less oxygen is able to be readily absorbed by it.

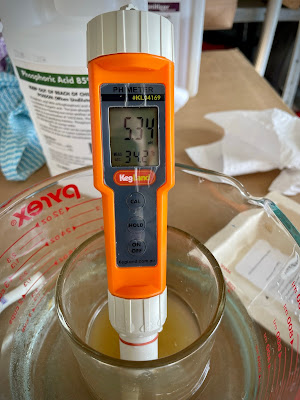
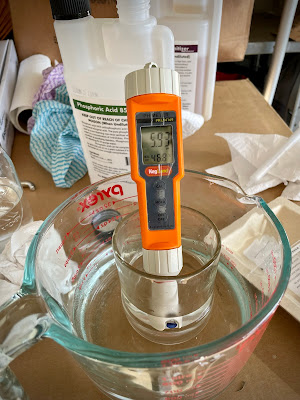
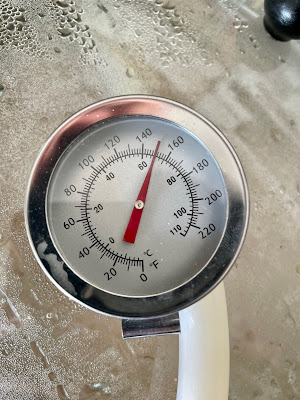
The generally accepted amount of oxygen required in wort prior to fermentation is 8-10 parts per million (ppm) with 5ppm being considered the bare minimum. It is possible to achieve 8ppm using regular atmospheric air, but levels above this will require the use of pure oxygen.

10ppm is considered the ideal amount for most fermentations, and when it comes to oxygen levels, too much is better than not enough. Yeast will typically consume all the available oxygen within 3-9 hours of being pitched into the wort, and some oxygen will also come out of solution during this time.

Oxygenation vs Aeration

When it comes to oxygenating wort, you'll often hear the terms "oxygenation" and "aeration" being used. So what's the difference?

Oxygenation is the process of adding pure oxygen to a solution.

Aeration is the process of adding regular air to a solution.

Obviously from a brewing perspective, the "solution" we're referring to is our wort, and both methods are employed after the wort has been chilled to yeast pitching temperature after boiling.

Aeration Methods

Arguably easier and more accessible for homebrewers is the aeration method. There are several ways that wort can be aerated such as;

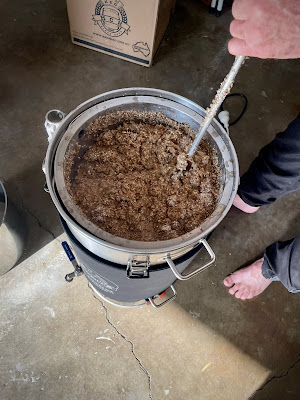
  • Vigorously stirring the wort with a mash paddle, whisk or other utensil
  • Using a paint stirring attachment on an electric drill
  • Covering and shaking the fermenter or carboy
  • Pouring the wort between two fermenters or carboys (can be repeated several times)
  • Creating a splashing effect when transferring to fermenter by using a mesh strainer or something similar
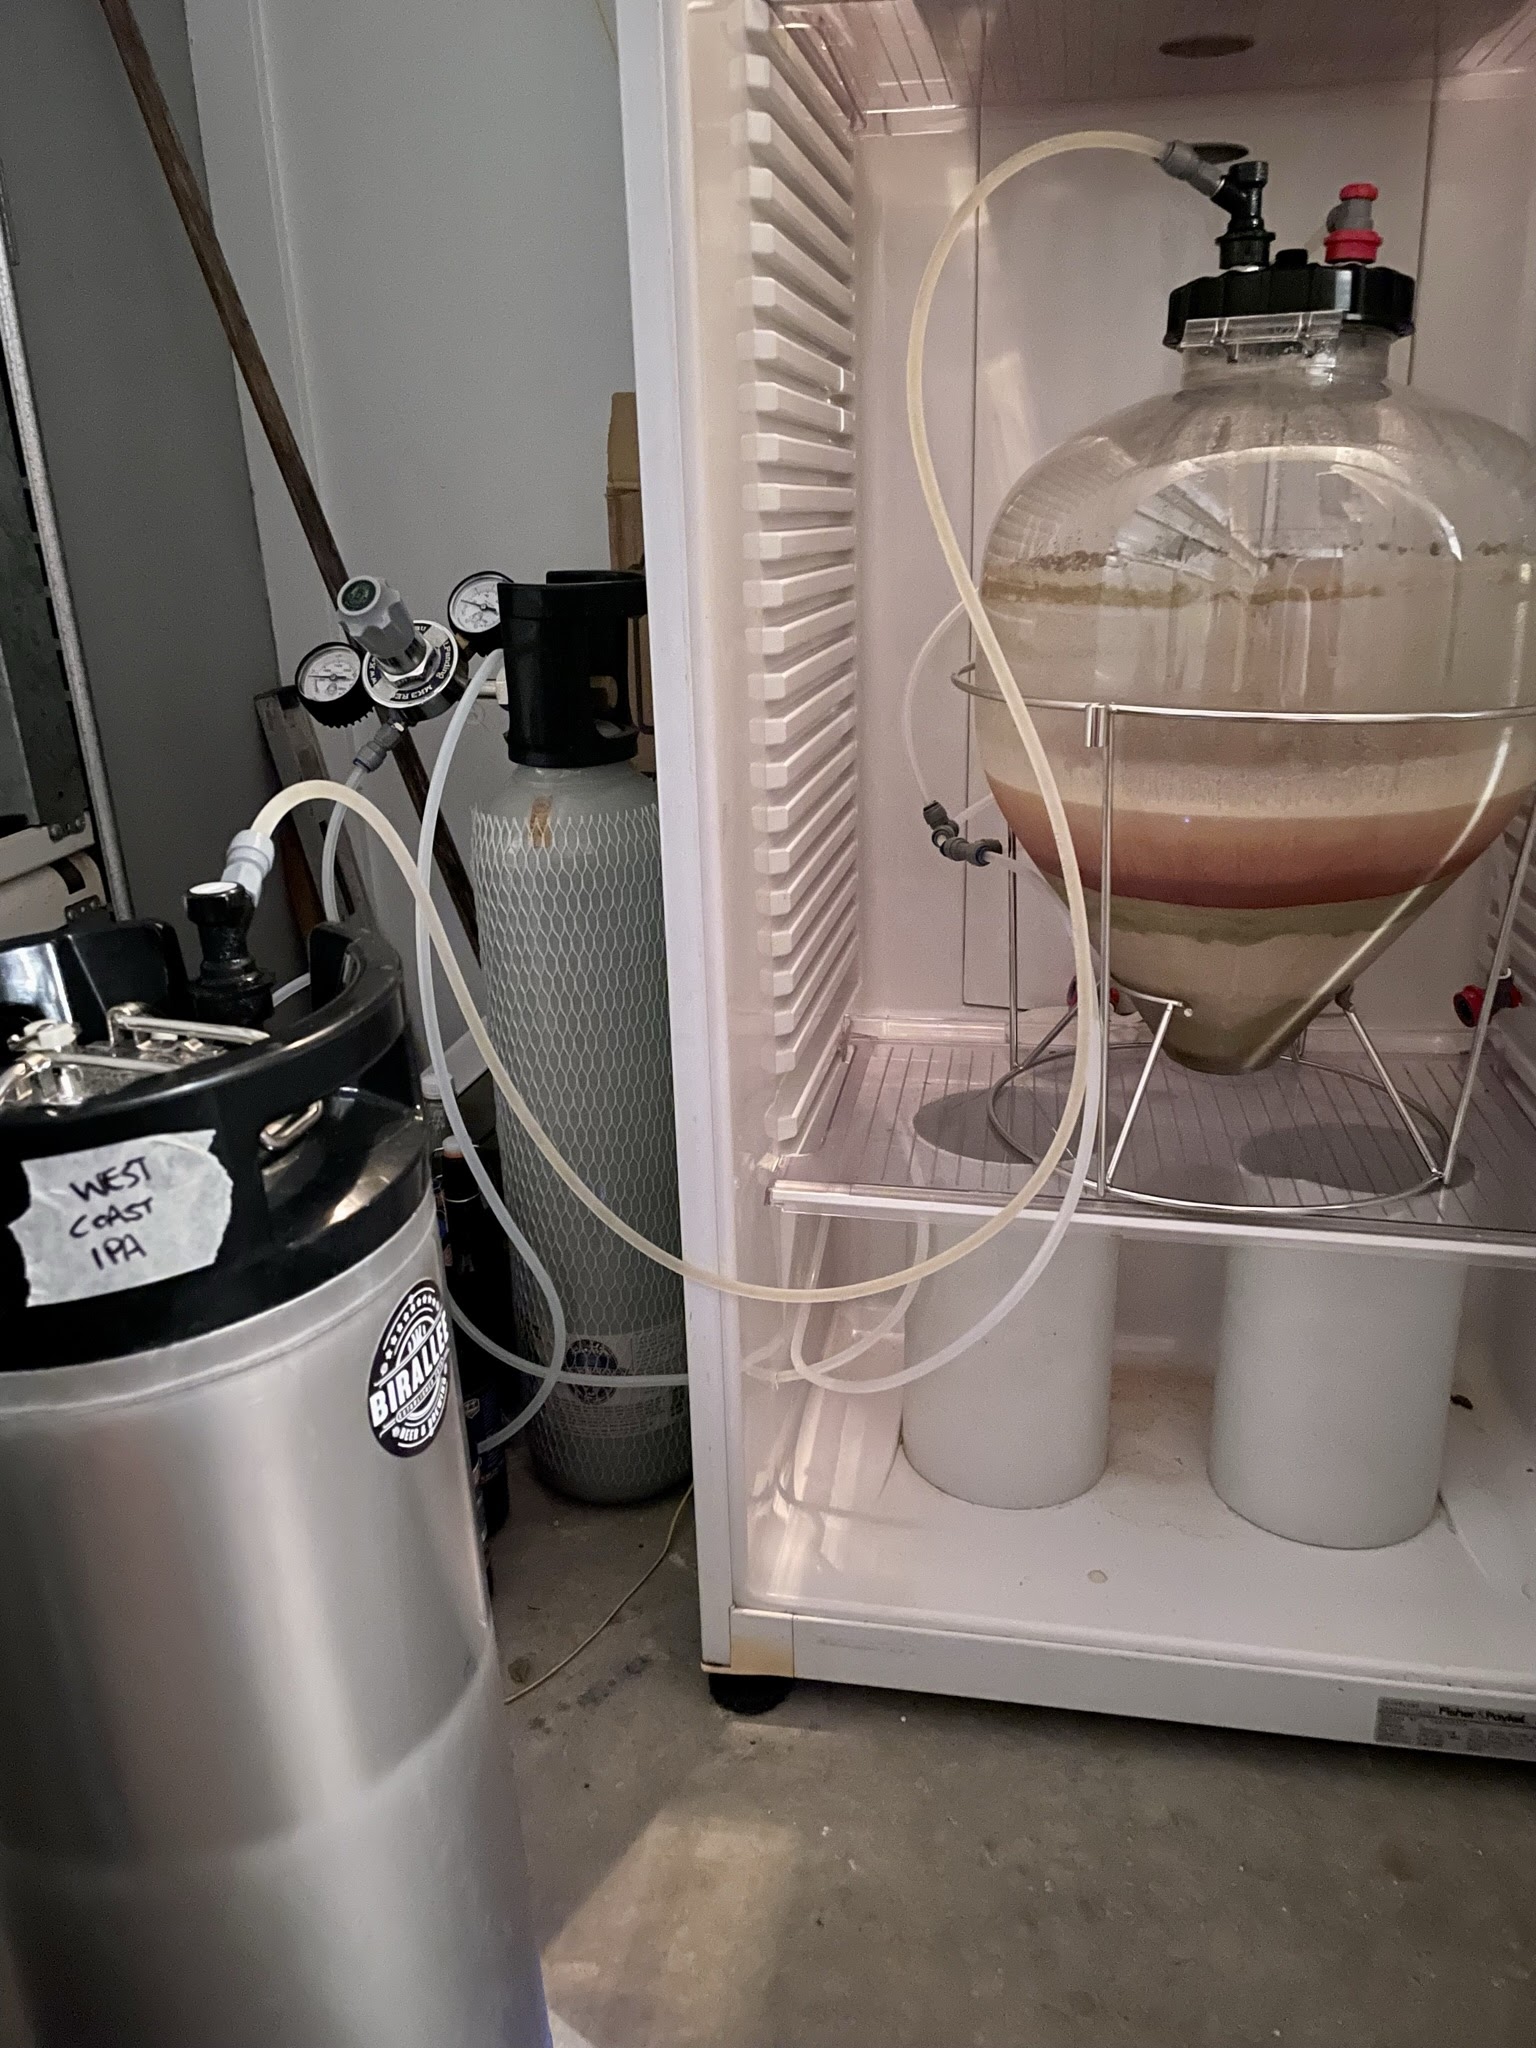
  • Using a pond or other pump connected to a diffusion stone submersed in the wort

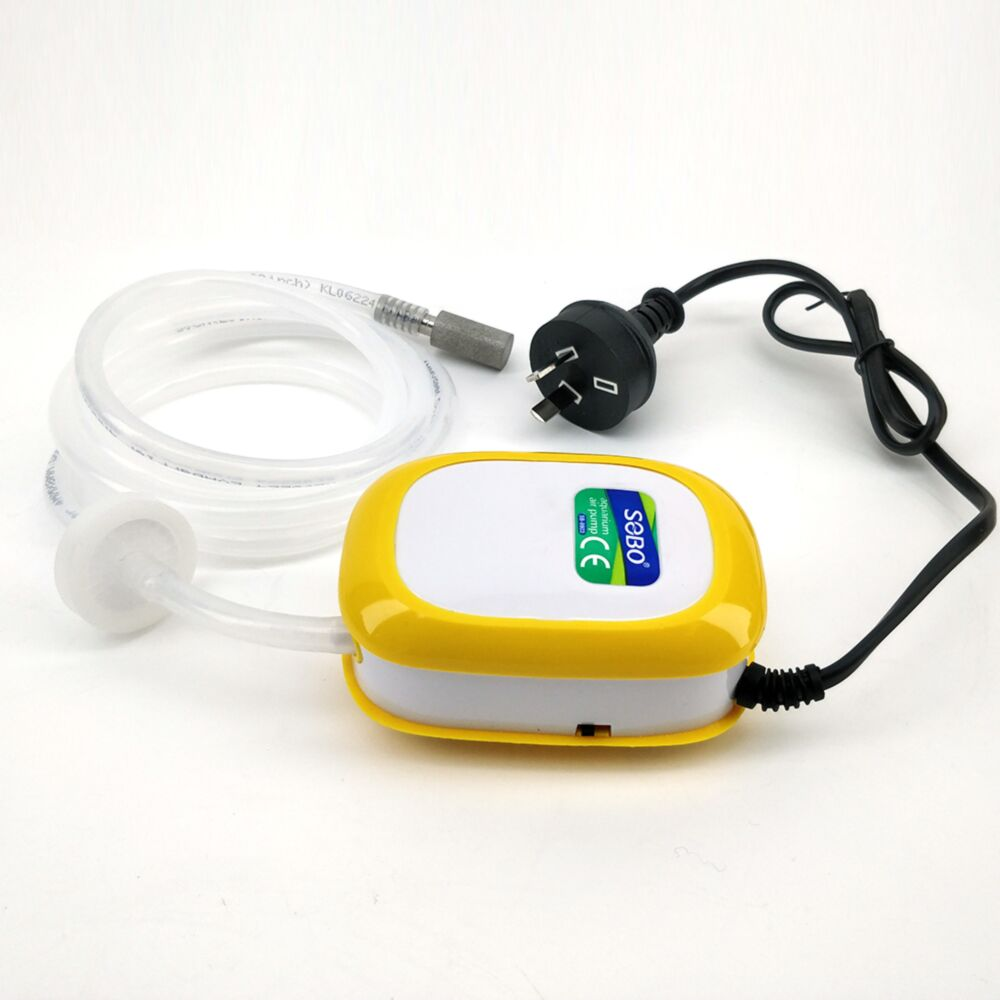
An example of a pump for wort aeration

From the list above you can see that aeration methods are typically quite manual and labour intensive. Since you're adding air, which is comprised of roughly 21% oxygen, it can take as long as 15-20 minutes to get the required amount of oxygen into the wort, and even then you won't get any more than 8ppm using aeration.

It's also difficult to know exactly how much air or oxygen is being added to your wort using these methods.

Finally, the risk of contaminants being introduced into your wort is arguably higher when using aeration methods since you're adding air from the atmosphere that may contain other microbes and particulates that may or may not lead to an infection occurring.

Oxygenation Methods

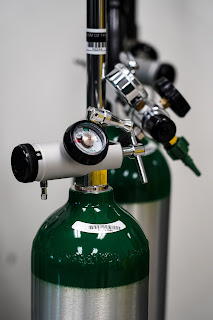
More effective and efficient that aeration, oxygenation involves adding pure oxygen directly into the wort. A source of pure oxygen (usually a tank) is required, as well as some other specialised equipment. Some common oxygenation methods are;

  • A diffusion stone submersed in the wort 
  • Inline oxygenation that infuses oxygen into the wort as it passes from the kettle to the fermenter

Equipment such as a pressure regulator, tubing and a diffusion stone will be required to perform either method outlined above, but since you're working with pure oxygen, the process is much faster, efficient and arguably less risky than aeration, since it's incredibly unlikely any microbes or other organisms could survive in an environment of pure oxygen.

Since you're adding pure oxygen in a form of controlled dose, it's also easier to determine (albeit roughly) how much oxygen you are adding into your wort.

Using pure oxygen you are also able to reach the desired level of 10-12ppm of dissolved oxygen in your wort and aren't limited to 8ppm like you are by using aeration methods previously described.

Conclusion

There are many factors to consider when brewing a beer - water chemistry, pH level, fermentation temperature are just a few critical elements that require the attention of brewers in order to achieve the best outcomes. It makes sense then that the health of yeast is also critical, after all - brewers create wort, and yeast create beer.

On it's own, it's unlikely that oxygenating will solely provide significant gains - especially if some of the factors we mentioned earlier aren't also addressed. Brewing an excellent beer is the culmination of getting many small things right which is all part of the journey of becoming a better brewer.

It's definitely worth taking notice of advice that is repeated as often as the professional advice around wort oxygenation. When yeast manufacturers themselves who have all the science knowledge, research and testing to back up their claims advise that this is the way to go to get best results, it's best to pay attention. 

Oxygenating wort is something we're going to start focusing more on in our own brewing journey in order to try and improve the quality of the beers we make. 

We've recently reviewed Spike Brewing's Oxygenation Kit which is a great piece of gear to help easily and accurately oxygenate your wort. Click the link above to see the article.


Monday 12 December 2022

All Inn Brewing Co - Mutiny Red IPA - Fresh Wort Kit Beer Review

Review Date: 9/12/22
Brewery Name: All Inn Brewing Co
Beer Name: Mutiny Red IPA

"A redshifted IPA with malt richness in overdrive and a gang of four powerful new world hop varieties to boldly go further."

General

Alcohol By Volume (ABV): Unknown

Label/Design: 7/10

Serving Style: Draft/Tap

Region of Origin: Pacific (Australia, New Zealand)

Style Family: IPA

Malts/Adjuncts: Ale, Munich, Aromatic, Shepherds Delight

Hops: Columbus, Citra, Mosaic, Simcoe (dry hops Citra, Azacca, Mosaic, Amarillo, Centennial)

IBU's: 70

Appearance

Colour: Brown

Clarity

Brilliant Clear Slight Haze Hazy

Collar of Foam & Head Retention

None 

Poor
(Up to 15 secs)

Moderate
(15 - 60 secs) 

Good
(more than 60 secs)


Foam Texture

N/A Thin Fluffy Mousse-Like

Carbonation (Visible)

None Slow Medium Fast-Rising Bubbles

Alcohol Aroma

Not Detectable Mild Noticeable Strong Harsh

Aroma & Flavour

Esters Aroma: None
Phenols: None


Alcohol Taste:

Not Detectable Mild Noticeable Strong Harsh

Hop Pungency:

Mild Moderate Strong Extreme

Hop Bitterness:

Restrained Moderate Aggressive Harsh

Malt Sweetness:

Low Medium High Cloying
(Excessive)

Astringency: 

Low Medium High

Palate/Mouthfeel: 

Light Bodied
(Thin/Watery)
Medium Bodied
(Light + Full)
Full Bodied
(Round, Rich & Creamy)

Palate Carbonation: 

Low Medium High

Length/Finish:

Short
(Up to 15 seconds)
Medium
(15 to 60 seconds)
Long
(More than 60 seconds)


Oxidative/Aged Qualities: None

All Inn Brewing Co - Mutiny Red IPA Fresh Wort Kit in the Craftd Freddy glass

Overall

Drinkability: 6/10

Overall Impression: 6.5/10

Notes

Straight off the bat, we've always thought from the very first sip of this beer that it was a little too bitter for our taste. The undiluted fresh wort kit comes in at 70 IBU's which is fairly high, and we only diluted it without about 3L instead of the recommended 5L to try and keep the ABV a little higher.

We threw the kitchen sink at it with dry hops, using a whole heap of spare, random hops we had left over with a total of just under 150g. Since they weren't particularly fresh we don't feel we got the full dry hopping effect we would have normally liked which could help offset some of the bitterness. If we did it again we'd dry hop it with at least 150g, possibly more of fresh hops.

There's a fair amount of residual sweetness from the malt to try and offset the bitterness but still we found the bitterness dominated, up front as well as at the finish - the balance just wasn't quite there with this one.

Others who tasted it said they quite liked it, we'd say it's not bad but not quite to our taste.


Related Articles

All Inn Brewing Co - Kissaki Japanese Lager (FWK) - Review


Friday 25 November 2022

Managing and Adjusting Brewing Water pH - Mashing & Sparging

What is pH?

pH is a universal method of measuring the alkalinity or acidity of water. It uses a numerical scale from 0 (very acidic) to 14 (very basic/alkaline) with 7 being considered neutral.

From a beer brewing perspective, the pH of your water is crucial to obtaining the right flavour profile for your beer as it directly impacts the flavours that are extracted from your malted grains. pH also has an impact on yeast health and therefore fermentation performance, so it really is important that pH is measured during the mashing and sparging process to ensure you're getting the best results and flavour in your end product.

If the pH of your water is too high (alkaline), it can lead to excessive extraction of tannins that can promote a dry or puckering sensation - also known as "astringency". If the pH of your water is too low (acadic) it can lead to a beer that is lacking in flavour and body, and if it's particularly low (less than 2), it can prevent brewing enzymes from becoming active.

Measuring pH

Measuring pH is simple, with pH meters being readily available and relatively cheap. It is important they're properly calibrated, but once they are you can get accurate, instant measurements of your mash and sparge water pH levels and make adjustments as necessary. Good pH meters will also have Automatic Temperature Compensation (ATC), meaning you can measure your sample at warmer temperatures and the device will compensate and adjust the reading accordingly.

a pH Meter can be used to quickly and easily measure your water pH level

pH when Mashing

For brewing beer, the recommended mash pH range is from 5.2 - 5.6 - which makes it slightly acidic. Most water sources will be neutral to slightly alkaline, meaning the water will generally need to be acidified to get it into this ideal range. Naturally, water can be acidified by adding acid directly to it - we use phosphoric acid, but lactic or muriatic/hydrochloric acid can also be used. We use phosphoric since it's less hazardous than hydrochloric and tends to be more flavour neutral than lactic acid, and phosphoric is generally used in other parts of the brewery such as sanitiser so is more readily available.

Here's where it gets tricky though. When we're talking about the pH of the mash, we have a moving target. That is, the pH of the mash will change and evolve throughout the duration of the mash - and since it is believed that the majority of conversion of starch to sugars happens quickly within the mash - within the first 15-20 minutes, there's a limited window of opportunity to make adjustments.

It's also recommended that mash pH not be measured until at least 10 minutes into the mashing process, since grains can have an impact on mash pH as well it allows time for them to do their thing.

To get the best results, we essentially need to predict what the mash pH will be, based on the pH of the source water that is added, other brewing salts that are used to adjust things like calcium, chloride and sulfate levels, as well as the grains that are being used in the mash.

No doubt this sounds confusing, but thankfully you don't need a science degree to work all this out - you can use brewing software (such as Brewfather which we use) to do all the heavy lifting here for you, and it will tell you how much acid to add to your mash to reach your desired pH level after completing your recipe.

You can then add 75-80% of the acid initially to your water before adding your grains, take a pH measurement after 10 minutes of mashing, and then make further, smaller adjustments if necessary.

Here's a screenshot taken from Brewfather of the pH adjustment calculations for a recent brew we completed.

You can see at the top of the window, the water pH for our mash is at 5.36. This has been calculated based off adding 2ml of phosphoric acid with an 85% concentration (the concentration level is stated on the acid bottle/packaging) as well as the other water adjustments that have been made (not pictured).

We like to aim for around 5.4 for our pH level as this gives a little bit of room for error so if we're a little more or less than this, we'll still be in that desired 5.2 - 5.6 range.

During the mash, after waiting for 10 minutes, you can draw a small sample from the top of the mash, cool it slightly so the sample is within the recommended range of the pH meter, then insert the pH meter probe into the solution and wait for the reading to stabilise. You can see in the image above, the reading is 5.34 - right within the 5.2 - 5.6 sweet spot for beer.

It's also worth noting that after hitting the target pH in the mash, the pH is then no longer adjusted and will typically take care of itself from this point onwards.

pH when Sparging

Although perhaps not considered as critical as mash pH, the pH of your sparge water is also important. Untreated sparge water will generally have a higher pH level and can lead to tannins being extracted from the grains which can lead to astringent flavours developing within the beer.

It is generally acceptable to have a pH level of less than 6 for your sparge water, it doesn't have to fall exactly within the 5.2 - 5.6 range like with mash water.

Once again, you can use brewing software like Brewfather to calculate this adjustment for you. You simply need to know the pH of the sparge water, and the desired pH level.

You can see in the image above our sparge water has a starting pH of 7.8. And to reach our desired target pH of 5.8, we only need to add 0.41ml of 85% phosphoric acid.

Conclusion

There's no doubt that the pH level of water used in brewing has a direct and significant impact on the end result. Afterall, water is the single largest ingredient in beer so it makes sense to give it the attention it deserves.

If you're not already using brewing software like Brewfather, you really should. There is a free version available that will let you use the water adjustment calculator as well as the majority of the other cool features within it.

pH meters are also a must have, especially since they can be had for around $30. We'd highly recommend one with Automatic Temperature Compensation. We use this one from KegLand.

Since the pH in the mash is a constantly changing variable, we've found using the method of adding the majority of our adjustments prior to mashing in, then making final adjustments after 10 minutes works really well and gets excellent results. Brewing software calculators are also surprisingly accurate and will generally get you pretty close to your target numbers, as long as the data you enter is accurate of course, so knowing the pH level of your source water definitely helps with this (another reason to get a pH meter!).


Related Articles


Monday 21 November 2022

RAPT Temperature Controller - Temperature Calibration

After a few uses of our RAPT Temperature Controller, as a matter of interest we decided to check it's accuracy to ensure we were actually fermenting at the temperature we had set on the controller.

Much to our surprise we discovered that the RAPT Temperature Controller was a whole 3°C off when compared to both our Inkbird Temperature Controller, and a stand alone Weber branded meat thermometer.

After inserting the probe for the Inkbird into the same location directly next to the probe for the RAPT Temperature Controller on our fermenter, we had a reading of 23°C on the Inkbird and 19.9°C on the RAPT. Our Weber probe thermometer had the same reading as well at 23°C.


Since both the Inkbird and Weber thermometers reading the same temperature, the RAPT Temperature Controller was the outlier and therefore presumed to be inaccurate. 

To be clear, we never bothered to run a calibration on the RAPT Temperature Controller - but then again we never calibrated our Inkbird controller either and it seems to be very accurate.

Looking at the instructions for the RAPT Temperature Controller - it has details on how to perform a calibration but suggests you use ice water in one glass, and "hot" water in another.

We initially attempted running the calibration against ice water, and near boiling water which improved the accuracy but it was still around 1.5°C out at the temperature range we really need to measure (around 18°C - 20°C).

We got better results by calibrating against ice water, and another "warm" water solution at around 30°C which got us to within 0.4°C which for us is close enough.

Here's the process for calibration;

Setup two glasses of water - put some ice in one (to make it as close to 0°C as possible) and another with warm tap water - around 30°C.

You will need another (accurate, previously calibrated) device to measure the temperature of the water to calibrate the RAPT Temperature Controller against - for us we will be using our Weber meat thermometer.

Put the second thermometer and sensor probe for the RAPT Temp Controller into the ice water solution first.

You can see when we did this our RAPT Temperature Controller is reading -1.9°C compared to 0.2°C from our meat thermometer.

Press the Enter button on the RAPT Temperature Controller to open the menu, then press the Down arrow to highlight Settings, then press the Enter button again to open the Settings menu.

Use the Down arrow to scroll through the options and locate the option for 2 point calibration. Press Enter to select the 2 point calibration option.

The calibration screen will now be displayed for calibration point 1. Make sure the probe is fully submersed in the ice water and wait for the number next to ADC Reading to stabilise. 

Once the ADC Reading number has stabilised, use the Up and Down arrows on the RAPT Temperature Controller to adjust the Temperature value so it matches the value on your other thermometer. In our example below, we set the RAPT Temperature Controller to a temperature of 0.2°C to match the temperature reading on our meat thermometer.

Press Enter to complete the calibration for calibration point 1.

You will now be prompted to repeat this step for a second, warmer solution for Calibration Point 2. Repeat this process in your other water solution after moving the temperature probe and your second thermometer and press Enter to finalise the calibration once you've adjusted the temperature to match.

Once completed you are returned to the menu screen - there's no other confirmation messages or anything to say the calibration has been completed.

As previously stated, we got more accurate results by calibrating against a second solution at around 30°C. We were still almost 0.5°C out though, so for the best accuracy we'd recommend calibrating against ice water and a warm solution at around 20-25°C.

So if you have a RAPT Temperature Controller and haven't calibrated it yet, it's well worth investing the time to do so. Temperature control is known to be such a crucial part of fermentation and ensuring the best possible product being produced by your yeast.

Related Articles


Thursday 17 November 2022

Cold IPA - Recipe Creation Guide

Cold IPA is a relatively new style of beer - and although it's not an officially recognised category within the Beer Judging Certification Program (BJCP) yet, we suspect it's only a matter of time until it will be added.

The style and name was originally coined in October 2018, with the "Relapse IPA" from Wayfinder Brewing. Relapse was their version of a "Wester than West Coast" IPA - similar to a West Coast IPA but with a drier, cleaner finish and excessive hoppiness.

In a previous post we broke down into more detail what a Cold IPA actually is, and how it differs from an India Pale Lager (IPL), but thought it would be useful to clearly define how a Cold IPA recipe should look, so here we go;

Appearance

The appearance should be a light straw colour, since the base malt is comprised of only rice or corn and two-row pilsner malt (see Malt/Grains section below for more detail on this). The beer should be filtered to achieve maximum clarity. Chill haze should not be present and is considered a flaw.

Aroma

Since this is still an IPA, the focal point should be the hops. New world American hop varieties with loads of fruit and citrus flavour are preferred. Little to no malt aroma should be present.

Flavour

The base malt will also provide little in the way of flavour, so the hops will dominate the pallet. There should be a moderate to high bitterness (without being harsh) with a lot of supporting tropical fruit and citrus hop flavour to balance it out. Other common flavours associated with American hops such as onion-garlic, catty, piney and resinous are also permitted.

Mouthfeel

Body and mouthfeel should be medium to low, since the finished beer should be fermented out fairly dry (to around 82-88% apparent attenuation). Carbonation should be high.

Vital Statistics

ABV: 6.4% - 7.9%
IBU: 50 - 70
SRM: 2.5 - 5
OG: 1.055 - 1.065
FG: 1.006 - 1.009

Malts/Grains

Rice or Corn - 20 - 40%
Two-Row Pilsner Malt - 60 - 80%

The majority of the grist will be American two-row pilsner malt, with rice or corn (eg. maize) making up the difference and being used anywhere from 20-40%.

This will provide a clean, blank canvas for the hops to be built upon, and will provide a light body. No other specialty malts should be added.

Simple sugar such as dextrose can be added to boost sugar/alcohol content whilst keeping the body and mouthfeel light. This should be kept at 10% or less of the total grist to avoid hot, fusel alcohol flavours from being imparted into the beer.

Hops

As with most other IPA styles, hops should be added throughout the boil - at the beginning to provide the majority of bittering, and later in the boil for flavour and aroma contributions. Popular and classic hop varieties such as Mosaic, Citra, Simcoe, Amarillo and Centennial are all great examples to include.

Whirlpool Hop Additions

Whirlpool hop additions are also optional but can certainly be done to help impart even more hop flavour and aroma in addition to (or instead of) late hop additions to the boil. Typical whirlpool hopstand would be for 10-15 minutes at approx 80°C.

Dry Hopping

Dry hopping should be aggressive to help promote the required hop flavours and characteristics of the style. Dry hops should be added before fermentation is completed to help achieve biotransformation from the yeast.

Mash (Temperature & Time)

Mash @ 65°C (to create a highly fermentable wort to leave promote a high attenuation and dry finish)
Mashout @ 75°C for 10 minutes

Yeast

Lager yeasts are typically used for a Cold IPA, but are fermented at warmer temperatures. Fast-fermenting strains that produce low ester and low sulfur are preferred. Clean fermenting ale strains such as Chico (US-05), Kolsch or California Common can be substituted in, as long as the sulfur and ester notes provided by the yeast are low. The style was created using lager yeast though, so if you really want to stay true to the original style - lager yeast should be used. Fermentis SafLager W-34/70 is a popular option.

Water Profile

As with any beer, water is an essential ingredient and should not be overlooked. In general terms, a water profile that has elevated sulfate levels should be used for this style of beer to help the hops shine and promote the dry finish on the palate. Brewfather's "Hoppy" water profile is a good baseline to start from. Aim for a sulfate to chloride ratio of around 2:1.

Fermentation Temperature

If using a lager yeast strain, ferment it at the higher range of the recommended temperature. If using an ale yeast strain, ferment it at the lower end of the recommended temperature range.

Pressure Fermentation

Pressure fermentation can be beneficial for this style of beer as fermenting under pressure will help to suppress any off flavours from being created - especially when fermenting at the upper range of a yeasts recommended temperature. Typical pressure used is around 10psi.

Cold Crashing

Cold crashing can be beneficial to this style of beer as it can help the hop debris settle to the bottom of the fermenter with the rest of the trub which in turn helps improve the clarity of the beer (which is a requirement of the style as per "Appearance").

Sample Recipe

Birallee Beer & Brewing - Cold IPA Recipe


Related Articles

All Recipe Creation Guides

All-Grain Recipe List

Monday 14 November 2022

West Coast IPA - BrewZilla Brew Day

Our latest brew day features our attempt at a West Coast IPA. You can view our full recipe here, as well as our recently published West Coast IPA Recipe Creation Guide for some ideas and guidelines on how to build your own West Coast IPA recipe.

Here's our sack of grain - at just under 7kg in total there was plenty to be added - we sourced all the ingredients from our friends at 41 Pints of Beer.


Our first step on brew days is to get our BrewZilla and Digiboil setup with their respective amounts of water, and water adjustments made as per the calculations from our recipe in Brewfather, as well as a half camden tablet in each to remove any chlorine from the water.

We adjust our water with calcium sulphate, magnesium sulphate and calcium chloride.


In our last brew we adjusted the pH of our mash for the first time using phosphoric acid - and in this brew we're also going to attempt to adjust the pH of our sparge water as well. Our research suggests that a pH lower than 6 is ideal for sparging, and any higher can lead to more tannins being extracted which can cause some astringency in the final beer. The tap water we use for brewing is more alkaline with a pH of over 7, so we’re thinking adjusting it is probably a worthwhile thing to do.

Part way through our mash in and you can see we've got a really thick mash - we reduced the amount of water in the mash to around 23.5L - the BrewZilla profile in Brewfather would have had us using more water than this and it would have been full to the brim which can be difficult to manage. The reduced water volume of 23.5L worked pretty well and seemed about right for a grain bill this size.


After letting the grain bed settle for 10 minutes after doughing in, we took a pH reading and we were bang on exactly what our recipe predicted at 5.34 - perfect!


What wasn't so perfect was when we checked the pH of our sparge water to find that the water had somehow reached a pH acidity level of under 4 - ie. super acidic which was incredibly strange and too acidic for sparging with. We're really not sure what caused this or why it happened, but we tipped out the sparge water we had prepared, and made a new batch with the same volumes, same water adjustments and the same relatively small amount of phosphoric acid (~0.4mL) and we got a pH of 5.93 which was exactly where we wanted it. I'm not able to explain what happened initially with the sparge water but we got it right in the end, so moving on!


We have a tendency to not heat up our mash water hot enough, so we get a fairly significant drop in temperature after doughing in - and even with recirculating it can take some time to come up to our target mash temperature. We ended up having to adjust our BrewZilla to over 75°C to get it reading 65°C at the top of the grain bed. West Coast IPA's are meant to be dry and ferment out fairly heavily, so we're not too concerned about having some extra fermentable sugar created from a lower mash temperature, but we really need to remember to adjust our mash in temperature so it's much higher to try and avoid this for future brews.

If you're using a BrewZilla, you should definitely get a long probe thermometer you can stick in the top of the grain bed so you can measure the temperature of your mash more accurately.


We would have liked to include rice hulls in our grain bill to help aid with recirculation, since wheat malt and toffee malt are known to create a thick, sticky mash. Unfortunately 41 Pints were out of stock so we had to make do without them, which lead to a fairly slow recirculation during the mash. You can see from the image below the tiny trickle we were restricted to for recirculation.


We stirred the grain bed a few times during the mash to try and help increase efficiency - but it was slow going. Unsurprisingly when sparging the drainage was also very slow and required a fair amount of stirring to coax the water through the grain bed. Rice hulls really are a game changer here - I normally use them so haven't had to deal with a slow/stuck for quite some time.

Moving on to the boil - and our pre-boil gravity reading shows we're bang on our expected target of 1.061. It's always a nice feeling to hit your numbers. The yellow refractometer pictured below is our AliExpress Digital Refractometer which we're finding after a bit more use is more accurate than we initially gave it credit for.

Whilst waiting for our BrewZilla to reach a boil, we measured and weighed out our hop additions. We've got a mixture of Citra, Centennial and Chinook hops for this one.


Hops were added as per the recipe into our hop spider with 15 and 10 minutes remaining in the boil. 


We then had a decent whirlpool hop addition for 15 minutes at 80°C to help extract a little more bitterness, but more of the desirable piney and fruity flavours from the hops.


After our whirlpool/hop stand, we continued to chill using the standard BrewZilla immersion chiller, before transferring to our Keg King PET Apollo Fermenter.

Gravity readings on our digital refractometer and good old floating hydrometer showed an OG of 1.066/1.065 - bang on what our recipe predicted. Colour looks amazing too.


We then pitched 2 packets of US-05 yeast and waited for the fermentation to begin!


There was a sizeable amount of trub in the fermenter as you can see from the picture above.

A gravity reading after a week of fermentation showed we had reached our target FG of 1.012


And lastly the graph from our fermentation using our RAPT Pill


Blue line = Temperature

Red line = Gravity

Green Line = Alcohol Content

As you can see fermentation was fairly steady and reached terminal gravity in just a couple of days before a soft crash (11/22) for dry hopping and finally the cold crash.


You can see after our cold crash has been completed we've got quite a bit of trub in the bottom, with a layer of yeast and then the dry hop charge sitting on top. 

The other larger white section at the top is a thin layer of yeast that has stuck to the fermenter wall during cold crash and didn't make it all the way to the bottom.


We transferred under pressure into a corny keg - initial taste is very promising and appears to have turned out very well, but we'll give it a couple of weeks to condition and fully carbonate before doing a full tasting review of this one.

Check out our Tasting Results and Review for this brew!

Related Articles