Tuesday 26 April 2022

Soft Crashing your Homebrew

What is a Soft Crash?

"Soft Crashing" is a relatively new concept that we first heard about when reading up on Lallemand's Verdant IPA yeast. James Heffron from Verdant Brewing Co mentioned that it's something they implement as part of their fermentation schedule to try and avoid hop creep - a phenomenon that causes over attenuation during fermentation as a result of (usually large) dry hops increasing the amount of fermentable sugars within your wort as a result of enzymatic changes from hops breaking down long chain unfermentable dextrins and making them fermentable.

The process of soft crashing involves dropping the temperature of your fermenter so it is outside the (lower) recommended temperature range for the yeast you are using. For ales, this would typically mean dropping to 12C-15C, and for lagers, dropping to 8C-10C.

Dropping the temperature will achieve several benefits. Firstly, it will cause some of the yeast and sediment to drop out of suspension in your wort. Secondly, the yeast will be too cold to actually ferment anything further which means the risk of hop creep is vastly reduced. It is also believed that the lower temperature helps to prevent the previously mentioned enzymatic changes from occurring as well that convert non-fermentable sugars into fermentable sugars. Finally, soft crashing is believed to also help reduce the impact of hop burn - an astringent flavour in the period immediately following a large dry hop.

The timing of your soft crash is important. As we know, temperature is a critical factor when dealing with yeast and fermentation. Controlling the temperature during active fermentation ensures that the yeast are healthy, happy, and can convert the sugars from your wort into alcohol and carbon dioxide without imparting any undesirable off flavours into your beer. Towards the end of fermentation, it is recommended the temperature be ramped up 2C-5C for several days for what is known as a diacteyl rest. The warmer temperature helps promote yeast activity so they can more effectively clean up any undesirable diacetyl (or it's precursor alpha-acetolactate) that is still remaining in the beer after fermentation has completed.

Performing your soft crash too early can mean that the diacetyl rest has not been fully completed and will leave traces of diacetyl in your beer. It is therefore important that you don't initiate your soft crash until after the diacetyl rest has been completed.

Once your soft crash has been initiated and the target temperature has been reached, the dry hops are then added and left for the desired time period. A cold crash is often then begun where the temperature of the fermenter is dropped, typically to serving temperature (2C-4C).

Here is a typical fermentation schedule that we use for a standard ale fermentation.

Day 0 - yeast pitched and fermentation started

Day 1-5 - recommended fermentation temperature maintained (approx 20C)

Day 6 - temperature slowly raised to approx 22-23C for diacetyl rest

Day 7-10 - 22C-23C temperature maintained for diacetyl rest

Day 11 - temperature dropped to 15C for soft crash. Once target temperature is reached, dry hops are added

Day 12-13 - soft crash temperature maintained

Day 13-14 - cold crash and transfer to keg

This is a typical schedule that we use, however, a great way to keep an eye on your fermentation progress in real time is to use a Wi-Fi hydrometer. We use Kegland's RAPT Pill, but there are other varieties available as well such as the Tilt Hydrometer or iSpindel. Seeing the specific gravity (SG) of your fermentation in real time gives you the benefit of beginning to ramp up the temperature of your fermentation using the heat generated from your fermentation when there are only a few specific gravity points left until the expected final gravity is reached. 

Here is a real-world fermentation example of our recently brewed Juice Boost NEIPA using our RAPT Pill. The red line represents temperature, and the blue line represents the gravity reading.

Point A shows where primary fermentation was underway, with temperature being more accurately controlled to maintain approx 20 degrees.

At Point B, we allowed the temperature of the fermenter to steadily rise a couple of degrees to 22 using the heat produced at the tail end of fermentation. We didn't have the means to maintain this warmer temperature once fermentation was completed, so you'll notice the temperature slowly decrease between points B and C as a direct result of the colder ambient temperature.

At Point C, we performed our soft crash and dropped the temperature to approx 15c and added our dry hops. After 48 hours, we initiated the cold crash at Point D.

Let us know your thoughts and experiences on dry hopping, hop creep and soft crashing below.


Related Articles

Thursday 21 April 2022

Nomad Brewing Co - Jetlag DDH IPA (JL-02) - Beer Review

Review Date: 9/4/2022
Brewery Name: Nomad Brewing Co (Brookvale, NSW, Australia)
Beer Name: Jet Lag DDH IPA

"Jetlag is undergoing an evolution that will see it modernise and develop into a DDH IPA series. Each brew is double dry hopped with a different exciting hop combination to maximise aromas and flavour extraction then loaded up with oats for a smooth, juicy mouthfeel and hazy appearance."

Nomad Brewing Co - Jetlag DDH IPA (JL-02) Can

General

Alcohol By Volume (ABV): 6.5% (High)


Label/Design: 9.5/10

Serving Style: Can

Region of Origin: Pacific (Australia, New Zealand)

Style Family: IPA

Malts/Adjuncts: Oats, Others Unknown

Hops: Galaxy, Mosaic, Enigma

IBU's: Unknown

Nomad Brewing Co - Jetlag DDH IPA (JL-02) can notes


Appearance

Colour: Straw


Clarity

Brilliant Clear Slight Haze Hazy

Collar of Foam & Head Retention

None 

Poor
(Up to 15 secs)

Moderate
(15 - 60 secs) 

Good
(more than 60 secs)


Foam Texture

N/A Thin Fluffy Mousse-Like

Carbonation (Visible)

None Slow Medium Fast-Rising Bubbles

Alcohol Aroma

Not Detectable Mild Noticeable Strong Harsh

Aroma & Flavour

Esters Aroma: None
Phenols: None


Alcohol Taste:

Not Detectable Mild Noticeable Strong Harsh

Hop Pungency:

Mild Moderate Strong Extreme

Hop Bitterness:

Restrained Moderate Aggressive Harsh

Malt Sweetness:

Low Medium High Cloying
(Excessive)

Astringency: 

Low Medium High

Palate/Mouthfeel: 

Light Bodied
(Thin/Watery)
Medium Bodied
(Light + Full)
Full Bodied
(Round, Rich & Creamy)

Palate Carbonation: 

Low Medium High

Length/Finish:

Short
(Up to 15 seconds)
Medium
(15 to 60 seconds)
Long
(More than 60 seconds)


Oxidative/Aged Qualities: None


Nomad Brewing Co - Jetlag DDH IPA (JL-02) in the Craftd Alpha glass

Overall

Drinkability: 8/10

Overall Impression: 9/10

Notes

Pretty much what you'd expect from a double dry hopped IPA. Loads of mixed fruit flavours - lots of citrus and stone fruit flavours. Predominantly mango, pineapple, and passionfruit. There's also a more than subtle bitterness hiding behind it that lingers a little after each sip. It works though, and combined with a fair whack of carbonation it all blends pretty well. Hop combination is solid and the hazy straw coloured hue is the standard for most new world IPA's these days. The inclusion of oats helps with the silky smooth mouth feel and plenty of alcohol content to hold it all together.


Tuesday 19 April 2022

BrewZilla Brew Day - Juice Boost NEIPA

Our latest brew day was for our Juice Boost NEIPA - our first attempt at a New England IPA (also known as a Hazy IPA). You can check out the full recipe details here. Or, see how it turned out with our Tasting Results and Review.

We started out our brew day with the usual water adjustments. The recipe calls for a chloride to sulphate ratio of 2:1. Volumes in Brewfather suggested 25.5L of water for the initial mash, followed by less than 4L of water for sparging.

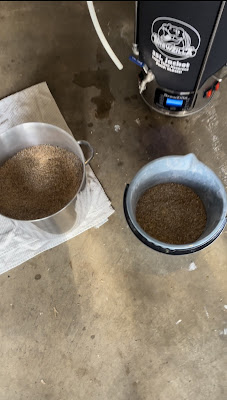
Grains for our Juice Boost NEIPA ready to go

At a little over 6kg of grain, this was the largest grain bill we'd attempted in our BrewZilla. It was pretty full during the mash, but room for a tiny bit more if necessary indicating that our previously stated BrewZilla maximum grain limit/capacity was accurate.

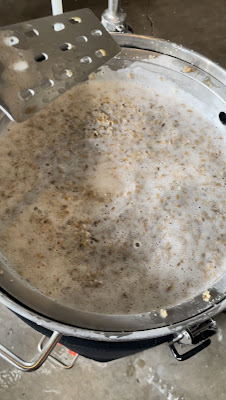
Initial mash in - loads of oats and wheat malt

We took our time during mash in, adding all of our grain slowly, and stirring as we went to try and prevent clumps or dough balls from forming. After adding all the grain we gave it a thorough stir, then left it for 10 minutes to settle before switching the pump on for recirculation.

Mash in completed. Malt pipe is very full, and the mash is thick and sticky

Due to the inclusion of a decent amount of wheat malt and unmalted (quick) oats in our grain bill - we anticipated a thick, sticky mash so we threw in a few big handfuls of rice hulls as well to help with recirculation and sparging. In hindsight, we could have used more as recirculation was still really slow. The recirculation valve was opened only the tiniest amount to really limit the flow and prevent the wort from backing up and overflowing back through the holes in the malt pipe for the malt pipe handle.

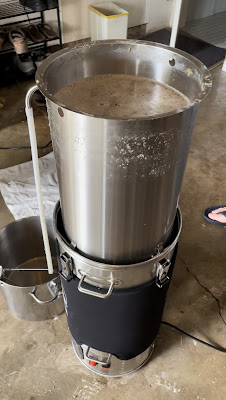
Sparging was slow, but did not get stuck

Sparging was also slow as we expected, especially when compared to other brews, however the flow was continuous and didn't get stuck. The rice hulls definitely did their job here!

Sparging complete, so whilst waiting for the wort to boil, we took the time to measure out our hops. This recipe has no boil hops, and a rather significant whirlpool/hop stand after the boil at 85c for 15 minutes.

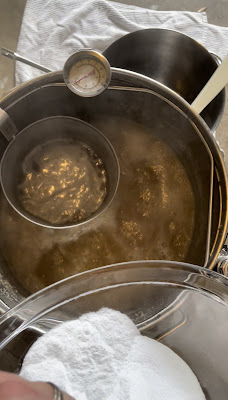
We took a pre-boil gravity reading of approx 1.056. Well down on the expected pre-boil gravity of 1.061.

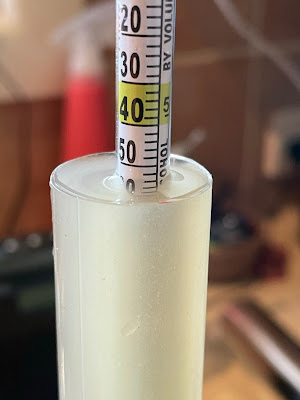
Pre Boil Gravity reading - much lower than expected

We anticipated a potential loss in mash efficiency for two main reasons. Firstly, we were using a grain bill towards the upper limit of what is possible in the 35L BrewZilla, and feedback from other BrewZilla users suggest that efficiency drops are common when using larger grain bills such as this.

Secondly, we had 650g of unmalted (quick) oats which are well known to reduce mash efficiency. In anticipation of this, we included 200g of dextrose to help boost the fermentable sugar levels to help compensate for these potential losses.

Adding dextrose to the boil

After boiling for 30 mins and chilling to 85c for our 15 minute hop stand, we then chilled down to pitching temp and transferred to our FermZilla fermenter.

We co-pitched our yeast and pleasingly, saw early signs of fermentation by the next morning. Our RAPT Pill was also in the fermenter to help monitor our fermentation progress.

We had an original gravity (OG) of 1.059 - much lower than the expected 1.068 which is disappointing, but not entirely surprising given the expected efficiency losses we previously mentioned. Very glad we included the dextrose to help compensate for this, otherwise we would have had a starting gravity that was really too low for this style of beer.

There's certainly no shame in using dextrose to help boost the sugar content of your wort - if you check the ingredients on some commercial NEIPA cans, you'll see that some of them contain dextrose as well! If it's good enough for pro breweries to use, it's good enough for us!

Original Gravity reading - approx 1.059. Also much lower than expected

The current state of fermentation after only a few days shows we have a final gravity several points lower than expected at 1.007. We suspect the co-pitching of BRY-97 West Coast Ale yeast in addition to the Verdant IPA yeast really helped the yeast chew through more of the sugars than expected. Although this is good as it was will help boost the alcohol content, which is necessary for this style of beer, it unfortunately means we've exceeded the BJCP recommended FG of 1.010 by a few points meaning we'll probably have an end result a little drier than expected and perhaps with a thinner body. A lack of residual sweetness in the malt shouldn't be a big problem though since most of the flavour will be coming from the huge dry hop (300g). Will be interesting to see if mouthfeel is impacted though.

These numbers give us a surprisingly high attenuation rate of over 88%, and plenty of alcohol content at 6.83%.

In terms of fermentation process, we set our Inkbird temperature controller to 19.5c with a 1c temperature differential. Once our gravity readings hit 1.017, we let the temperature climb up to 21 degrees to help the yeast finish it's work and cleanup any diacetyl or other off flavours. We'll leave it to rest at this temperature (approx 21-22c) for another 7 days before soft crashing and adding our dry hop.

We also performed the majority of fermentation with no pressure - our spunding valve was totally open, essentially acting as a basic type of air lock. This was to allow the flavours and esters from the Verdant IPA yeast to be imparted into the beer. At the same time that we let the temperature begin to rise (SG 1.017), we also adjusted the spunding valve to begin pressurising with about 5psi of pressure.

Want to see how it turned out? Check out our Juice Boost NEIPA - Tasting Results & Review post.

We also commemorated this brew with some custom 3D printed tap labels - check them out here


Monday 11 April 2022

Dainton Beer - Blood Orange NEIPA - Beer Review

Review Date: 1/4/2022
Brewery Name: Dainton Beer (Carrum Downs, Victoria, Australia)
Beer Name: Blood Orange NEIPA

"Bursting into life with juicy hops, enhanced by the addition of real blood oranges! Bold and Citrusy with a subtly smooth finish. Juicy, Hoppy, Hazy fun!

Dainton Beer - Blood Orange NEIPA Can

General

Alcohol By Volume (ABV): 6.0% (High)


Label/Design: 9/10

Serving Style: Can

Region of Origin: Pacific (Australia, New Zealand)

Style Family: IPA

Malts/Adjuncts: Unknown

Hops: Unknown

IBU's: 29

Appearance

Colour: Straw


Clarity

Brilliant Clear Slight Haze Hazy

Collar of Foam & Head Retention

None 

Poor
(Up to 15 secs)

Moderate
(15 - 60 secs) 

Good
(more than 60 secs)


Foam Texture

N/A Thin Fluffy Mousse-Like

Carbonation (Visible)

None Slow Medium Fast-Rising Bubbles

Alcohol Aroma

Not Detectable Mild Noticeable Strong Harsh

Aroma & Flavour

Esters Aroma: None
Phenols: None


Alcohol Taste:

Not Detectable Mild Noticeable Strong Harsh

Hop Pungency:

Mild Moderate Strong Extreme

Hop Bitterness:

Restrained Moderate Aggressive Harsh

Malt Sweetness:

Low Medium High Cloying
(Excessive)

Astringency: 

Low Medium High

Palate/Mouthfeel: 

Light Bodied
(Thin/Watery)
Medium Bodied
(Light + Full)
Full Bodied
(Round, Rich & Creamy)

Palate Carbonation: 

Low Medium High

Length/Finish:

Short
(Up to 15 seconds)
Medium
(15 to 60 seconds)
Long
(More than 60 seconds)


Oxidative/Aged Qualities: None

Dainton Blood Orange NEIPA in the Craftd Alpha glass

Overall

Drinkability: 8/10

Overall Impression: 9/10

Notes

Another absolute hop bomb from Dainton. Very similar in many ways to our recently reviewed Jungle Juice - the Blood Orange NEIPA hosts plenty of tropical and citrus fruit flavours - along with a subtle twist from actual blood oranges. Adding real fruit to beers can be tricky and sometimes less is more. Thankfully, Dainton have done an excellent job here, with the blood orange additions being relatively subdued, well balanced and matched with the hops. 

We've got a super hazy straw coloured hue providing a fairly neutral malt base to let the hops shine and do their thing. This all makes for a refreshing taste with a medium dry finish. Plenty of palate carbonation to accentuate the relatively low bitterness of 29 IBU's - the perceived bitterness certainly seemed a little higher than this to us.

Personally we prefer the Jungle Juice but this ones still a cracker nonetheless.


Tuesday 5 April 2022

Passivating our new 304ss Stainless Steel Fermenter

In our previous blog post, we discussed the findings from our research into options and methods for passivating stainless steel. In this post, we wanted to document how we went with actually performing the passivation and a couple of things we learned along the way.

We opted to use the citric acid based version of Bar Keepers Friend powder that is available in Australia to passivate our new Cheeky Peak Nano X Fermenter, since citric acid seemed to be a safe and effective option to use to accomplish this. 

Bar Keepers Friend Cleanser & Polish powder

Firstly, we made a mixture of Bar Keepers Friend (BKF) powder and water in a glass pyrex jug to make a thick paste. We put a small amount of water in then added the powder. In hindsight, we had way too much water as we needed to use a lot of BKF powder to get the paste to the right consistency.

Our Bar Keepers Friend and water mixture to make a thick paste

You want to get the paste to a thick consistency, but not too thick. We initially had ours a little too thick, so when we tried to coat the stainless surface of our fermenter, it was clumping up and wouldn't spread easily. Thankfully the paste can be easily adjust by either adding a tiny amount of water (or more BKF powder to thicken it). 

Here's what our first attempt looked like - you can see the paste is clumpy and not spread evenly, which obviously isn't going to work particularly well

Our first attempt at applying the paste revealed it was too thick/dry and clumped up on the stainless fermenter wall

Not a big deal though - we simply added a little more water to our paste to thin it a little, then continued to apply it over the top of the clumps.

Here's how it looked after applying the paste with a more workable consistency.

Adjusting the paste consistency and it applied much more easily

At this point we left it uncovered in the garage for 30 minutes. After which point we hosed it out on the grass. 

A tip to remember for next time would be to remove all the covers/caps from any of the openings on the fermenter to let the water drain out more easily - otherwise bits of the paste tend to get trapped in these openings and have to be wiped out.

The paste rinsed off very easily with a garden hose - not wiping/scrubbing required. We then dried the fermenter with some paper towel and were left with a nice clean and shiny finish.

The final and most important step of the passivation process is to leave the fermenter open and exposed to air. It is this exposure to air that will form the passivation layer.

The end result after passivation - shiny!

The thing about passivation is there isn't really an easy way to test it at home - guess we'll just have to get a brew into it to find out, but we certainly don't expect any issues.