Showing posts with label brewing. Show all posts

Monday, 27 June 2022

KegLand RAPT Pill Update - Bluetooth Functionality Enabled

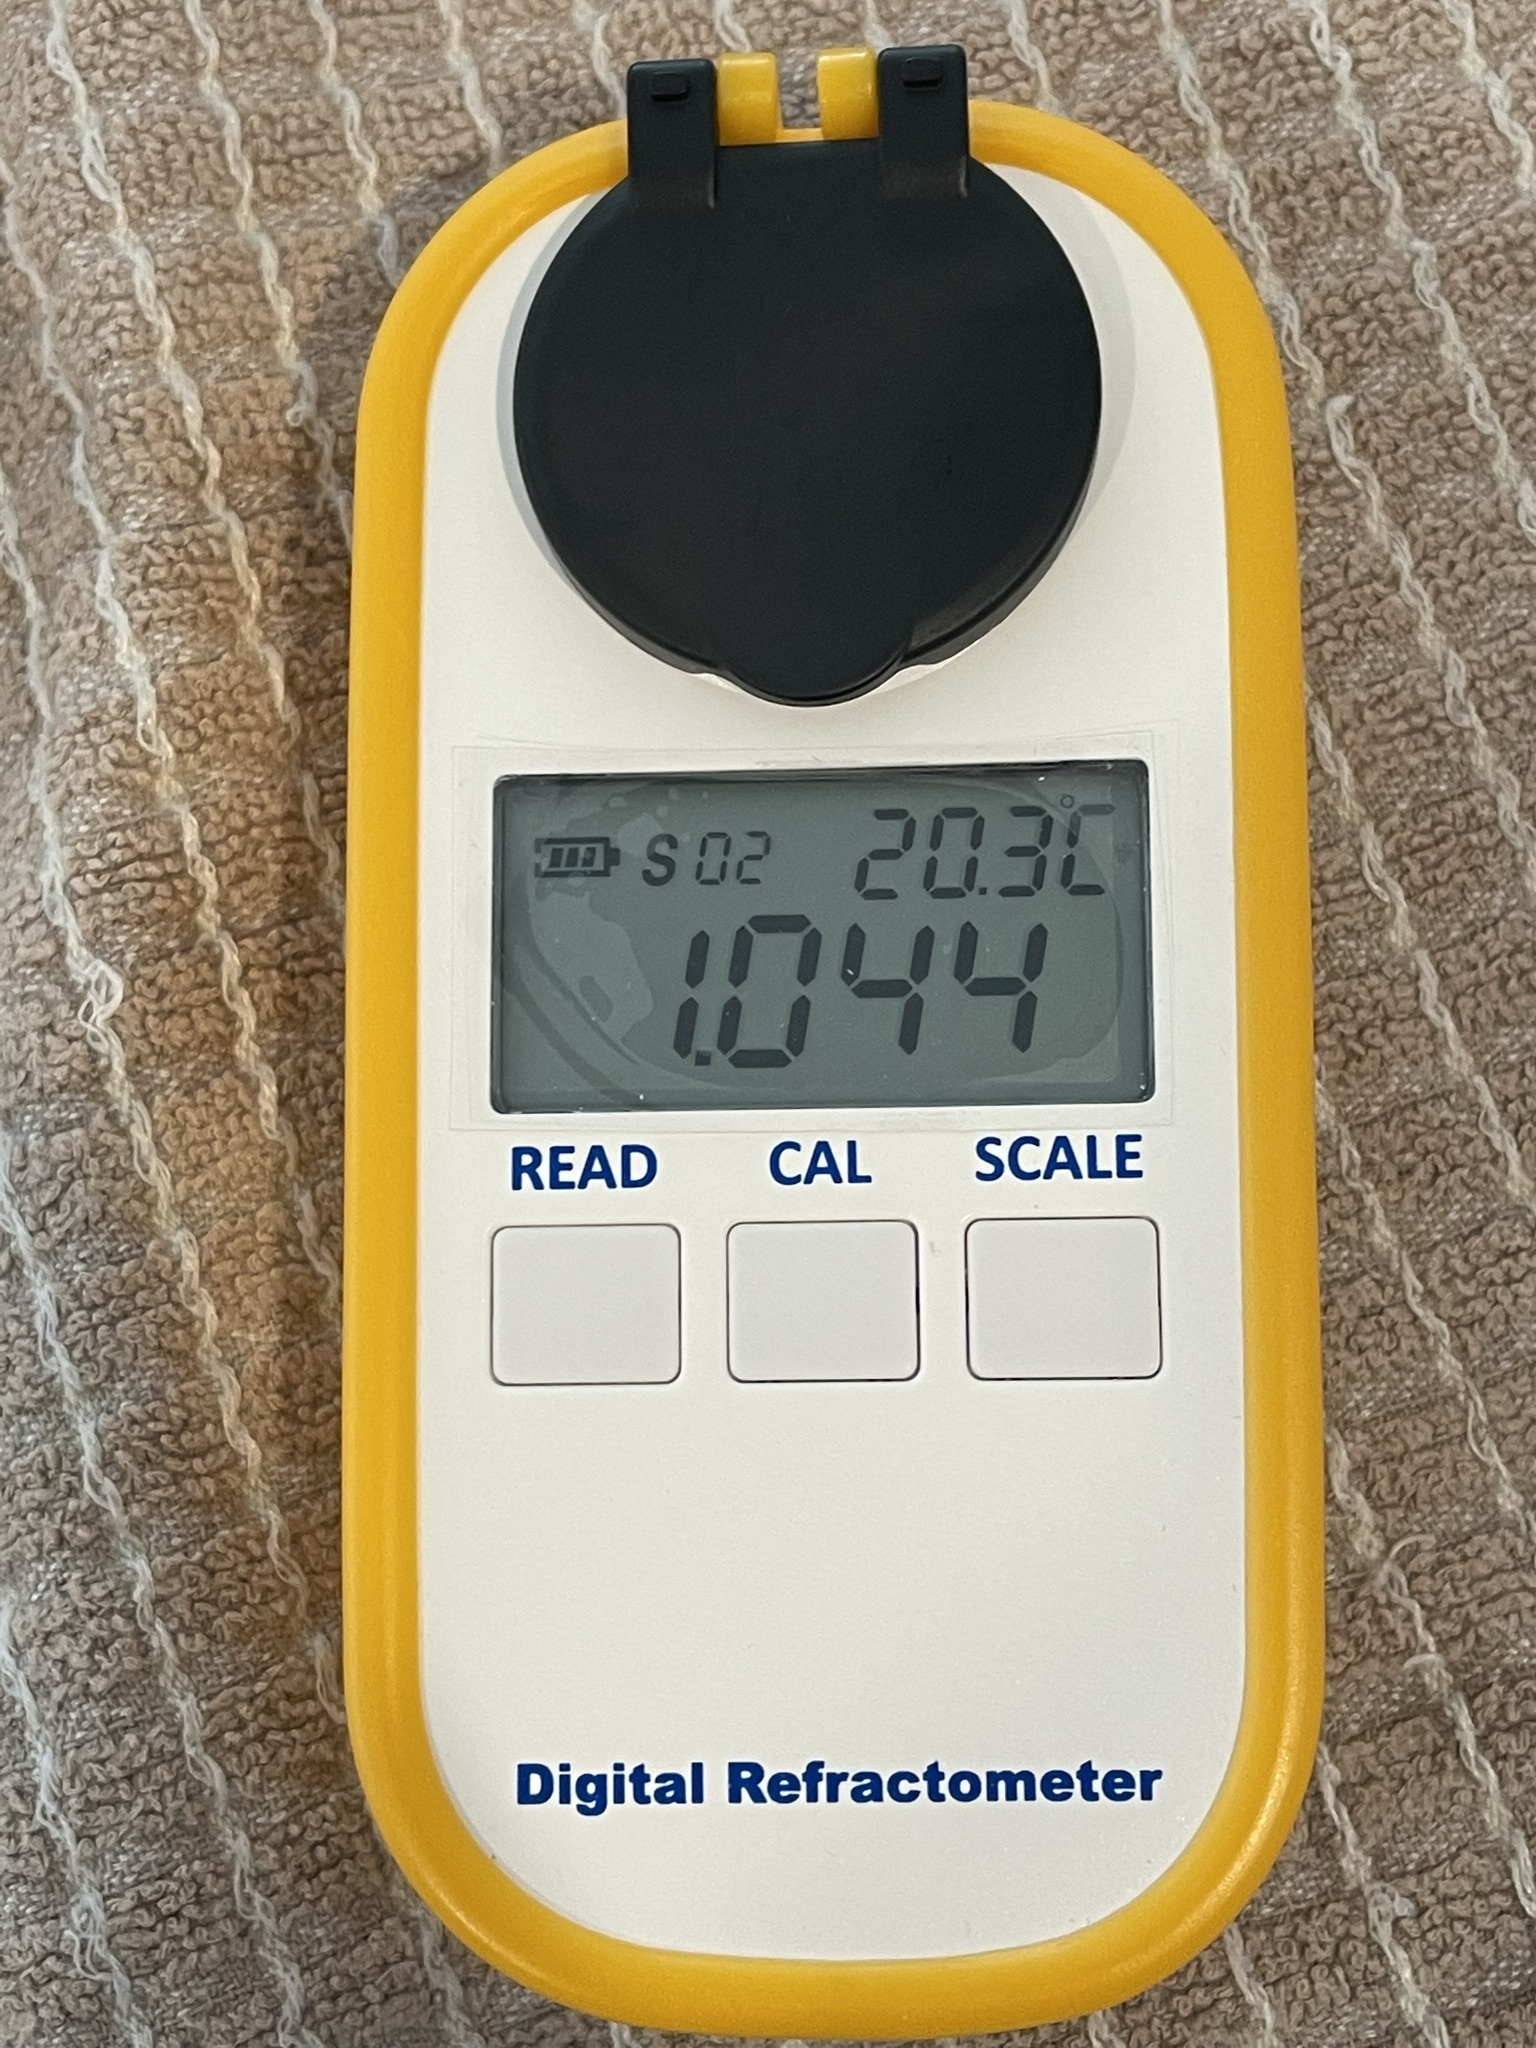
Since it's release in 2021, KegLand's RAPT Pill was touted as having Wi-Fi and Bluetooth connectivity options, however users have been only able to access and use the Wi-Fi functionality up until now.

A recent firmware update for the Pill has enabled Bluetooth functionality which has prompted the RAPT developer, Trent Devers to clarify exactly how the Bluetooth feature works with the Pill.

The following text has been copied directly from Trent's post in the RAPT Users Group on Facebook. If you're a RAPT Pill (or other RAPT product user), it's a great idea to join so you can keep up to date on these features as well.

Q. What is the purpose of the Bluetooth feature?
A. The bluetooth feature allows Rapt Devices to talk to each other. This allows tight integration of Rapt devices and will allow us to expand the feature set of the Rapt ecosystem.

Q. Will Bluetooth on the Pill help me with my Wifi signal problems?
A. Yes - but you need to pair it to a Rapt Fermentation Chamber or Temperature Controller. The paired (bridging) device will pickup the bluetooth readings from the pill and include them when the bridging device submits its telemetry. Users with wifi signal problems typically have their pills inside a stainless fermenter that is inside a fridge and multiple brick walls between their wifi router. The Fermentation Chamber & Temperature Controller are usually not located within a steel "Faraday Cage" (https://en.wikipedia.org/wiki/Faraday_cage) and can usually get a decent signal from a shed or garage even when the wifi router is inside the house. These device can easily pickup the bluetooth signal and relay it on behalf of the pill and should resolve wifi signal problems.

Q. Can I use the Pills temperature probe to control the temperature of my Rapt Fermentation Chamber or Temperature Controller?
A. Yes. User manuals will be updated soon with instructions on how to do this.

Q. Can I use the Rapt Mobile App on my phone to talk to a bluetooth enabled Rapt device?
A. No

Q. Can I build a device/write my own code to read the Bluetooth signals from the Pill?
A. Yes, but we aren't offering any technical assistance on how to decode the bluetooth data.

Q. If I write my own code to read the bluetooth signal, can I submit it to the Rapt Cloud.
A. No. The public Api for Rapt Cloud only allows you to read data and not submit data.

Q. Will any Rapt Devices be able to talk to other non-Rapt devices like the InkBird Temperature Controller in the future?
A. No.

The timing of this update couldn't be better for us personally. We just completed our most recent brew, which was the first in our new stainless conical Cheeky Peak Nano-X Fermenter. We experienced the exact issue Trent outlined in the second question above with our Pill not able to reliably submit telemetry because of issues connecting to our Wi-Fi network due to being in a stainless fermenter enclosed in a refrigerator. 

We were looking at Wi-Fi range extenders to help boost the signal in our garage where the fermentation fridge is located to address this, but may instead look at getting a RAPT Temperature Controller instead to replace our InkBird ITC-308 temp controller.

No doubt the Bluetooth functionality isn't going to meet the expectations of what some users were hoping for as not everyone wants to (or is able to) submit their telemetry to the cloud and would rather just be able to have the Pill report to a device locally via Bluetooth.

Check out our guide on How to connect RAPT Pill to RAPT Temperature Controller for detailed instructions on how to link the RAPT Pill and RAPT Temperature Controller together.

Related Articles


Friday, 24 June 2022

Keg King - Apollo Titan 30L Stainless Conical Fermenter - Preview

We recently noticed a new product added to Keg King's website for their Apollo Titan 30L stainless steel pressure capable fermenter - pictured below. It certainly caught our attention so we thought we'd take a closer look and break down our thoughts and findings.

Keg King's Apollo Titan 30L Stainless Conical Fermenter
Image Copyright of Keg King

Pressure fermenting is all the rage these days in the homebrewing community - and rightfully so. It offers loads of benefits over fermenting at regular atmospheric pressure, so it's only natural that companies and manufacturers start focusing their products on meeting the demands of what brewers want - and at the moment it's pressure capable fermenters.

Plenty of brewers are no doubt looking for a more affordable next step up, after typically starting their homebrewing journey on some kind of plastic based fermeter. This next step open involves upgrading their equipment to stainless steel, but the price often makes it prohibitive to do so. This is obviously a problem Keg King identified and have created an attractive solution for.

Enter the Apollo Titan - a 30L stainless steel fermenter capable of withstanding pressures up to 35psi. At the moment, most home brewers opt for pressure fermenters made of PET plastic due to their attractive price point making them easily accessible - like Keg King's Fermenter King and Apollo range, and although these fermenters are great and certainly have their benefits, they do have some limitations.

So what have we got in the Apollo Titan? Let's break it down and take a look.

Firstly, the body is made entirely of stainless steel. Three steel legs support the fermenter, with leg extensions available to raise the height from 574mm to 754mm (measuring to the top of the ball lock posts on the lid). Total width is quoted at 367mm.

The body itself has the conical shape at the bottom allowing the trub and yeast cake to collect, allowing more of the fresh beer to be settled and accessed from on top using a floating dip tube. 

There are 3 x 1.5" openings with tri clover clamps. One at the very bottom of the cone could have a dump valve fitted to allow the trub/yeast cake to be easily removed.

The next opening located part way up the cone could allow a sight glass, sampling tap, carbonation stone or other ball valve attachment to be fitted, for racking or drawing samples.

The upper most 1.5" opening could be used for a thermowell or temperature probe, though this may not even be necessary because of the clever lid design.

And this is the beauty of tri clover openings/attachments - they're a standard fitting, meaning you can fit just about any attachment you like that matches the 1.5" size, giving brewers enormous flexibility and customisation options to have their fermenter configured just the way they like. You can even opt to fit nothing to it and just attach the end caps that are included with the fermenter to blank off the ports.

Looking at the aforementioned lid and it appears that the same 115mm lid that is fitted to the PET-based Fermenter King and Apollo has been kept and reused for the Apollo Titan. The lid features two ball lock disconnects (1 for gas, 1 for liquid), a centralised port for a thermowell, plus a screw in pressure release valve (PRV) which doubles as a dry hopping port.

Apollo Titan Lid
Image Copyright of Keg King

No doubt it's this clever lid design that gives the Apollo Titan the ability to withstand such high pressures as 35psi. Most other stainless fermenters feature a much larger lid - usually the entire diameter of the top of the fermenter body meaning they are limited to how much pressure they can withstand. A smaller lid/opening also means it's easier to seal and less likely to leak which is often a source of frustration for brewers with pressure fermenting.

Having a body made entirely of stainless steel means you essentially have a 30L keg. PET plastics inevitably leech some oxygen over extended periods of time, but there's no such risk with stainless steel meaning you can ferment and store your beer in the same vessel indefinitely if you wanted to. Stainless is also much more durable when it comes to cleaning and the types of cleaning agents that can be used on them.

Keg King state that the body is actually the same size as the Apollo fermenter meaning some of the accessories like the insulating jacket and cooling coils are interchangeable between the models.

Currently on the Keg King website at AU$399, the price point is seriously sharp and attractive, with an anticipated release date of mid to late July 2022. The inclusion of tri clover ports means that brewers can upgrade and add parts later on if they wish to, and the use of stainless steel means their investment will last a very long time if looked after.

What do you think about the new Apollo Titan? Will you be upgrading? Let us know in the comments below.

Now that this has been released and is available for sale, you can check out our full Hands on Review of the Apollo Titan fermenter.


Related Articles

Keg King - Spundy Spunding Valve - Hands on Review

Keg King - Apollo Titan - 30L Stainless Conical Pressure Fermenter - Hands on Review

Keg King - Corny Keg & Fermenter Cleaning Kit - Hands on Review

Keg King - Quickie - Cornelius Post Dispenser Nib - Hands on Review

Wednesday, 22 June 2022

USA Hop Growers - 2021 Statistical Report Breakdown


We recently came across the USA Hop Growers statistical report for 2021. After having a read through it there were definitely some interesting takeaways which give a great insight into the brewing industry - from homebrewing all the way through to full scale brew houses.

The USA are responsible for providing the majority of "new world" hop varieties used in modern day brewing, and with the explosion in recent times of heavily hopped beers like Hazy/NEIPA's, it's no surprise to see the hop industry in the USA growing year on year.

There was a total production increase of 11.18% in US hop crops in 2021 compared to 2020.

Below is a table taken directly from the report showing the top 10 Pacific North West (PNW) Region Hop Varieties by acreage

Source: USA Hop Growers 2021 Statistical Report

Unsurprisingly, Citra is the top hop and has held the number one position since 2018. We're a big fan of citra hops (as are lots of other people apparently). According to the report nearly 1 out of every 5 hop bines in the PNW region was for Citra!

Mosaic has claimed the number two spot for the first time and has steadily been increasing it's ranking since 2018.

CTZ - or Columbus, Tomahawk and Zeus was relegated from 2nd to 3rd on the list, with the remaining varieties and rankings staying relatively the same, with the exception of Simcoe and Cascade swapping places compared to 2020.

Over the past 10 years, hop acreage has increased by 109% from just under 30,000 acres to now just over 62,000. This growth has also seen a shift from a 50/50 split in alpha/bittering and aroma hops to 80.5% aroma varieties in 2021, meaning 19.5% of the crops were for alpha/bittering hops. Would be interesting to understand how dual purpose hops (like Citra) are classified here as they're often used for bittering and aroma/flavour.

Here's another interesting graphic giving a visual representation of the crop volume (acreage) for each of the top 10 varieties.

Source: USA Hop Growers 2021 Statistical Report

This really gives a good insight into just how popular these top 10 varieties of hops are, with the top 3 varieties accounting for just over 40% of total crops.

When you consider how many other hop varieties are available, it's pretty astounding to see these figures, with the countless other hop varieties account for just over 30% of total crops.

We've used nearly all of these top ten varieties at some point in our brewing journey, with the exception of Pahto. Sounds like we might be missing out on something here so we'll be keeping an eye out for this variety for future brews.

Check out the 2021 Hop Growers of America Statistical Report for yourself.

Monday, 20 June 2022

AliExpress - Digital Refractometer Testing

In our previous blog post, we gave a quick run down on our recently purchased digital refractometer from AliExpress. In this post, we're going to outline a quick side by side comparison we did to compare the results when measuring a simple solution of dextrose and water using a standard floating hydrometer, and our new digital refractometer. 

After mixing up the sugar solution in a glass pyrex jar (to simulate our wort), we poured a sample into the floating hydrometer tube and floated the hydrometer and took a reading. We then took a small sample from the hydrometer tube and used this on the digital refractometer. After each test, we returned the solution from the floating hydrometer into the pyrex jar, then added more dextrose (or in some cases added water to re-dilute) to get different and randomised levels of sugar in the solution. I didn't measure the amount of dextrose used, just simply "free poured" then stirred it in thoroughly.

Interestingly, we found we were getting more accurate results by adding 5-6 drops onto the digital refractometer which is contrary to what we found in our previous/initial testing of the device.

Our first comparison after adding only a small amount of dextrose, sees a reading of around 1.008 on the floating hydrometer and 1.005 on the digital refractometer. As you can see from the display of the digital refractometer, the temperature of the water was quite cold at a little over 15c. The floating hydrometer is calibrated at around 20c so using morebeer's hydrometer temperature correction calculator, the actual reading would be 1.007, meaning a difference of 2 gravity points between them.


Our next comparison shows a value of 1.028 on the floating hydrometer and 1.026 on the digital refractometer. Our sample temperature is now a more reliable 19c, so once again we have a difference of 2 gravity points.


For the next side by side test, we unfortunately didn't break the meniscus on the floating hydrometer sufficiently before taking our photo, so we'll go off the reading of 1.052. Our digital refractometer read 1.049 giving us a difference of 3 gravity points.


This next test was surprising, as we had a reading of 1.080 on the floating hydrometer and exactly the same reading on our digital refractometer!


Next we revisited our previous reading where we failed to break the miniscus on the floating hydrometer properly (by diluting our 1.080 sample). This time around we had a reading of around 1.050 on the floating hydrometer and a surprisingly low 1.044 on the digital refractometer. A difference of 6 gravity points which is significant.


Next up we had 1.036 on the floating  hydrometer and 1.034 on the digital refractometer. Once again, giving us a difference of 2 gravity points.


Our final test and we have a reading of 1.054 on the floating hydrometer and 1.053 on the digital refractometer, giving us a difference of 1 gravity point.


Here's a table outlining the results of our tests.

Floating Hydrometer Digital Refractometer Difference
1.007 1.005 -0.002
1.028 1.026 -0.002
1.052 1.049 -0.003
1.080 1.080 0
1.050 1.044 -0.006
1.036 1.034 -0.002
1.054 1.053 -0.001

The table outlined above shows the digital refractometer consistently had a lower gravity reading than the floating hydrometer. For the majority of tests, the reading was within 2 gravity points of the floating hydrometer. The advertisement for the digital refractometer states it's accurate to within +- 0.001 gravity points, and given floating hydrometers aren't necessarily 100% accurate either, this all seems reasonable. 

We'll write off the test with a difference of 6 gravity points as an outlier - perhaps the digital refractometer screen wasn't cleaned properly, or the sample was otherwise contaminated or diluted which may have affected the reading.

Our initial concern was that perhaps in the range of 1.050, the digital refractometer wasn't accurate - but was more accurate at higher gravity readings such as 1.080, however our last test at 1.054/1.053 indicates this isn't the case.

What can we take away from this? We think it demonstrates that the readings are reasonably accurate, especially for homebrewers where having measurements 1 or 2 points off really aren't that big a deal. We're not calculating alcohol percentage for tax and labelling/packaging purposes after all so the implications of a slightly inaccurate reading are almost negligible. The convenience of much lower sample sizes is a major benefit in using the digital refractometer, but I think we'll end up taking measurements with both for the next few batches to see how they compare.

You can check out our previous review of our AliExpress Digital Refractometer here.

Tuesday, 19 April 2022

BrewZilla Brew Day - Juice Boost NEIPA

Our latest brew day was for our Juice Boost NEIPA - our first attempt at a New England IPA (also known as a Hazy IPA). You can check out the full recipe details here. Or, see how it turned out with our Tasting Results and Review.

We started out our brew day with the usual water adjustments. The recipe calls for a chloride to sulphate ratio of 2:1. Volumes in Brewfather suggested 25.5L of water for the initial mash, followed by less than 4L of water for sparging.

Grains for our Juice Boost NEIPA ready to go

At a little over 6kg of grain, this was the largest grain bill we'd attempted in our BrewZilla. It was pretty full during the mash, but room for a tiny bit more if necessary indicating that our previously stated BrewZilla maximum grain limit/capacity was accurate.

Initial mash in - loads of oats and wheat malt

We took our time during mash in, adding all of our grain slowly, and stirring as we went to try and prevent clumps or dough balls from forming. After adding all the grain we gave it a thorough stir, then left it for 10 minutes to settle before switching the pump on for recirculation.

Mash in completed. Malt pipe is very full, and the mash is thick and sticky

Due to the inclusion of a decent amount of wheat malt and unmalted (quick) oats in our grain bill - we anticipated a thick, sticky mash so we threw in a few big handfuls of rice hulls as well to help with recirculation and sparging. In hindsight, we could have used more as recirculation was still really slow. The recirculation valve was opened only the tiniest amount to really limit the flow and prevent the wort from backing up and overflowing back through the holes in the malt pipe for the malt pipe handle.

Sparging was slow, but did not get stuck

Sparging was also slow as we expected, especially when compared to other brews, however the flow was continuous and didn't get stuck. The rice hulls definitely did their job here!

Sparging complete, so whilst waiting for the wort to boil, we took the time to measure out our hops. This recipe has no boil hops, and a rather significant whirlpool/hop stand after the boil at 85c for 15 minutes.

We took a pre-boil gravity reading of approx 1.056. Well down on the expected pre-boil gravity of 1.061.

Pre Boil Gravity reading - much lower than expected

We anticipated a potential loss in mash efficiency for two main reasons. Firstly, we were using a grain bill towards the upper limit of what is possible in the 35L BrewZilla, and feedback from other BrewZilla users suggest that efficiency drops are common when using larger grain bills such as this.

Secondly, we had 650g of unmalted (quick) oats which are well known to reduce mash efficiency. In anticipation of this, we included 200g of dextrose to help boost the fermentable sugar levels to help compensate for these potential losses.

Adding dextrose to the boil

After boiling for 30 mins and chilling to 85c for our 15 minute hop stand, we then chilled down to pitching temp and transferred to our FermZilla fermenter.

We co-pitched our yeast and pleasingly, saw early signs of fermentation by the next morning. Our RAPT Pill was also in the fermenter to help monitor our fermentation progress.

We had an original gravity (OG) of 1.059 - much lower than the expected 1.068 which is disappointing, but not entirely surprising given the expected efficiency losses we previously mentioned. Very glad we included the dextrose to help compensate for this, otherwise we would have had a starting gravity that was really too low for this style of beer.

There's certainly no shame in using dextrose to help boost the sugar content of your wort - if you check the ingredients on some commercial NEIPA cans, you'll see that some of them contain dextrose as well! If it's good enough for pro breweries to use, it's good enough for us!

Original Gravity reading - approx 1.059. Also much lower than expected

The current state of fermentation after only a few days shows we have a final gravity several points lower than expected at 1.007. We suspect the co-pitching of BRY-97 West Coast Ale yeast in addition to the Verdant IPA yeast really helped the yeast chew through more of the sugars than expected. Although this is good as it was will help boost the alcohol content, which is necessary for this style of beer, it unfortunately means we've exceeded the BJCP recommended FG of 1.010 by a few points meaning we'll probably have an end result a little drier than expected and perhaps with a thinner body. A lack of residual sweetness in the malt shouldn't be a big problem though since most of the flavour will be coming from the huge dry hop (300g). Will be interesting to see if mouthfeel is impacted though.

These numbers give us a surprisingly high attenuation rate of over 88%, and plenty of alcohol content at 6.83%.

In terms of fermentation process, we set our Inkbird temperature controller to 19.5c with a 1c temperature differential. Once our gravity readings hit 1.017, we let the temperature climb up to 21 degrees to help the yeast finish it's work and cleanup any diacetyl or other off flavours. We'll leave it to rest at this temperature (approx 21-22c) for another 7 days before soft crashing and adding our dry hop.

We also performed the majority of fermentation with no pressure - our spunding valve was totally open, essentially acting as a basic type of air lock. This was to allow the flavours and esters from the Verdant IPA yeast to be imparted into the beer. At the same time that we let the temperature begin to rise (SG 1.017), we also adjusted the spunding valve to begin pressurising with about 5psi of pressure.

Want to see how it turned out? Check out our Juice Boost NEIPA - Tasting Results & Review post.

We also commemorated this brew with some custom 3D printed tap labels - check them out here


Related Articles


Saturday, 19 March 2022

Best Juicy New England IPA (NEIPA) Recipe

After much research and putting together our NEIPA Recipe Creation Guide, we have settled on the below recipe for our Juicy New England IPA (NEIPA) Recipe

Recipe Notes

Recipe Inspiration

We have taken inspiration for this recipe from David Heath's YouTube video (recipe is in the video description). We've made a couple of minor adjustments but wanted to credit David's work as we're big fans of his YouTube video's so check him out!

Malt Substitutions

We've substituted David's recommended Maris Otter malt for Golden Promise - simply because we used Maris Otter recently in our El Dorado Smash so we wanted to try something different and we haven't used Golden Promise malt before.

We also reduced the amount of acid malt (sour grapes) malt that is used, simply to err on the side of caution as we haven't used this before to adjust mash PH.

Hops

Our hop varieties are also a little different, mainly because of what our local brew shop had available/in stock at the time. Any variety of juicy/fruity new world hop is going to work well with this recipe.

Water Profile

One of the most important aspects of a NEIPA is the water profile/chemistry - in particular the chloride and sulfate ratio. In this recipe we're using a chloride to sulfate ratio of 2:1 which is a common/popular starting point for NEIPA recipes.

Dry Hopping

We've also opted to not use a dry hop during active fermentation which is commonly used to help achieve "biotransformation" of hop oils. We figure there will be more than enough hop oils present from the large whirlpool hop addition to allow this to happen, so we're saving all of our dry hops until after fermentation is completed. We'll also use a soft crash by dropping the temperature of the fermenter to approx 15c after fermentation has completed to avoid hop creep from occurring.

All Grain Homebrew Recipe

Vitals

  • Batch Volume: 22L 
  • Boil Time: 30 minutes
  • Brewhouse Efficiency: 75%
  • Original Gravity: 1.064
  • Final Gravity: 1.013
  • IBU (Tinseth): 30
  • BU/GU: 0.47
  • Colour: 9.3 EBC

Mash

  • Temperature: 65c - 60 minutes
  • Mash Out: 75c - 10 minutes

Malts

  • 2.2kg - Gladfield Pilsner Malt (35.5%)
  • 2.2kg - Golden Promise Malt (35.5%)
  • 650g - Gladfield Wheat Malt (10.5%)
  • 650g - Flaked Oats (Uncle Tobys Quick Oats) (10.5%)
  • 300g - Gladfield Gladiator Malt (4.8%)
  • 200g - Gladfield Sour Grapes Malt (3.2%)

Hops

  • Citra (18 IBU) - Whirlpool/Hopstand - 85c for 15 minutes
  • Azacca (12 IBU) - Whirlpool/Hopstand - 85c for 15 minutes

  • 100g - Amarillo - Dry Hop (3 days)
  • 100g - Azacca - Dry Hop (3 days)
  • 100g - Citra - Dry Hop (3 days)

Yeast

  • 2 packets of dry yeast to be co-pitched
    • Lallemand Verdant IPA (Dry - 1 Packet)
    • Lallemand BRY-97 (Dry - 1 Packet)

Fermentation

  • 20°C for 14 days

Carbonation

  • 2.4 CO2-vol

Water Profile

  • Ca2+ (Calcium): 119
  • Mg2+ (Magnesium): 14
  • Na+ (Sodium): 19
  • Cl- (Chloride): 185
  • SO42- (Sulfate): 92
  • HCO3- (Bicarbonate): 43

Want to see how the recipe turned out? Check out our Brew Day post for this recipe or the Tasting Results and Review.

Also check out our Juice Boost 2.0 All Grain Recipe below

Related Articles

e


Thursday, 20 January 2022

KegLand BrewZilla Gen 4 Release - First Impressions

The next generation of KegLand's all in one brewery system, the BrewZilla has finally been published on the KegLand website. Here's our initial thoughts on the design and features now that we have  confirmation on the details.

BrewZilla Gen 4
Image used with permission from KegLand

  • The general size and footprint of the unit appears to be relatively unchanged - which is good as the small footprint was convenient for storage, and brewers with limited space. The tall narrow design does cause temperature variations between the top and the bottom, compared to shorter and wider designs though but this can compensated for relatively easily.

    BrewZilla Gen 4
    Image used with permission from KegLand

  • Release date (for Australia) is March 16, 2022.

  • Possibly the biggest and most significant change is the relocation of the digital display and control panel from the base of the unit to the top. This is a big step in the right direction and will greatly improve the ergonomics and usability of the BrewZilla. There appears to be a single lead connecting the display back to the base of the unit which would likely be easily disconnected for removal and cleaning. No more worrying about getting the display wet when cleaning! The screen is now colour as well which is a nice addition and can be tilted up/down for easier viewing depending on your height.

  • Pump and heating elements are all now electronically controlled from the display. Time will tell how this one plays out - we liked the benefit of having a 'kill switch' for the pump and electric heating elements. Certainly in the case of a boilover, it was great to be able to quickly shutoff the heating element(s) with the flick of a switch. Some closeup pictures of the screen (which aren't currently available) would help determine how this works. Perhaps physical buttons instead of touch screen functions for this?

  • The base of the unit is now concaved meaning that wort can be more easily drained from the unit without needing to tip/tilt it.

  • Rapt portal integration - brew day information such as mash time and temperature can be logged to the Rapt portal and it also appears the BrewZilla can be controlled from the portal (or app) as well. Notifications and alarms can also be setup to automatically notify on certain events such as strike temp being reached, hops needing to be added etc. The Rapt portal is an exciting and innovative idea and we're excited to see how it plays out with the integration of a range of different brewing devices/equipment.

  • Bluetooth gateway - the BrewZilla can act as a bluetooth gateway/ repeater meaning that other devices such as bluetooth thermometers can communicate with the BrewZilla which can then repeat/relay this information elsewhere - such as the Rapt portal.

  • Ball lock tap at the base of the unit appears to be unchanged from the previous model.

  • Recirculation pipe from the base of the unit with a flow control valve also appears unchanged. KegLand state an "improved recirculation arm design". It's unclear so far what this means. As far as we can tell from the photos it's still got a standard camlock fitting which was known to come loose fairly easily on the previous generation BrewZilla. Strongly suspect this issue would have been addressed though.

    BrewZilla Gen 4 - recirculation pipe and lid
    Image used with permission from KegLand

  • False bottom protection screen - an additional screen to go over the false bottom to help filter hop/trub material and prevent it from entering (and clogging) the pump

  • Standard IEC power cable - similar to what plugs into the back of most computer power supplies, this is a good improvement as the power cable can now be removed when cleaning the unit and for storage.

  • Immersion chiller - still appears to be stainless steel and unchanged from the previous generation.

  • Two stage malt pipe removal - the malt pipe can now be lifted and set to 2 different heights for sparging - useful for smaller batches.

    BrewZilla Gen 4 - malt pipe removal stage 1
    Image used with permission from KegLand

    BrewZilla Gen 4 - malt pipe removal stage 2
    Image used with permission from KegLand


  • Pump for the recirculation arm is still located in the base of the unit and is easily accessible for repairs/servicing. Obviously there are fewer electric components in the base now which is good due to the relocation of the digital display. There are still some electronic components in the base which are sealed away, and the bottom cover has been removed completely leaving the pump and hoses/connections exposed.
    BrewZilla Gen 4 - underside view of base with no cover
    Image used with permission from KegLand

  • Larger, more ergonomic handles on the glass lid. The handles are now made of stainless instead of the previous plastic 'ball' type handles.


    BrewZilla Gen 4 - new glass lid handle
    Image used with permission from KegLand

  • Larger malt pipe design - malt pipe is now 30% larger than the previous generation meaning more grain and therefore high gravity beers can now be made without needing reiterated mashes.
  • There is an optional accessory for an "low volume CIP rotor" - ie. cleaning in place head. No pictures or info on this yet but we're looking forward to seeing more detail on this.

  • Available in 35L, 65L and 100L versions.

  • "Ultra Low Watt Density" heating elements are stated, but not clear on the exact power rating on these and if they are the same or changed from the Gen 3 BrewZilla.

  • Advertised price is currently AU$599 which is AU$200 more than the current price of the BrewZilla 3.1.1 (AU$399). Although a sizeable 50% increase from the previous version, it is still significantly cheaper than other single vessel breweries such as the recently released GrainFather G40.

What are your thoughts on the features and price of the BrewZilla Gen 4? Will you be upgrading?

You can check out pictures and more information on the BrewZilla Gen 4 on KegLand's website.