

There is a well worn path that many homebrewers have been down when it comes to packaging their precious brews. It typically involves starting out with bottling, and fairly quickly realising that washing dozens of bottles for every batch that is brewed is tedious and time consuming - so much so that it probably leads some to give the hobby away all together.
The next step after bottling for those that persevere is typically packaging into kegs - with the 19L ball lock cornelius "corny" style kegs being the most popular option. Kegging is great - it means you generally only have one vessel to clean and sanitise for each batch, and you can serve from a simple picnic tap or go the whole hog and attach beer taps or faucets to your beer fridge or purpose built kegerator for the true draught beer experience at home.
The undisputed problem with diving down the kegging rabbit hole is the setup cost though. Nothing on it's own is particularly expensive, but when you add up the cost of all the components you need to get going it can become out of reach fairly quickly.
Cheap second hand fridges and freezers for kegerator or keezer conversions can be found fairly easily on used marketplaces, but when you add in the additional components like a CO2 gas tank, gas regulator, taps, shanks, beer line, gas line, disconnects, fittings/clamps and of course, kegs, you can see how quickly the costs can accumulate.
Corny kegs when brand new typically retail for around AU$100 - which doesn't seem too bad, but if you want 3 or 4 of them for your new kegerator setup, you can see how once again cost can be come an issue.
There's a fresh new option available now that is challenging the age old adage that stainless steel is the only way to go for homebrewing equipment like kegs and that kegging is too expensive.
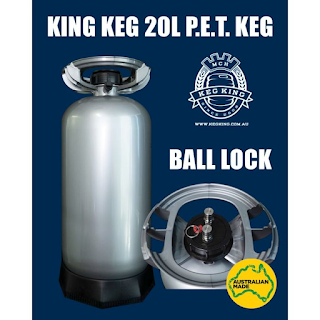
The King Keg from Keg King - a name that will undoubtedly cause mass confusion amongst the internet's search engines, is a PET plastic based keg that provides brewers with a much more budget friendly alternative to the traditional stainless steel corny kegs.
 |
| King Keg - 20L PET Ball Lock Keg |
Opening the box and we've got our parts package sitting on top of the keg which includes a stick on thermometer, volume markings sticker, lid, screw on collar, gas/liquid ball lock posts, pressure release valve (PRV) and a rigid plastic dip tube.
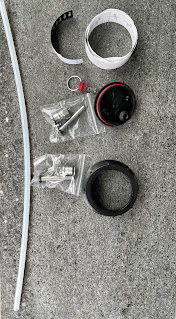 |
| Included parts with the ball lock version of the King Keg |
The gas and ball lock posts need to be assembled which involves inserting the spring and poppet into the post and then screwing it onto one of the threads on the lid. This process would be familiar for anyone who has purchased/put together one of Keg King's fermenters like the Apollo in the past - it's a piece of cake and only takes a couple of minutes with no tools required.
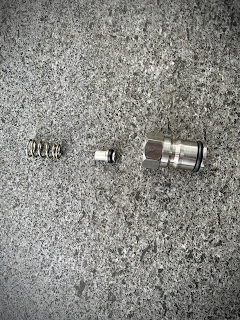 |
| Ball lock post assembly - spring, poppet and post |
The rigid plastic dip tube is then attached to the under side of the liquid ball lock post (the post without the small notches on it). Pro tip - submerge the dip tube in some hot/boiling water to soften it and make it more malleable before trying to slide it onto ball lock post. Failure to do may result in the dip tube cracking/splitting when being stretched.
If you do manage to split the dip tube, it can easily be replaced with a piece of regular beer line, or even a length of silicone tube. You could also use your floating dip tube from your fermenter instead (if you have one) and harvest beer from the top instead of the bottom.
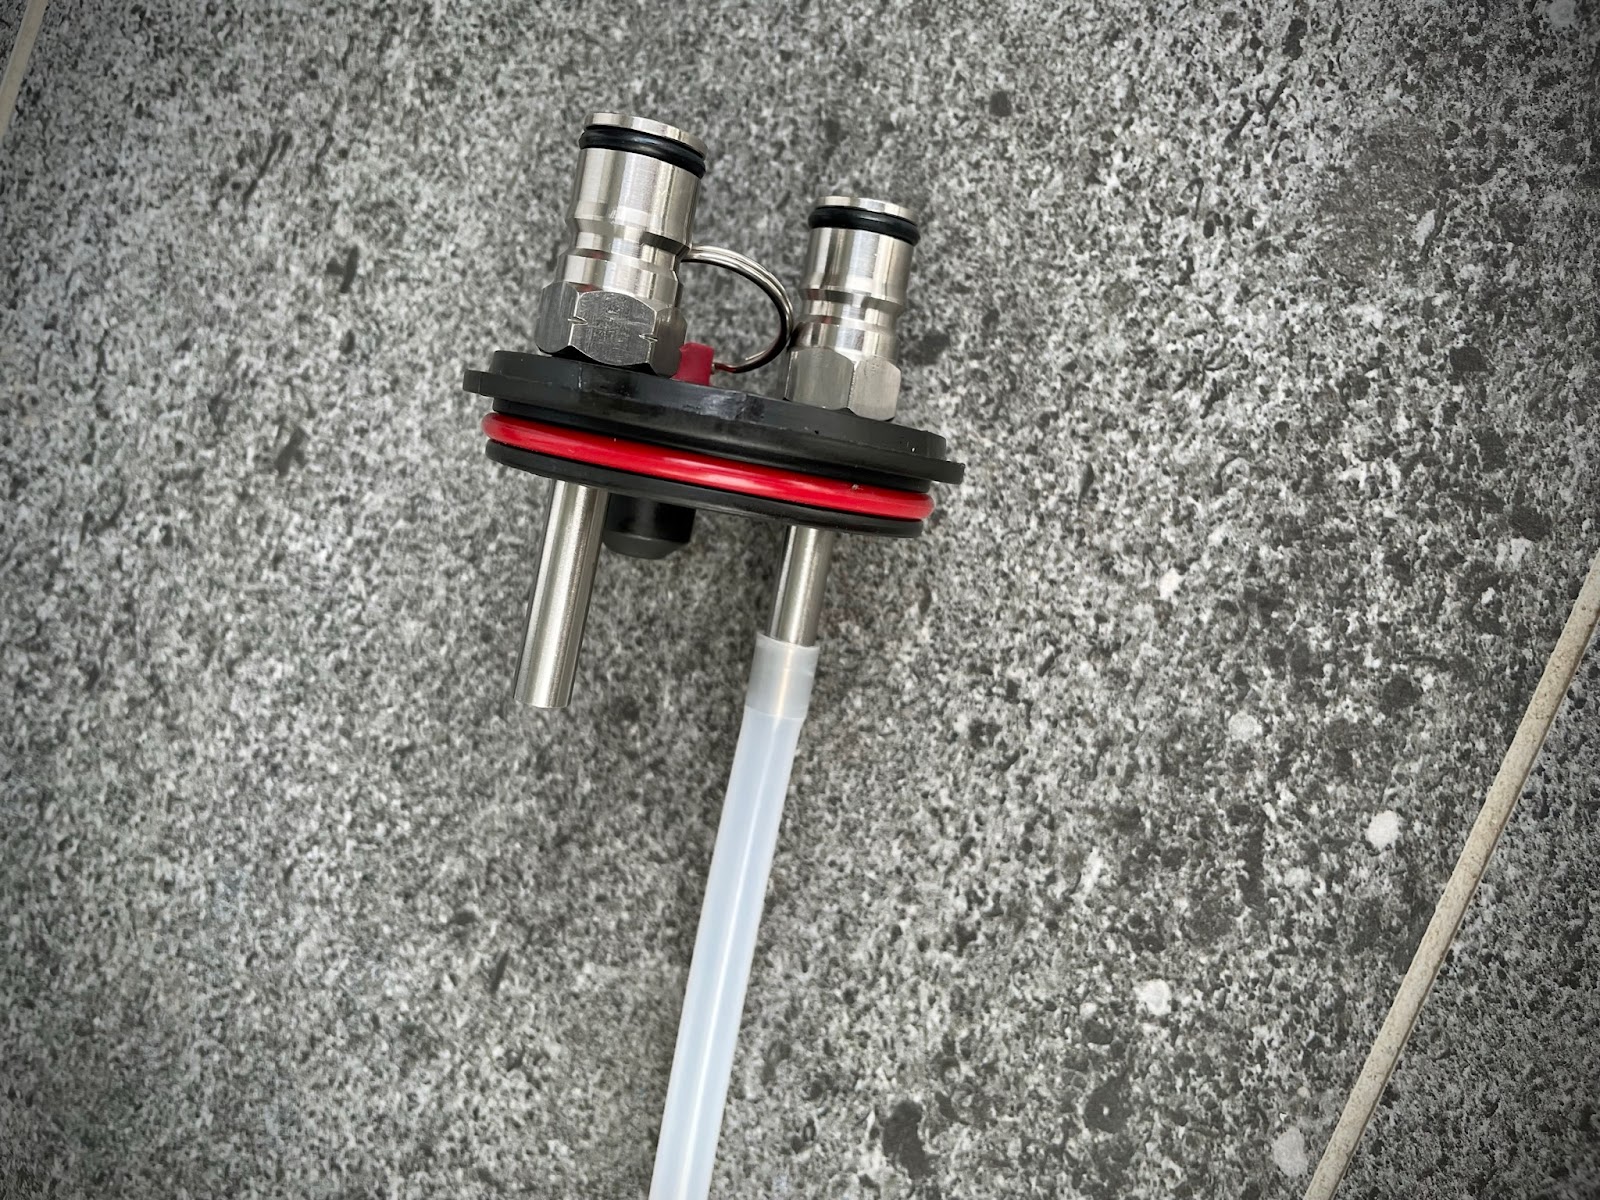 |
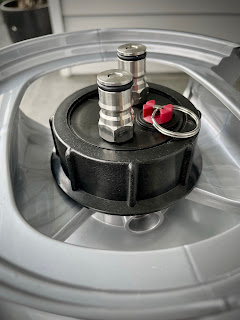
| King Keg lid assembly |
Lastly, the screw collar then screws into place to hold the lid down and we've got a keg ready to go.
 |
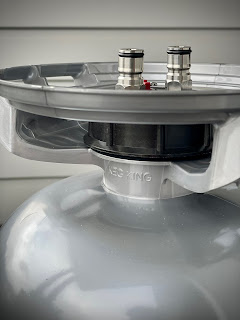
| King Keg with ball lock lid and collar fitted |
The King Keg features moulded/integrated handles at the top around the lid opening that feel plenty strong enough to lug the keg around when full - the relatively thin edges don't have a particularly ergonomic feel, but to move around the garage or in/out of the fridge poses no problem at all.
 |
| Side profile view of the King Keg integrated handles |
The opening where the lid attaches is quite small - there's no chance an adult arm would be able to reach in for cleaning/scrubbing purposes, so a keg/corny cleaner kit is a good idea, or otherwise just throw some powdered brewery wash (PBW) and water in and give it a good shake. The maximum recommended temperature of any fluid inside the keg is 35°C so warm water is ok to use as long as this temperature is not exceeded.
Compared to a standard cornelius keg, the King Keg is 2.6cm wider in diameter with a total width of 237mm and a total height of 575mm making it a little shorter. It holds an extra litre too with a total capacity of 20L.
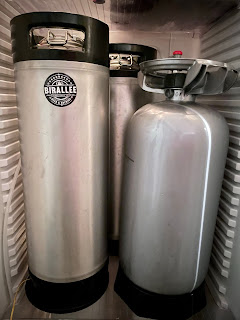 |
| King Keg side by side with a corny keg |
The main body of the King Keg is a generic grey/silver colour, with a printed stamp stating the maximum working pressure of 45psi and when it's due for it's next pressure testing - ours is good until 2025, meaning it has an expected working life of 3 years from it's manufacture date.
 |
| King Keg printed max working pressure and test date |
Back to the lid and the tolerances here are quite tight - with two ball lock disconnects attached (in our case the Spundy and a gas disconnect), you can see there is only a couple of millimetres of clearance, but it's enough to get them on and off easily without any problems.
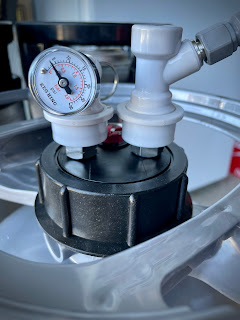 |
| King Keg - clearance between the posts with disconnects fitted |
Functionality wise, you've essentially got all the same features and uses as a standard cornelius keg. You can purge the keg of oxygen using CO2 (from a gas bottle or from active fermentation) prior to filling, and perform pressure transfers to further eliminate the risk of oxygen being introduced into your beer. You even get the good old condensation forming on the outside during transfers so you can see the fill level - since you're not actually able to see the fluid level inside the keg as they've made it as impermeable to light as possible.
 |
| Condensation reveals the fill level when transferring |
So, what's the catch then? Keg King state that beverages will last up to 18 months in the King Keg, due to it's unique oxygen scavenger technology in the plastic design that greatly reduces oxygen ingress through the plastic. We've certainly never had a keg last anywhere near 18 months so for us this really isn't an issue, but it's worth considering and being aware of, especially if you like to age some of your darker beers for extended periods of time. The damaging effects of ultra violet (UV) light are also eliminated by the protective coating on the plastic.
Being made of plastic, the King Keg inevitably has a limited life, with a hydrostatic test recommended after 2-3 years of service. When it is time for replacement though, the keg body itself can be replaced (without the lid components) for only AU$15 meaning for less than the cost of a 6-pack of craft beer you can have another 2-3 years of service (or longer) from a brand new keg, and just re-use the lid and collar components from your original King Keg. The keg itself can be recycled as well, helping to reduce landfill waste.
It makes a lot of sense, and even if you replaced the keg body every 2 years, you'd get 8 years of keg service (2 years from your original King Keg purchase + 3 replacement kegs at AU$15 each) before coming close to the cost of a stainless corny keg - and that doesn't include the cost of maintaining and replacing seals on a regular stainless corny keg over this period too.
We previously mentioned there are a couple of varieties available for the King Keg. There's currently a 10L and 20L version available, with options for A-Type and D-Type spears as well as ball lock configurations, meaning whatever setup you're running for connections can be accommodated.
Pricing on the Keg King website is AU$49.95 for the 20L ball lock configuration, with the A-Type and D-Type 20L versions coming in a little cheaper at AU$45.95.
Finally, and perhaps most importantly, King Keg's are designed and manufactured here in Australia which is great to see. Keg King even have a YouTube video giving an insight into the manufacturing setup especially to make these kegs. Pretty cool and insightful stuff and well worth a look.
 |
| Keg King's YouTube video on the King Keg is well worth a watch |
Advancements in manufacturing and technology are certainly helping to bridge the gap in functionality between plastic and stainless steel. With such a vast difference in price (a new ball lock 20L King Keg can be had for less than 50% of the cost of a new stainless cornelius keg), and no real downsides or disadvantages besides the limited lifespan, they're definitely a good alternative, especially if you're just getting your kegging setup underway and need to purchase multiple to get going.
Some care needs to be taken not to split the included dip tube (like we did), but even so, a floating dip tube is worthwhile considering fitting - and if you've got a Keg King fermenter, you probably already have one of these anyway.
The 20L version like the one reviewed here is great for home Kegerator setups. The 10L option looks good as well, and we're hoping a smaller 4-5L option is developed in the future for a "party keg" option to take the equivalent of a couple of 6 packs on the go with you.
Check out Keg King's website for the full range of King Keg's and more.
Related Articles

No comments:
Post a Comment