For those that stick with it, bottling can soon become tedious though - mainly because of the labour and effort required to clean and sanitize dozens of bottles for every batch. This inevitably leads many homebrewers (like us) down the rabbit hole of kegging their beer - which gives plenty of additional benefits over bottling, but perhaps most significantly reduces the cleaning and preparation time involved for packaging. Cleaning a single keg is inevitably faster and easier than cleaning 20+ bottles for every batch of beer that is brewed.
Ironically, once homebrewers have their kegging operation underway, it's soon realised that there isn't a particularly easy way to efficiently get their precious beer from the keg into a bottle - which can be handy for sharing with family and friends, entering into competitions or taking to parties etc.
Sure, you can fill a bottle or growler directly from a tap, but this will often lead to a fair amount of foaming which reduces the level of carbonation, and with no way to reduce oxygen being introduced into the beer during this process, the beer will likely suffer the effects of oxidation and spoil within a matter of days in the bottle.
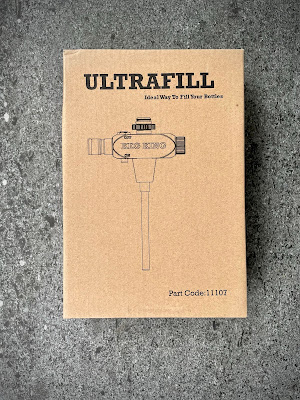 |
| Keg King's UltraFill Counter Pressure Bottle Filler Box |
That's where counter pressure bottle fillers come in. They provide a reliable way for brewers to get their beer packaged from a keg into bottles/growlers by significantly reducing the effects of foaming and oxygen ingress during the bottling process.
The term counter pressure bottle filling can sound a little daunting though. The theory (and process) behind it is relatively simple, and similar to that of general pressure transfers from (pressurised) fermenters to kegs. The bottle is pressurised to be the same or similar pressure to the source keg. Then once the beer transfer line is opened on the bottle filler, a vacuum effect is created by reducing the pressure in the bottle that draws the beer from the keg into the bottle.
Since the beer remains under pressure during the transfer process, the amount of absorbed carbon dioxide (CO2) that comes out of solution is limited which in turn reduces foaming and helps maintain the right level of carbonation within the beer after being bottled. And since the bottle is pressurised with CO2, this also greatly reduces the level of oxygen present in the bottle which helps reduce the risk of oxidation.
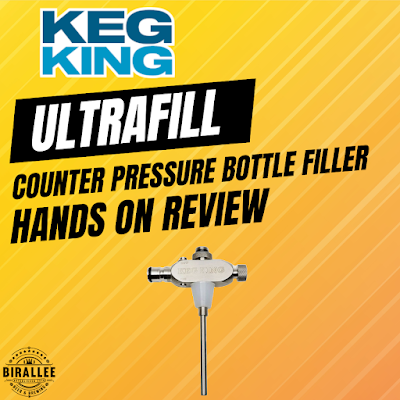
Keg King have designed their own counter pressure bottle filler, named the UltraFill which is a versatile little unit to help brewers leverage the benefits of counter pressure filling.
The UltraFill comes assembled as a single unit, constructed almost entirely of stainless steel. Straight out of the box it has a threaded connection to enable it to be screwed directly onto the nozzle of Keg King's range of UltraTap's. Some other counter pressure bottle fillers use a push-in style adapter to insert into the tap nozzle which are more prone to leaks, or simply popping out during use. Having a screw in thread like this means leaks and accidental disconnections are much less likely to occur.
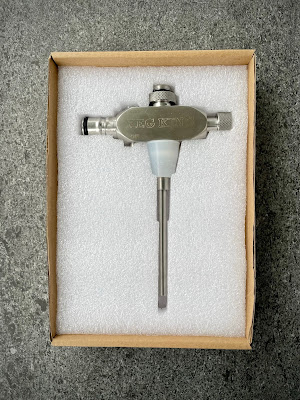 |
| Keg King's UltraFill Counter Pressure Bottle Filler |
There are a few other connection options available for the UltraFill, such as UltraTap or InterTap extension kits which allow beer extension lines to be fitted to the respective taps (instead of connecting the UltraFill directly to the tap nozzle), or a Keg Connector kit - all of which allow bottle filling to be accomplished on a table top, or the ground. In this review we'll be using the Keg Connector kit.
The image below illustrates the key components of the UltraFill;
1. Gas ball lock connection
2. Gas On/Off toggle
3. Liquid/beer input - pictured is the thread to connect to UltraTap's.
4. Screw collar
5. Pressure release adjustment
6. Plastic/silicone bung
7. Telescopic filling arm
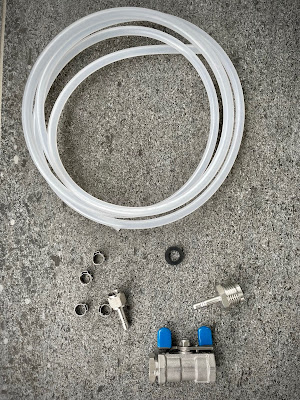 |
| UltraFill Keg Connector Kit Parts |
The Keg Connector kit that we're using has a ball lock housing that attaches to the liquid input (3) of the UltraFill. There's also a length of beer line, a washer and some stepless clamps to attach the beer line to the ball lock housing and the other end to a liquid disconnect (liquid disconnect is not included). It's relatively straight forward to assemble, though we got caught out after failing to install the included washer when first assembling which resulted in leaking during initial testing. A single page instruction sheet or diagram on the Keg King website wouldn't go astray to help young players piece it together.
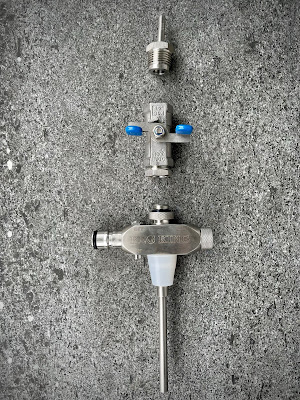 |
| UltraFill Keg Connector Kit Assembly |
The inclusion of a gas ball lock connection on the UltraFill housing is a great idea, helping to make the unit as "plug and play" as possible.
The on/off toggle for the gas is well positioned near the gas ball lock post and allows for easy single handed operation of the gas input.
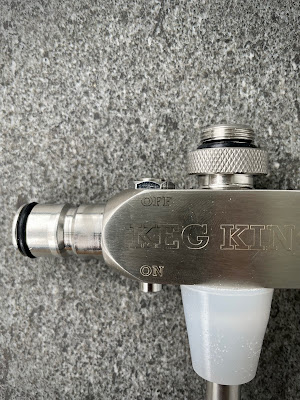 |
| Closeup of the UltraFill gas on/off toggle |
An additional screw collar (4) means that the UltraFill can be adjusted and oriented correctly after having whatever is to be attached to main liquid input thread (3) screwed into place. This is a really nice and well thought out feature as it would be extremely difficult to operate if not facing the correct way after being screwed into place.
The pressure release control (5) is tactile and has a nice feel to it, giving precise control over the pressure being released from the bottle. There are also some markings as you unwind it giving an indication of what pressure is currently set which is a nice touch.
Just about any size bottle can be filled using the UltraFill. Since the filling arm is telescopic, it can be extended to reach the bottom of even the largest of bottles, and the tapered shape of the silicone bung (6) means any size bottle opening can be used and sealed for pressurising and filling.
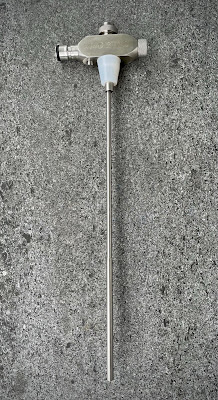 |
| UltraFill Telescopic arm fully extended |
After connecting everything together, we were ready to go with filling our first bottles. Here's the step by step process we followed;
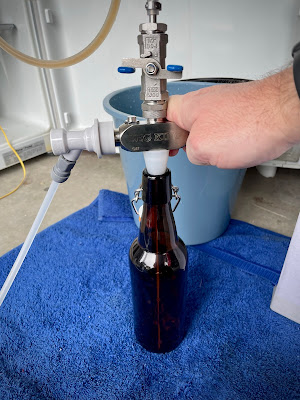 |
| Keg King UltraFill Counter Pressure Bottle Filler in action |
1. Ensure the ball valve control is in the off/horizontal position and the pressure release control on the UltraFill is fully tightened (turned clockwise).
2. Extend the telescopic arm so it's as long as possible (only required for the first bottle if subsequent bottles to be filled are the same size/length).
3. Insert the telescopic arm into the bottle and lower the UltraFill so the plastic bung is seated securely in the bottle opening. The telescopic arm automatically retracts whilst doing this so it's as close to the bottom of the bottle as possible.
4. Set the gas toggle to the "On" position which will begin building pressure within the bottle. A little bit of downward pressure to keep the UltraFill seated on the bottle is required to ensure pressure is built/maintained. We briefly release the pressure by lifting the UltraFill slightly to "burp" it and help release some of the oxygen from the bottle. This can be done a couple of times, though we only did it once per bottle.
5. After 10-15 seconds, pressure has been built so the transfer can now start. Set the gas toggle to the "Off" position, then open the ball valve by rotating the control arm into the open/vertical position.
6. Depending on how much pressure is in the bottle, and the pressure differential between the bottle and the keg, beer may now start flowing. The flow rate can be controlled by releasing pressure from the bottle using the pressure release valve on the UltraFill (by turning it counter clockwise). Release more pressure to speed up the filling process, though slow and steady is generally recommended to minimise foaming.
7. Once the desired fill level is achieved, shut off the beer flow by rotating the ball valve control back to the off/horizontal position.
8. Gently/carefully remove the UltraFill from the bottle. A little bit of spray/foam may come out of the top of the bottle as the pressure is released.
Repeat the above process for each subsequent bottle.
Having never used a counter pressure bottle filler before, we were pleasantly surprised at the ease of operation. It perhaps sounds a bit more involved than it actually is, and it was surprisingly easy to operate the controls whilst maintaining a little bit of downward pressure on the bottle to ensure a good seal.
We really liked the Keg Connector kit that allowed us to have bottles placed on a hard surface so we didn't have to hold the bottles and maintain pressure on the UltraFill - though there's no reason to think attaching it to a tap and maintaining upward pressure on the bottle would be overly difficult either. The inclusion of push in fittings instead of stepless clamps, or an optional upgrade to include them and a liquid disconnect on the website for an additional fee might be a good idea too.
There was definitely a reduced amount of foaming compared to our previous bottling method from kegs using a beer gun. Whilst beer guns are still good, the requirement to use them at much lower serving pressures to reduce foaming (around 2-3 psi is typically recommended) means there's a bit more mucking around with lowering keg pressures which has it's own implications (quickly reducing pressure in the keg will lead to foaming in the keg) which then leads to increased foaming when bottling unless you leave the keg to settle again after reducing the pressure.
Counter pressure bottle filling does away with all of this, meaning you can bottle quickly using the same pressure that your keg is at, with minimal fuss and less cleanup since there's less foaming. Less foaming means a reduction in lost carbonation too. And filling into a bottle pressurised with CO2 greatly reduces the risk of unwanted oxidation occurring - meaning your beer will stay fresher for longer after being bottled.
The fact the entire UltraFill unit is made of stainless steel means it's robust and sturdy and can be quickly and easily cleaned and sanitised before and after each use. The pressure control valve can also be fully removed for cleaning should some foam happen to make it back up into the unit during bottling by overfilling.
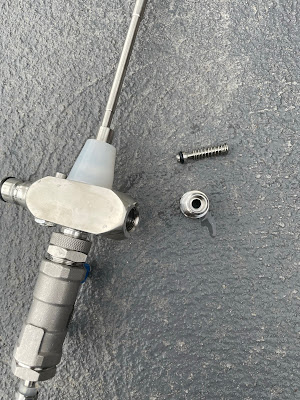 |
| UltraFill with the pressure control disassembled for cleaning |
When it comes to bottling beer from a keg, a counter pressure bottle filler is arguably the best option to use, and Keg King's UltraFill has all the features brewers would need. The ability to directly attach to UltraTap's makes it a must have accessory if you're already using them, but even if you're not, the Keg Connector kit gives the flexibility to work with just about any keg.
Some people have concocted their own counter pressure filling devices using carbonation caps and lengths of silicone hose, which may work but are inevitably finicky and difficult to use, especially if you want to fill different size bottles. There's a lot to be said for purpose built applications such as the UltraFill to make processes as easy and efficient as possible.
The UltraFill is available from Keg King's website and is currently retailing for AU$59.95.


No comments:
Post a Comment