Thursday, 16 February 2023

Hydrom - Wifi & Bluetooth Hydrometer - Hands on Review

Introduction

When it comes to monitoring the progress of your fermentation, the most accurate and reliable way is to measure the specific gravity (SG) of the wort that is being fermented. The term "gravity" refers to the amount of dissolved sugar present in a solution (which is wort in the context of brewing). As fermentation progresses and the yeast consume the sugar and produce carbon dioxide gas, alcohol, and loads of other byproducts that make beer, the gravity will decrease.

Gravity readings are critical at the beginning of fermentation to know what the original gravity (OG) is, and at the end to know what the final gravity (FG) is. These readings are then used to calculate the amount of alcohol present in the beer.

Gravity readings are typically taken by drawing a sample from the fermenter into a test tube, and are then measured by inserting a floating hydrometer into the test tube that will indicate the current SG of the sample. This obviously works well but there's some wastage involved with repeatedly drawing a couple hundred millilitres for samples. Arguably not such a big deal in large scale brewing where the loss is negligible when brewing hundreds of litres of beer, but at a homebrew scale these losses can be annoying and more wasteful. No one likes to waste beer, afterall.
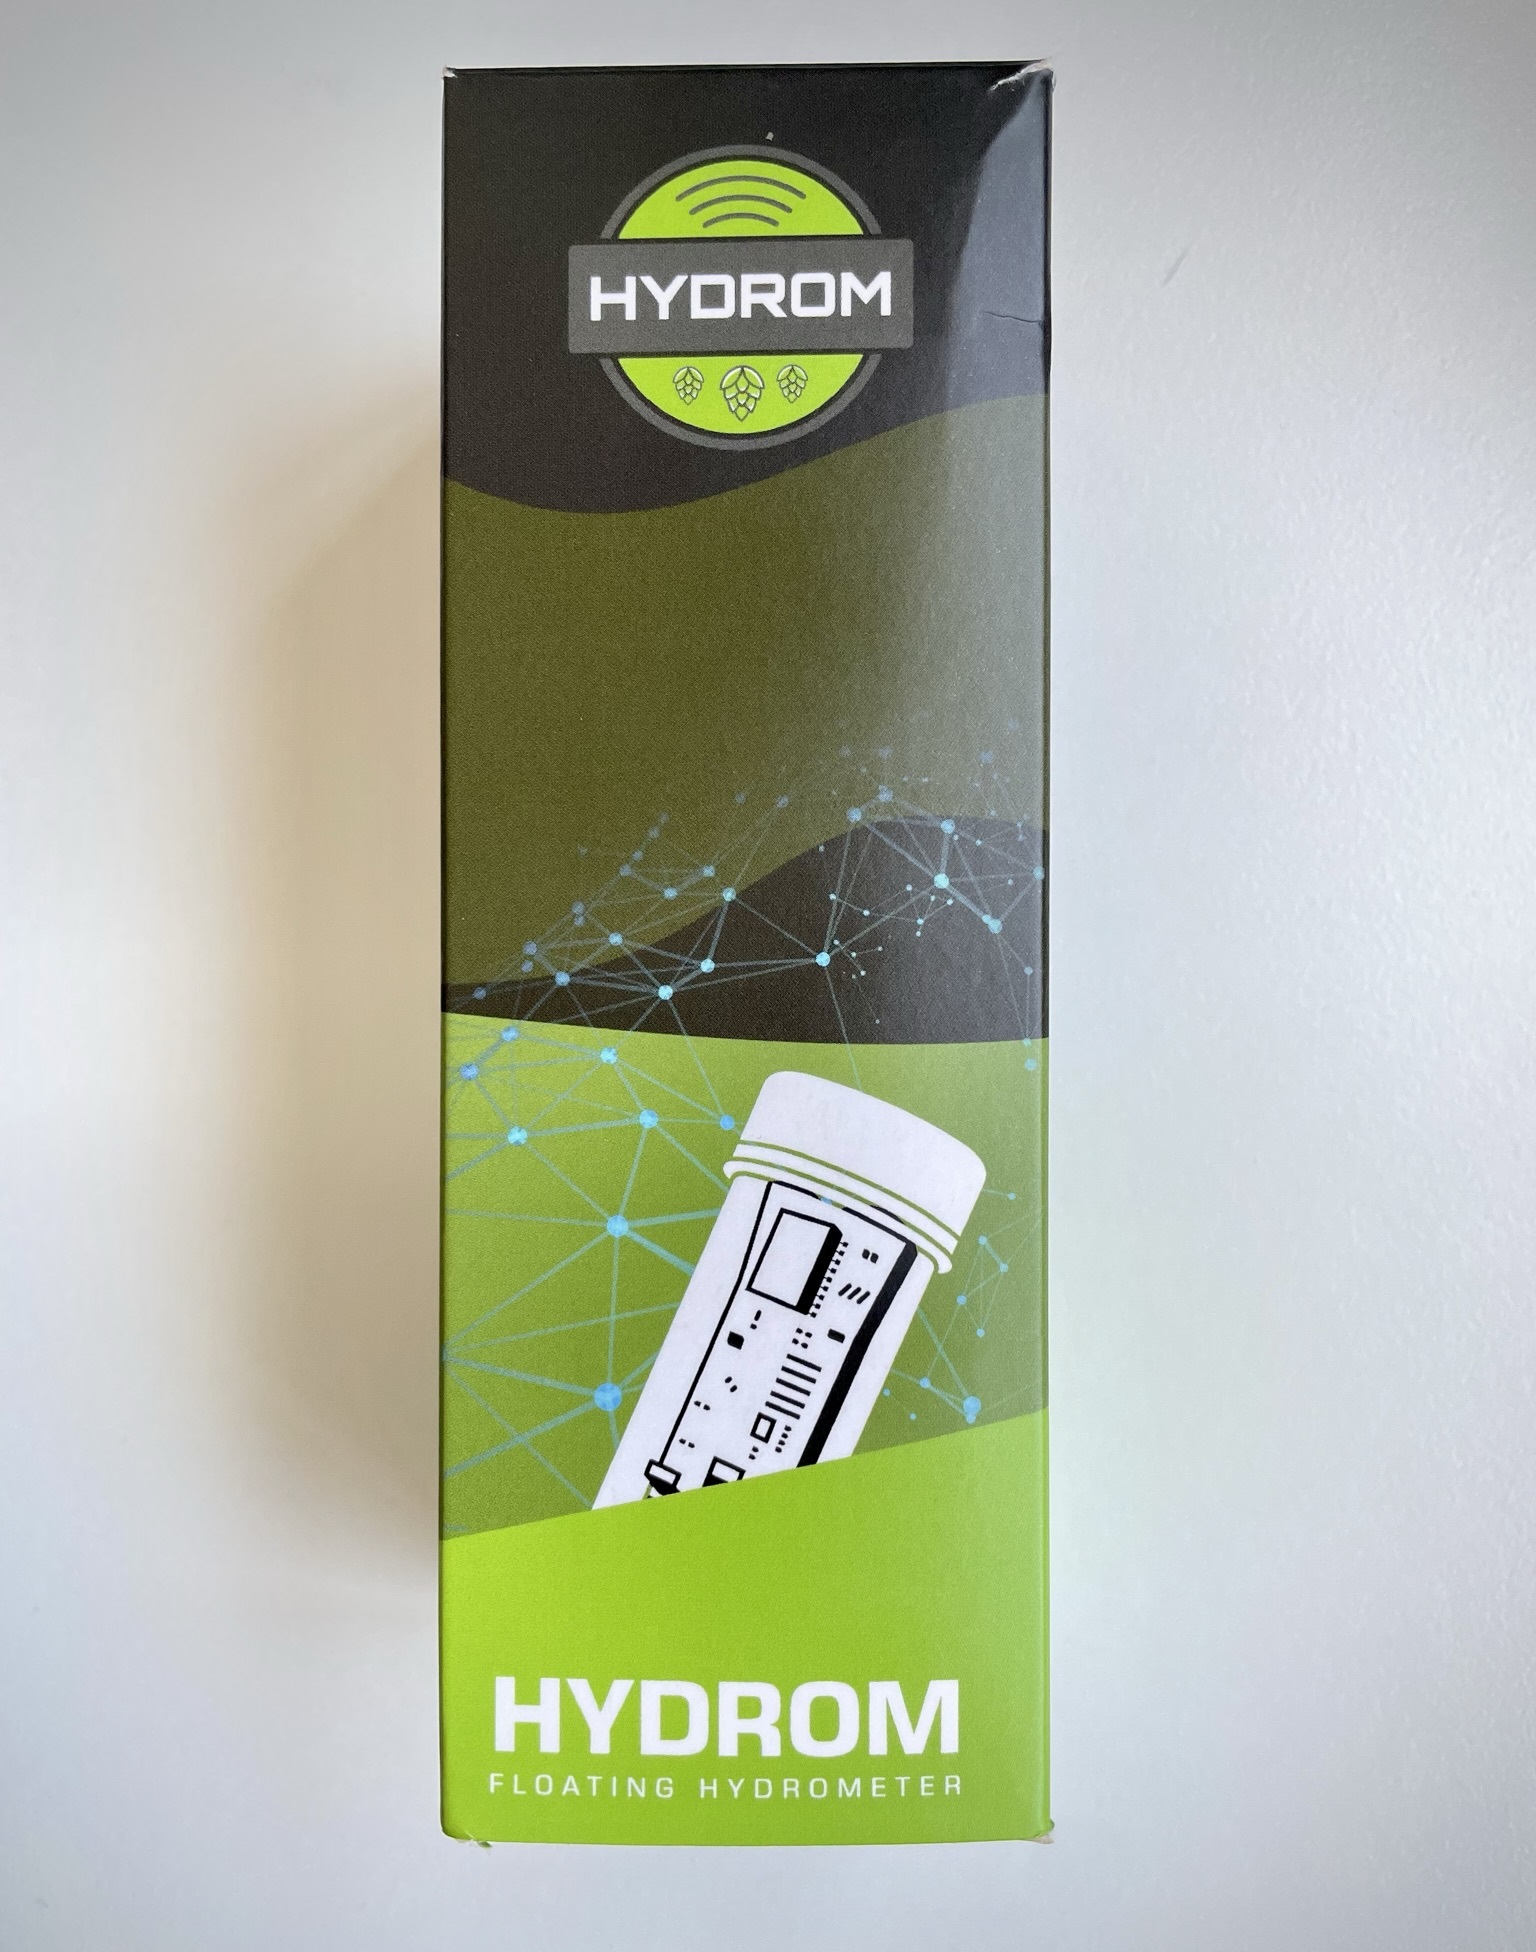
The invention of smart, internet-connected hydrometers have proven a game changer in this space, and have given brewers new insights into fermentation behaviour and what happens between those original and final gravity readings (without needing to draw repeated samples). These hydrometers work by being submerged in the fermenter and then transmit readings for gravity and temperature via Wi-Fi or Bluetooth either to a cloud service or other connected device so the readings can be stored, interpreted and presented in pretty graphs.

We got our hands on the latest smart hydrometer, called the "Hydrom" from German-based company Bonorum UG for a hands on review to see for ourselves how this device differentiates itself from other smart hydrometers currently available.

Unboxing

The Hydrom comes fully assembled in a single box with a small pamphlet including some technical information/specifications and brief instructions in multiple languages. The instructions are quite brief and can get you started and to a point, but the instructions on the Hydrom website are much more comprehensive.

Looking at the Hydrom itself, and it's bigger than we expected - it looks a bit like the iSpindle, and that's because it's been created by the same person. The body is around 150mm long and is made of clear plastic and features a green screw on lid which has a 50mm diameter. Through the clear plastic you can see the internal electronic components, battery and weights to keep it balanced.

There is no rubber seal on the lid, but it does create a water tight seal without any problems when screwed on. The green lid has vertical grooves in it - presumably to help with gripping the lid when wet to make loosening/tightening easier, but this and parts of the cap thread would likely build up with trub from krausen and hops after being in the fermenter so care should be taken when cleaning to make sure all these grooves are free from any such debris or foreign matter. Since these hydrometers need to be submerged in the wort, cleaning and sanitiation is paramount to avoid infections.

Charging

First order of business is to charge the Hydrom by connecting a USB-C charger into the charging port after unscrewing the lid. A USB-C cable is not included with the Hydrom so you will need to source one if you don't already have one lying around, but they're easy to come by and have become the standard charging connection for devices in the EU.

Charging the Hydrom via USB-C

A solid red LED light indicates charging is underway, followed by a solid green LED when charging is complete and the Hydrom is ready for use.

Initial Use & Setup

To the right of the charging port is a toggle switch where the Hydrom can be powered on or off. There are markings on the board to indicate which side of the switch is on and off, and once the unit is switched on it immediately goes into "Deep Sleep" mode. This is the native, power saving mode for the Hydrom where it will remain in between brief "Wake Up" periods where it connects and transmits data before returning to Deep Sleep mode. The time between these wake up periods is configurable too which we'll cover in more detail later.

A web interface is able to be accessed/loaded by briefly pressing the round Reset button located to the left of the USB-C charging port. Pressing the button loads the web portal interface in a matter of seconds and places the Hydrom into AP mode where it broadcasts its own wireless SSID, or will connect to an existing Wi-Fi network once configured.

If connecting for the first time, you'll need to connect directly to the Hydrom using it's SSID - titled "Hydrom_xxxxx" (where xxxxx is presumably the last 5 digits of the Hydrom MAC address). After connecting to the SSID, you can access the Hydrom web interface by opening a web browser and navigating to http://192.168.2.1.

The web interface is simple and intuitive and is optimised for mobile devices so looks great on an iPhone. When you first connect you're presented with the main page which displays the current gravity reading (in Plaato) and the temperature.

The Hydrom interface main page showing current reading and temperature

You can access the menu by selecting the button in the top left corner which opens a left side bar menu that presents a list of options for Wifi, Settings, Services, Calibration, Update and DeepSleep.

Firmware Update

It's generally advisable to keep internet connected devices on the latest available firmware, so we decided to update the firmware before attempting to do anything else. The firmware update page is accessed by selecting the Update option from the menu, but it does require you to download the firmware .bin file onto a computer first before uploading it through the web browser which then applies the firmware to the Hydrom. This could definitely be improved by making the firmware updates able to happen directly over the Internet (if connected to a separate Wi-Fi network) without needing to download the file onto a computer first. Not everyone has access to a computer to accomplish this process so shouldn't miss out on being able to keep their device updated. A direct link from this page to the location of the firmware updates would also be a good inclusion.

Hydrom firmware update page

After locating and downloading the firmware file from the Hydrom website, we then click the green Upload button. At this point the firmware file is installed onto the Hydrom, however there is no progress bar or other indication as to how the firmware update went, and after the update is completed the device appears to restart and go back into Deep Sleep mode so you need to press the Reset button on the Hydrom to re-activate the web portal and connect again. There's no way to determine when to actually do this though so we'd like to see this firmware process updated in the future to give some clearer indication on the update progress and when the device can be used again, or alternatively reboot it back into the web portal mode automatically after a firmware update.

WiFi Settings

The Hydrom utilises the older 2.4GHz wireless standard, which is actually preferable to the newer 5GHz standard for this particular use case. Since the 2.4GHz wireless spectrum has much better penetration through objects and a greater signal range than the newer 5GHz spectrum, this makes it easier to get a signal and connection to your home WiFi router if the signal has to travel through a fermenter, fridge and several walls of a house. You do need to make sure that the 2.4GHz wireless option is enabled on your router though so if you're having issues getting it connected this should be the first thing to check.

After opening the WiFi option from the Hydrom menu, you're presented with the WiFi options screen where you can enter the SSID (WiFi-Name) for your home wireless network and password for use "Client Mode".

Hydrom WiFi connection screen

You can also adjust the SSID name for the Hydrom when in AP mode and set a password on it if you wish.

If using Client Mode, a banner will appear at the top of this screen confirming the connection and what IP address has been assigned to the Hydrom by your router.

Wi-Fi was very easy to setup, and really is a necessary step to make sure you get the most out of the  Hydrom.

General Settings

By selecting Settings from the Hydrom menu you're able to access the general settings for the device where you can set the network name for the device, and adjust the gravity reading units to either Plato, Specific Gravity or Degrees. You can also change the temperature units between Celsius, Fahrenheit and Kelvin, so whatever unit of measurement you like to use for temperature and gravity readings, the Hydrom has you covered.

Hydrom Setings screen

There are toggles for Deep Sleep so you can disable this feature and prevent the Hydrom from going into Deep Sleep mode, and also configure the amount of time between Deep Sleeps - ie. how long the Hydrom will remain in Deep Sleep for before waking up and transmitting data again. Shorter time periods will mean more frequent transmissions, but will reduce battery life.

The Hydrom online instructions state that the Hydrom requires 23 seconds to start, connect to Wi-Fi and transmit readings. This means you can adjust the deep sleep timing to factor this in - for example, to have data transmit every 15 minutes on the dot, you can configure the sleep time to 14 minutes and 37 seconds.

You can also enable and configure temperature compensation, change the language and enable/disable an option to "Recognize Headstand" - though there is no information about what this last feature actually does.

Services

After selecting Service from the Hydrom menu, you are presented with the Service screen where you can select and configure what service(s) you wish to integrate your Hydrom with. This is where we think the Hydrom really separates itself from other smart hydrometers on the market. The Hydrom isn't forced to directly integrate with any particular app or provider, so you have the choice as to which provider, or providers you wish to transmit to and store your data on.

Note in the previous sentence we mentioned "providers". This is because you are able to configure multiple applications and transmit to as many as you like at the same time. Want to have your gravity and temperature readings stored in BrewFather and Ubidots? Sure, why not.

At the time of writing, the following Services are available;

  • Bluetooth
  • BierBot Bricks
  • Brewblox
  • Brewfather
  • CraftbeerPi
  • Grainfather
  • HTTP
  • InfluxDB
  • MQTT
  • Prometheus
  • TControl
  • Telegram (BETA)
  • TCP
  • Ubidots

Obviously we haven't gone and tested every one of these, but we have tested a couple of them.

The list of options here can be a little intimidating, especially if you're not especially tech-savvy, but rest assured there is a free and easy option to setup your logging to which we'll outline below.

Hydrom recommend Ubidots as a good cloud service to integrate with when starting out. Ubidots have a free subscription option available which we signed up to (Ubidots Stem). The Stem platform is the non-commercial option for Ubidots which does have some limitations such as a maximum of 3 devices, 1 dashboard, 4000 "dots" or data points per day and retention of data for 1 month, but for the purpose of logging hydrometer data we won't be exceeding any of these metrics.

After following the instructions on the Hydrom website, we had our integration going and data being logged into Ubidots in no time.

After integrating and getting some telemetry data into Ubidots, you can easily create some cool widgets on a dashboard to help visualise your data - like battery life, temperature, RSSI (WiFi signal strength) and of course the specific gravity reading. Here's an example of a dashboard we created for our testing.

Ubidots Dashboards look great with the included widgets

For a free service it absolutely ticks all the boxes, and although it doesn't have a mobile application, it is mobile responsive so does look great on a mobile web browser and gives plenty of customisation options for excellent looking gauges, graphs and widgets.

Ubidots Dashboards also display well on mobile devices

The flexibility within the Ubidots platform is awesome, and the interface is really intuitive so creating multiple graphs, adjusting them and making it look good is easy.

Integration with one of the most popular brewing apps, Brewfather is also included in the list of supported Services.We were able to get our Hydrom integrated in a matter of minutes by simply retrieving a unique Stream ID from within Brewfather. This Stream ID is then entered into the corresponding field in the Hydrom. This was as simple as following the instructions on the Hydrom website and after doing so the Hydrom appeared in our list of devices in Brewfather. Easy. The only catch here is that you need to pay for the Premium version of Brewfather in order to integrate devices.

Integrating the Hydrom with Brewfather was simple

Another neat inclusion on the Service page is a toggle to send a test message. After toggling this option at the bottom of the list and clicking Save, a test message is immediately transmitted to all enabled services. This was a great feature to have during initial setup and testing as it avoided having to put the device into Deep Sleep and waiting for the automatic transmission time to elapse to see if things are working.

With 14 options currently available under Services, and the ability to use more than one service at a time, there's a plethora of options available here. If you're into web development there are also options to transmit data via MQTT, TCP or HTTP to capture data using customised apps, servers or brokers too, but importantly there is at least one really good, simple, and most importantly, free option (Ubidots).

Calibration

The Calibration page, as the name suggests gives you a couple of options to calibrate your Hydrom. We tested ours in ~25°C water as per the instructions and found it was reading spot on at 1.000 specific  gravity, so we didn't see the need to run a calibration at this point.

Hydrom Calibration screen

If you do wish to calibrate your Hydrom, you have three options available on the Calibration page. First is a plain water measurement where you can set the Hydrom calibration for plain water, which as previously mentioned has a specific gravity of 1.000. Sit the Hydrom in a plain water solution at approximately 25°C and enable the option for PlainWater-Measurement then tap the option to Start.

You can also perform a more advanced calibration, known as a "reference calibration" where you place the Hydrom in various reference solutions of differening gravities (by adding different amounts of sugar or malt extract to them) which although is a more time consuming process, will give improved accuracy in the readings from the Hydrom.

If you're really feeling adventurous you can even go in and customize the calibration formula yourself, though we suspect for most homebrewers this wouldn't be necessary.

Is there an App?

One of the things we found ourselves pondering during our testing is that it would be good to have a dedicated Hydrom app. But after thinking about this a little more, we believe such an app would go against the philosophy that the Hydrom has been built on.

The Hydrom has been designed in a way to make it platform agnostic - which means that after purchasing the Hydrom, you aren't locked in to any particular application or platform to use it. It's a novel idea, as it means from a developer point of view the makers of the Hydrom don't need to worry about developing or maintaining an app or back-end infrastructure - which can be time consuming and costly.

From a customer point of view, it means you have the freedom and flexibility to integrate the Hydrom with any suitable application or platform you like - as we outlined in the Services section above. You can even "roll your own" if you have the skills and technical ability to do so. Don't be surprised to see some "homebrew" applications pop up that keen homebrewers develop themselves for the Hydrom and share with the community in the future.

The beauty of this platform agnostic philosophy is that if an application like Brewfather were to shutdown tomorrow, you could very quickly and easily reconfigure your Hydrom to connect to another service instead, like Brewblox. 

Other digital floating hydrometers that are currently available simply don't offer the same sort of flexibility that you can get with the Hydrom, since they're integrated with their own applications and platform to form their own ecosystem. 

Battery Life

Battery life of the Hydrom will very much be dependent on how it is used, and how frequently it wakes up to transmit data (determined by the Deep Sleep interval).

For our testing, we had our Hydrom configured to transmit data every 5 minutes, and after over 2 weeks of constant transmission, the battery had dropped from 100% to 57%. This is with a lot of configuration and having the Hydrom in configuration mode which consumes more battery as well.

Example Ubidots Stem graph showing battery history

Most fermentation schedules are around 14 days so you can rest assured you'll comfortably get through this period on a full charge. 5 minutes is also a particularly frequent setting for reporting fermentation telemetry and is no doubt overkill - an adjustment from 5 to 10 or 15 minutes would yield significantly improved battery life from what you can see in the example graph above.

Conclusion

There are a number of smart hydrometers currently available on the market. The Hydrom is a worthy competitor and has certainly found it's place by giving consumers complete freedom and flexibility as to how it is used and what platform or platforms it integrates with. The insight that a smart hydrometer like this gives into your fermentation progress is such a great thing to have so you can time temperature changes (like temperature increases at the tail end of fermentation for diacetyl rests etc), dry hopping and simply knowing when your fermentation has reached it's final gravity.

Care needs to be taken after use to ensure the lid and lid-threads are clean prior to putting into your fermenter but this shouldn't discourage people - cleaning and sanitation is such a key part of brewing that it should be second nature to most anyway. 

We like the fact that the Hydrom comes fully assembled and has a master on/off switch and reset button to quickly enable the web interface without the need to connect a charging cable to it.

The interface for setup and configuring the Hydrom is intuitive, looks good and is easy to use - and the recommended free platform for integration with Ubidots Stem is great and will meet the needs of 99% of brewers. Being able to integrate with multiple platforms simultaneously is also a great feature - for us, we'll be using both Ubidots and Brewfather for tracking our fermentation data.

You can purchase the Hydrom from Australia's Keg King - currently selling for AU$99.95 or from hydrom.io for 99,99€. At this price point it represents good value for money for brewers - negating the need to take samples for floating hydrometer readings is arguably worth the cost alone, but the comprehensive list of services the Hydrom can integrate with and solid performance really make a compelling case.

Let us know what you think of the Hydrom in the comments section below.

We've also created another post with a step by step guide on how to setup your Hydrom with Ubidots and create some graphs. which you can access using the link below.

Related Articles


Tuesday, 24 January 2023

Spike Brewing - Oxygenation Kit - Hands on Review

In a previous post, we outlined the importance of oxygenating wort prior to pitching yeast. Adequate oxygen levels in the wort are vital to ensure that yeast are able to grow and replicate and subsequently produce the best possible flavour profile into the finished beer.

Failure to supply adequate oxygen to yeast can cause issues such as a stuck or incomplete fermentation, or lead to yeast stress which results in undesirable off flavours being generated and imparted into your beer.

It is generally accepted that the amount of dissolved oxygen required in the wort is in the range of 8-10 parts per million (ppm). It is possible to achieve 8ppm of dissolved oxygen in your wort using aeration, which is essentially forcing atmospheric air into the wort using mostly manual methods - think stirring, splashing, shaking or utilising a pond or other pump.

For most fermentations, 10ppm of dissolved oxygen is considered ideal, and the only way to achieve this level of oxygenation is by utilising pure oxygen (from a pressurised cylinder). This of course requires some specialised equipment - namely an oxygen tank and suitable gas regulator, which are typically geared more towards the welding or medical industries.

Oxygen tanks are easy to come by, however oxygen gas regulators in our experience are a little problematic. The more affordable ones either have no gauge to measure pressure, or have a gauge with a scale far too large for the relatively low volumes and pressures required to introduce oxygen to wort. This makes it difficult to determine with any level of accuracy exactly how much oxygen you're introducing into your wort.

Oxygen gas regulators used in the medical industry are more applicable as they measure and control flow rate as opposed to pressure, however they are often incredibly expensive making them cost prohibitive to homebrewers.

Milwaukee based Spike Brewing have engineered and released an oxygenation kit that gives brewers an easy to use and affordable option for oxygenating their wort to ensure the best possible yeast health and fermentation outcomes.

We got our hands on one for a review and to put through it's paces so let's take a closer look.

The Spike Oxygenation Kit Box Contents

Opening the box and we've got the following items included inside;

  • Oxygen regulator with attached silicone hose and gas ball lock disconnect
  • Carbonation stone in an integrated 1.5" stainless steel tri clamp housing
  • 1.5" tri clamp and seal
  • Gas ball lock post

As you can see it's an all-inclusive kit and has everything you need to get going, with the exception of an oxygen cylinder (more on that later).

The regulator itself is coloured black with an integrated gauge to show the current pressure in the oxygen tank, as well as an adjustment dial at the top where you can set the flow rate. The body feels sturdy and solid, and the adjustment dial at the top has a tactile feel as each flow rate selection is engaged.

Spike O2 Kit Regulator with pre-attached hose and gas ball lock disconnect

An integrated gauge with a coloured scale ranging from 0-600psi gives a visual indication on how much  gas pressure is left in your oxygen tank when connected to help avoid any surprises with unexpectedly running out. Time for a new tank or a refill when you hit the red zone!

Spike O2 Kit Regulator

The silicone line and gas ball lock disconnect all come attached with stepless clamps which is great to have straight out of the box and saves some mucking around with assembly (and all but eliminates the chance of oxygen leaks from incorrectly installing or not securing clamps fully).

The carbonation stone is an optional extra (you can buy the oxygenation kit with or without the carbonation stone included), and utilises a 1.5" tri clamp connection to attach to your fermenter. This standardised connection means it can be used on any fermenter with a suitable 1.5" tri clamp port. The housing is of course made of stainless steel so is nice and shiny and looks great. The carbonation stone itself is quite long, taking up the majority of the depth of the housing it sits in, which no doubt aids in its effectiveness.

The Spike O2 Kit Carbonation Stone

If you already own a carbonation stone then you can of course attach the Spike Oxygenation Kit O2 regulator to it directly using silicone hose, or using a ball lock disconnect.

All that's left to do for assembly is attach the gas ball lock post to the carbonation stone. Spike recommend a few wraps of teflon tape around the post thread to ensure a leak free seal. Once this is done the carbonation stone is then attached to the fermenter using the previously mentioned 1.5" tri clamp and seal. It's also recommended to submerge or spray the carbonation stone with a phosphoric acid based sanitiser solution (like Star San) prior to installing in order to avoid any risk of infections being introduced by the stone. Easy.

Some teflon tape around the ball lock post thread to ensure a good seal

Next, we ensure the flow rate is set to 0 on the regulator, then attach the oxygen cylinder. We sourced a Bernzomatic branded oxygen cylinder (red is the standard colour for small oxygen tanks like this) which are relatively cheap and available from most hardware stores. The thread used is a CGA600 type and this tank has a capacity of 40 grams. Designing the kit to use these small and relatively inexpensive cylinders was a great idea as it makes them easily accessible to homebrewers.

Spike O2 Kit with 40g Bernzomatic oxygen tank attached

The cylinder is screwed onto the regulator using a reverse thread (turning counter-clockwise) - you may hear some hissing from the cylinder as the regulator engages, but if you continue turning it stops quickly so the losses are negligible.

Connect the supplied ball lock disconnect to the gas post of the carbonation stone, and we're ready to go. If you have the carbonation stone installed on the end of a valve then you will need to open this valve to allow the wort to submerge the carbonation stone. Installing it on the other end of a valve in this manner is probably a good idea, as it means that after oxygenating you can shut off the valve then remove the carbonation stone - otherwise you'll have to leave the carbonation stone in place throughout the entire duration of fermentation before it can be removed and cleaned - which may be a little more involved after being covered in wort, yeast and trub for a week or two.

It's worth mentioning the timing of oxygenating your wort as well. It's important that your wort is oxygenated after your wort has been cooled down to yeast pitching temperature, but prior to actually pitching your yeast.

There are a lot of variables that determine how quickly and how much oxygen is absorbed by the wort - like gravity (sugar content) and temperature (low gravity and temperature wort will absorb gases more readily than high gravity and temperature wort), but Spike recommend a flow rate of 1/4 litres per minute (lpm) for a duration of 30 seconds per gallon of wort as a good starting point. If the flow rate is too high the oxygen will simply bubble to the surface and come out of solution rather than remaining absorbed. Too little flow rate and you won't oxygenate your wort sufficiently. If in doubt, err on the side of caution and leave it a little longer - over-oxygenating is generally considered less of an issue compared to under-oxygenating your wort.

Spike O2 Kit Regulator and Carbonation Stone

Based on Spike's recommended flow rate of 1/4 lpm, oxygenating a typical 5 gallon (19 litre) batch would mean running oxygen through the carbonation stone for approximately 2 minutes and 30 seconds - certainly much faster than any aeration method. Compare this to aerating using an aquarium pump which takes anywhere from 20-30 minutes, which at best will get you to 8ppm and you can see how much more efficient using pure oxygen with the Spike Oxygenation Kit is.

Spike estimate up to 200 gallons (757 litres) of wort can be oxygenated using one of these tanks which is further evidence of the efficiency of oxygenating with the Spike kit.

Measuring the amount of oxygen absorbed in a fluid requires the use of a dissolved oxygen meter, something we don't have access to so we're happy to heed the recommended 1/4 lpm flow rate from Spike who have done all the testing and heavy lifting on this for us. However, there are other flow rate options available on the dial too - 1/32, 1/16, 1/8, 1/4, 1/2, 3/4, 1, 1.5, 2, 3 and 4 lpm are available on the adjustment dial if you're feeling adventurous or wish to utilise different flow rate settings.

The video below gives an idea of what the oxygenation process looks like using the carbonation stone submersed in liquid. We did this test in water so it's easier to see. Even at the relatively low rate of 1/4 lpm, you can see there's a lot of bubbling activity as the oxygen passes through the carbonation stone into the water.

The carbonation stone itself isn't just a one-trick pony either. As the name suggests, you can also use the stone for carbonating as well as oxygenating. Carbonating happens after fermentation has been completed and adds the desirable fizziness to your beer. The process for carbonating is basically the same as oxygenating, except you are connecting a carbon dioxide gas source (using a carbon dioxide gas cylinder and regulator) to the carbonation stone instead of an oxygen gas source. Using a carbonation stone is a faster way of achieving the desired level of carbonation in your beer as opposed to the typical method of having to pressurise the headspace of your serving vessel (typically a keg) then waiting for the gas to be absorbed from the headspace into the beer.

Cleaning is a breeze as well. Spike recommend cleaning the carbonation stone by soaking in powdered brewery wash (PBW) or similar, followed by a warm water rinse. You can then purge the stone by connecting your oxygen (or CO2) tank to it on order to remove any residual fluid from the porous stone, followed by a quick spray of sanitiser prior to storing for next use.

Overall we think the Spike Oxygenation Kit is a great product. We like the option of being able to purchase the kit with or without the carbonation stone (in case you already have one) or wish to use a carbonation stone that doesn't feature a 1.5" tri clamp fitting. Spike providing recommended flow rates and durations for oxygenation make it simple to figure out how long you need to oxygenate for to achieve optimal results is also incredibly beneficial. We also appreciated the hose and ball lock disconnected coming attached and clamped together meaning the kit is essentially plug and play - always a bonus and all but eliminates the risk of frustrating leaks from incorrect assembly.

Currently for sale on the Spike website at US$85 for the O2 Kit (regulator and gas ball lock disconnect), and US$165 for the O2 Kit + Carbonation Stone it represents good value in our opinion. All the equipment is of the highest quality and is no doubt built to last, but keep in mind an oxygen tank still needs to be purchased separately as well to get going, plus you can also use the carbonation stone for carbonating as well as oxygenating.

You'll also need a couple of other bits and pieces to get the most out of the kit if you're using the carbonation stone. Some thread tape for attaching the ball lock post to the carbonation stone is strongly recommended, and we also recommend installing the carbonation stone onto a 1.5" valve to allow for faster and easier removal after you're done oxygenating.

There's no doubt that oxygenating your wort is a crucial part of making the best beer possible, and the Spike Oxygenation Kit provides an effective and user friendly way of achieving it, especially at the homebrewing level. In our research we struggled to find other oxygen regulators that connect to the small oxygen tanks and boast the same integrated gauge and ability to dial in the relatively low flow rate like the Spike unit does.

Unfortunately at the moment Spike only ship to the US and Canada, but we'd strongly encourage anyone interested in their products from outside these countries to reach out to them and ask when they'll start shipping to your country, or if they're working on using any local distributors. 


Related Articles


The Importance of Oxygenating Wort when Brewing Beer


Thursday, 12 January 2023

Cold IPA Recipe (All Grain)

Following on from our recently published Cold IPA Recipe Creation Guide - here's our Cold IPA recipe.

Notes

As outlined in our Recipe Creation Guide, the grain bill is very simple, with around 74% being pilsner malt, and 23% being malted maize (you can use flaked maize instead). We've also added in a little bit of dextrose to help boost the OG and to promote the low attenuation and dry finish that is required for this style.

Our OG of 1.060 is right in the middle of the recommended range of 1.055 to 1.065 for Cold IPA's.

The hop combination features a new hop we haven't tried before (Mandarina Bavaria), as well as Mosaic and El Dorado. A decent charge of Mosaic at 30 minutes and another dose of El Dorado and Mandarina Bavaria at 10 minutes left in the boil provide the majority of the bitterness. There's a fairly hefty whirlpool hop addition of all 3 hop varieties to make up the remaining IBU requirements and will no doubt impart loads of other fruity, citrus and piney flavours.

Hop added during the boil and whirlpool have been specified by their IBU contribution instead of weight since the AA% of hops will vary between suppliers so this is a more reliable way to get consistent results.

Finally the dry hop comes in at around 10g/L, with an equal mix of the 3 hop varieties.

IBU's are at 55 which is slightly above the minimum 50 IBU's required for the style.

Fermentis W34/70 is the most recommended yeast for Cold IPA, and isn't one we've used before so we're looking forward to trying it - will ferment it at 18°C, slightly above the recommended range of 11-15°C. W34/70 is known to still produce clean results at these slightly higher temperatures, but also helps to reduce diacetyl and promote good attenuation to ensure we get that dry finish.

Some sort of fining agent like Whirlfloc or Irish Moss is recommended to achieve the crystal clear clarity required for the style but I haven't specified it here.

This beer is currently featured on our To Brew List and we'll be sure to update this article with a link to our brew day and tasting results once ready.

Vitals

  • Batch Volume: 23L 
  • Boil Time: 30 minutes
  • Brewhouse Efficiency: 75%

  • Original Gravity: 1.060
  • Final Gravity: 1.009
  • IBU (Tinseth): 55
  • BU/GU: 0.91
  • Colour: 7.9 EBC
  • Expected ABV: 6.7%

Mash

  • Temperature: 65°C - 60 minutes
  • Mash Out: 75°C - 10 minutes

Malts

  • 4.8kg - Gladfield Pilsner Malt
  • 1.5kg - Gladfield Malted Maize
  • 0.2kg - Dextrose

Hops

Boil Hops

  • 30 mins - Mosaic - 20 IBU
  • 10 mins - El Dorado - 10 IBU
  • 10 mins - Mandarina Bavaria - 10 IBU

Hopstand - 15 mins @ 80°C

  • Mosaic - 5 IBU
  • El Dorado - 5 IBU
  • Mandarina Bavaria - 5 IBU

Dry Hop - 3 Days Contact Time (after primary fermentation)

  • Mosaic - 80g - 3 days
  • El Dorado - 80g - 3 days
  • Mandarina Bavaria - 80g - 3 days

Yeast

  • Fermentis Saflager W34/70 (2 packets - dry)

Fermentation

  • 18°C for 14 days

Carbonation

  • 2.4 CO2-vol

Water Profile

  • Ca2+ (Calcium): 110
  • Mg2+ (Magnesium): 18
  • Na+ (Sodium): 17
  • Cl- (Chloride): 51
  • SO42- (Sulfate): 150
  • HCO3- (Bicarbonate): 48

Related Articles

Birallee brewing all grain recipe list title image


Saturday, 7 January 2023

Spike Brewing - All-In-One PRV - Hands on Review

Pressure fermenting has really taken off in recent years within the homebrewing community. With the abundance of affordable and quality pressure capable fermenters, it's a technique that many a brewer is adopting or considering using, particularly given the well known benefits such as the ability to ferment at warmer temperatures, and the suppression of esters and off flavours that are usually generated by yeast when fermenting at these warmer temperatures.

Working with pressure comes with some inherent risk and danger though, which is easy enough to mitigate as long as you're using equipment that is fit for purpose and setup correctly.

Two key pieces of equipment for pressure fermenting are a spunding valve and a pressure relief valve (PRV). The two are essentially safety devices and are typically used in conjunction with one another, with the spunding valve being responsible for regulating the pressure of the carbon dioxide gas created by fermenting yeast that is captured within the headspace of the fermenting vessel. The PRV is then used as a "safety net", to ensure the maximum working pressure of the fermenter is not exceeded in the event of the spunding valve failing or becoming clogged/blocked.

There are some problems and limitations with the array of spunding valves and PRV's available currently on the market though, which lead to Milwaukee based Spike Brewing coming up with a solution to address these shortcomings.

The All-in-One PRV is Spike Brewing's combined spunding valve and PRV - and with a couple of other neat features included as well, it is as the name suggests, an all in one solution for spunding and pressure relief, negating the need for separate components for each of these jobs as described previously.

We were fortunate enough to get our hands on one of the Spike All-in-One PRV's to review, so let's take a closer look at what it's all about.

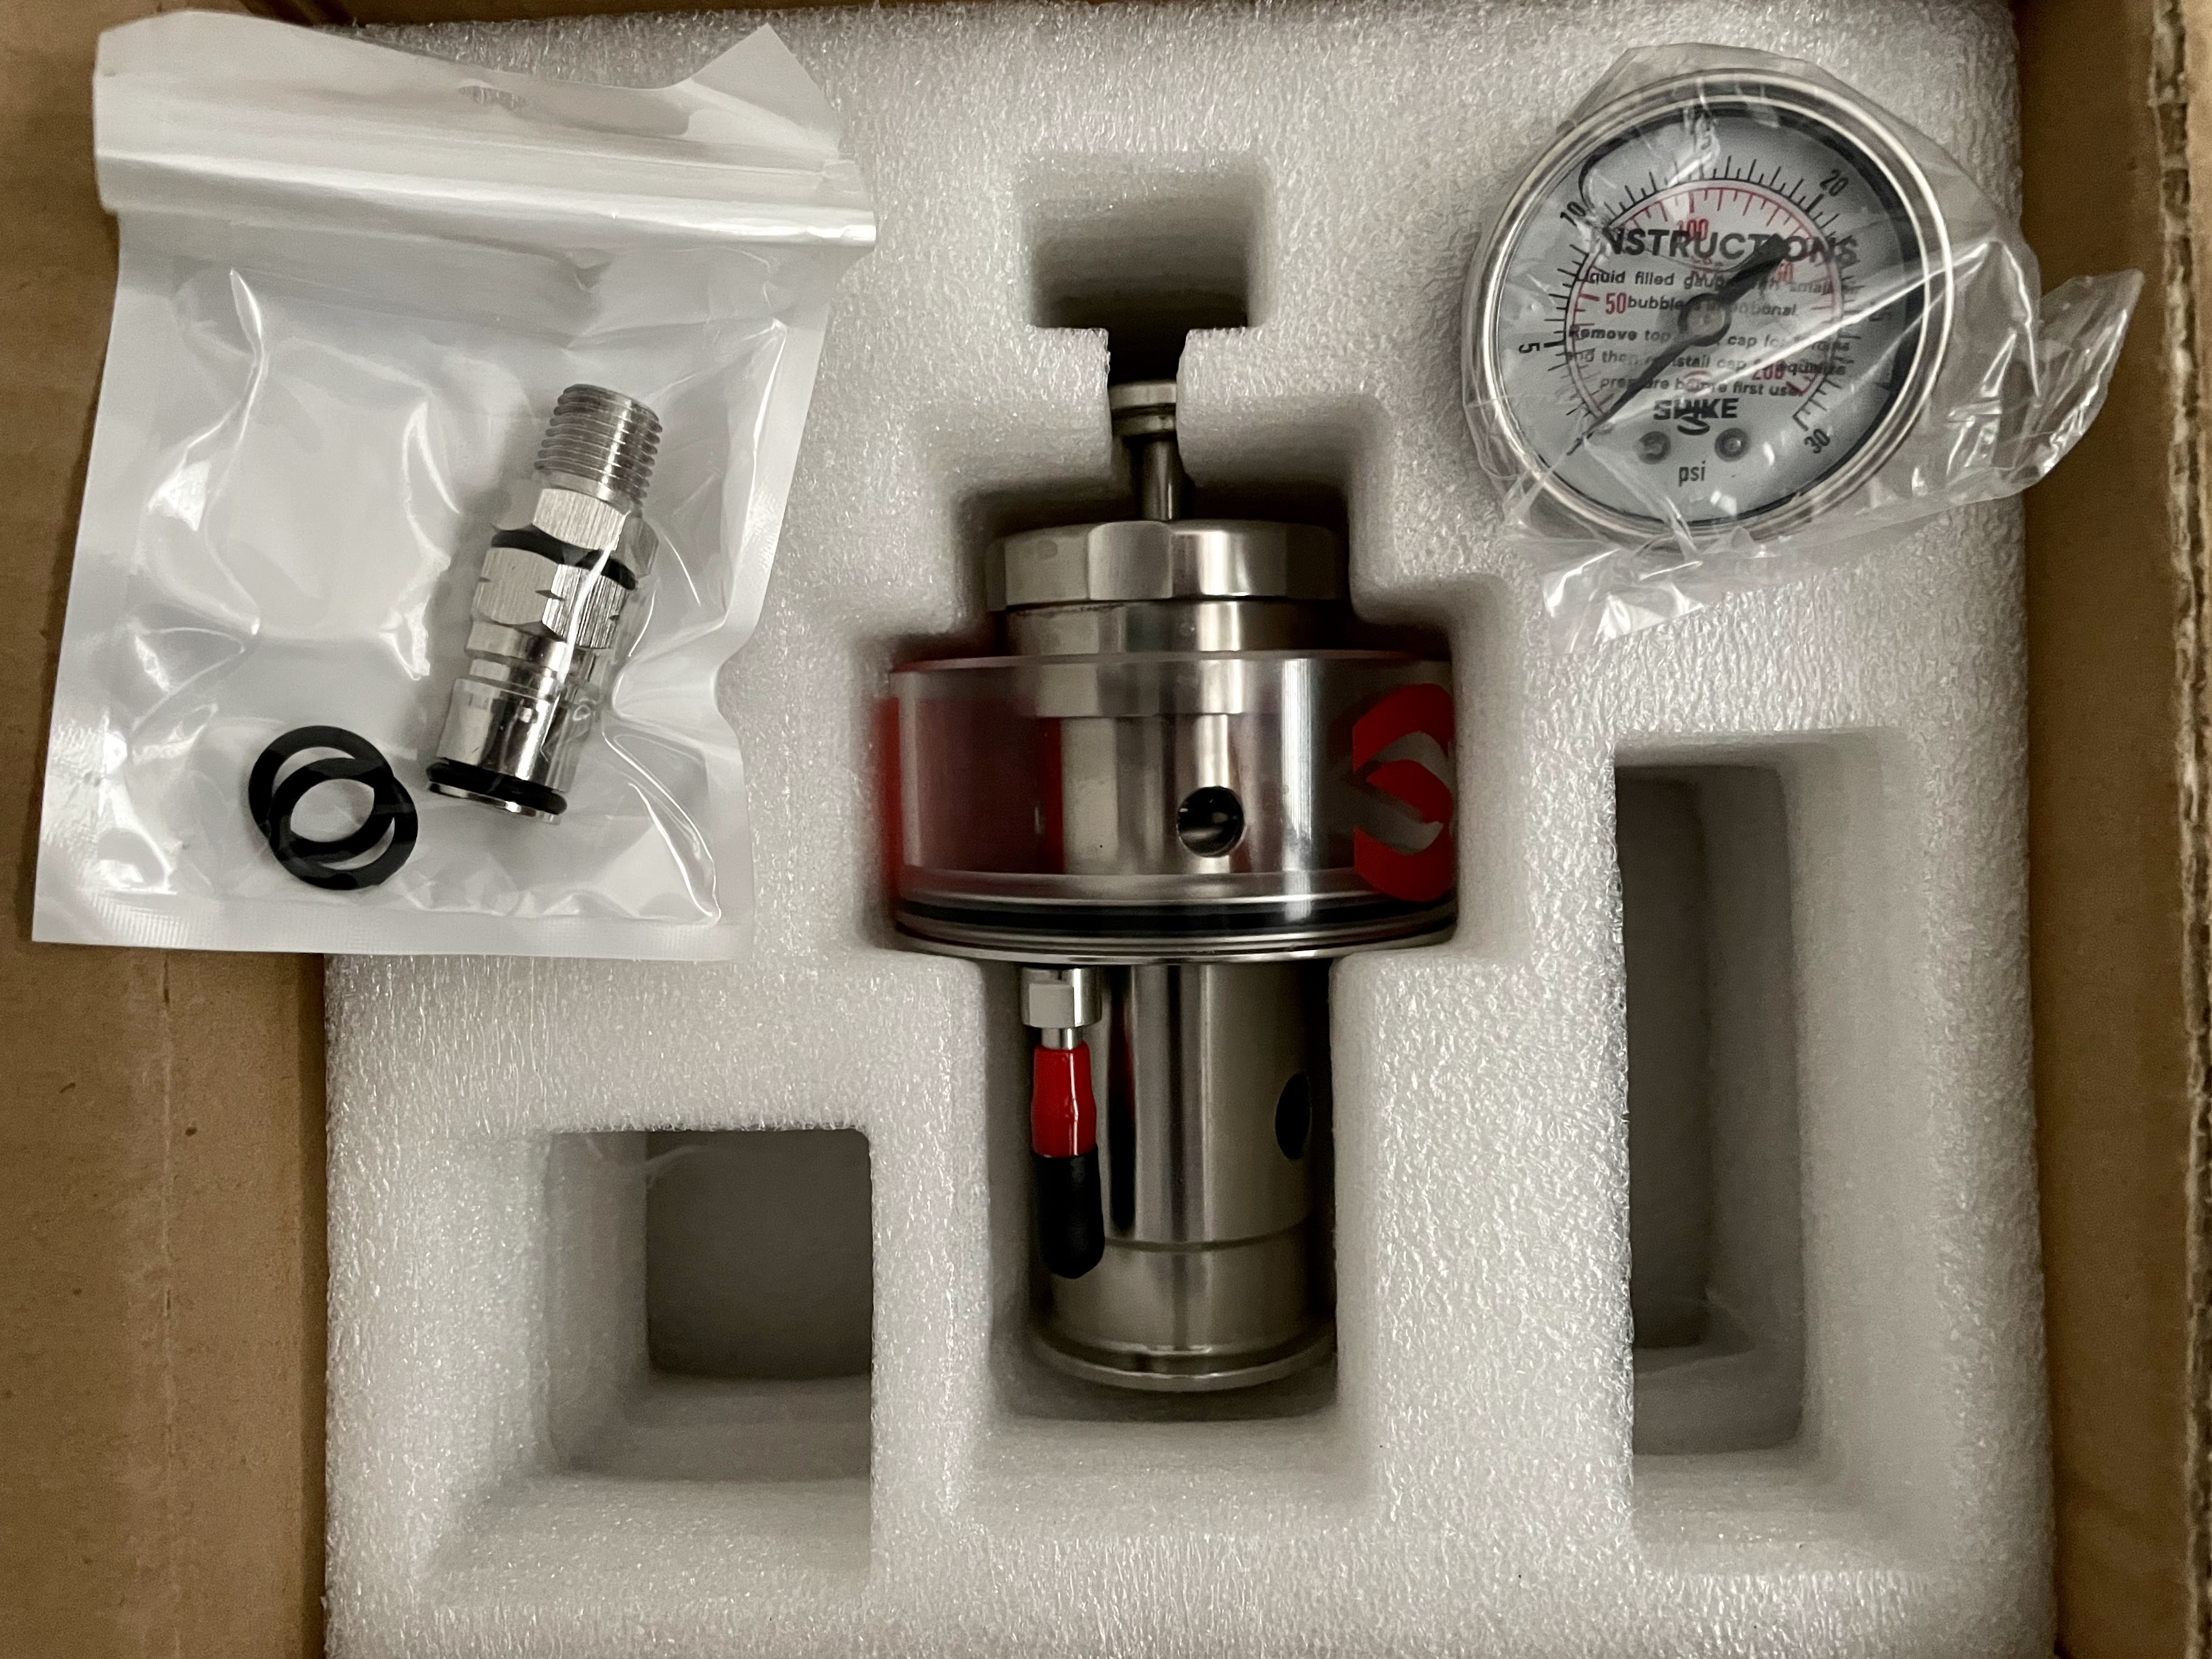
Opening the box and we've got the PRV body, with the gauge and ball lock gas packed separately and needing to be attached. The ball lock post comes with some spare seals which is a nice inclusion, but the 1.5" tri clamp and gasket/seal required to attach it to your fermenter are not included so need to be purchased separately.

Spike All-in-One PRV box contents

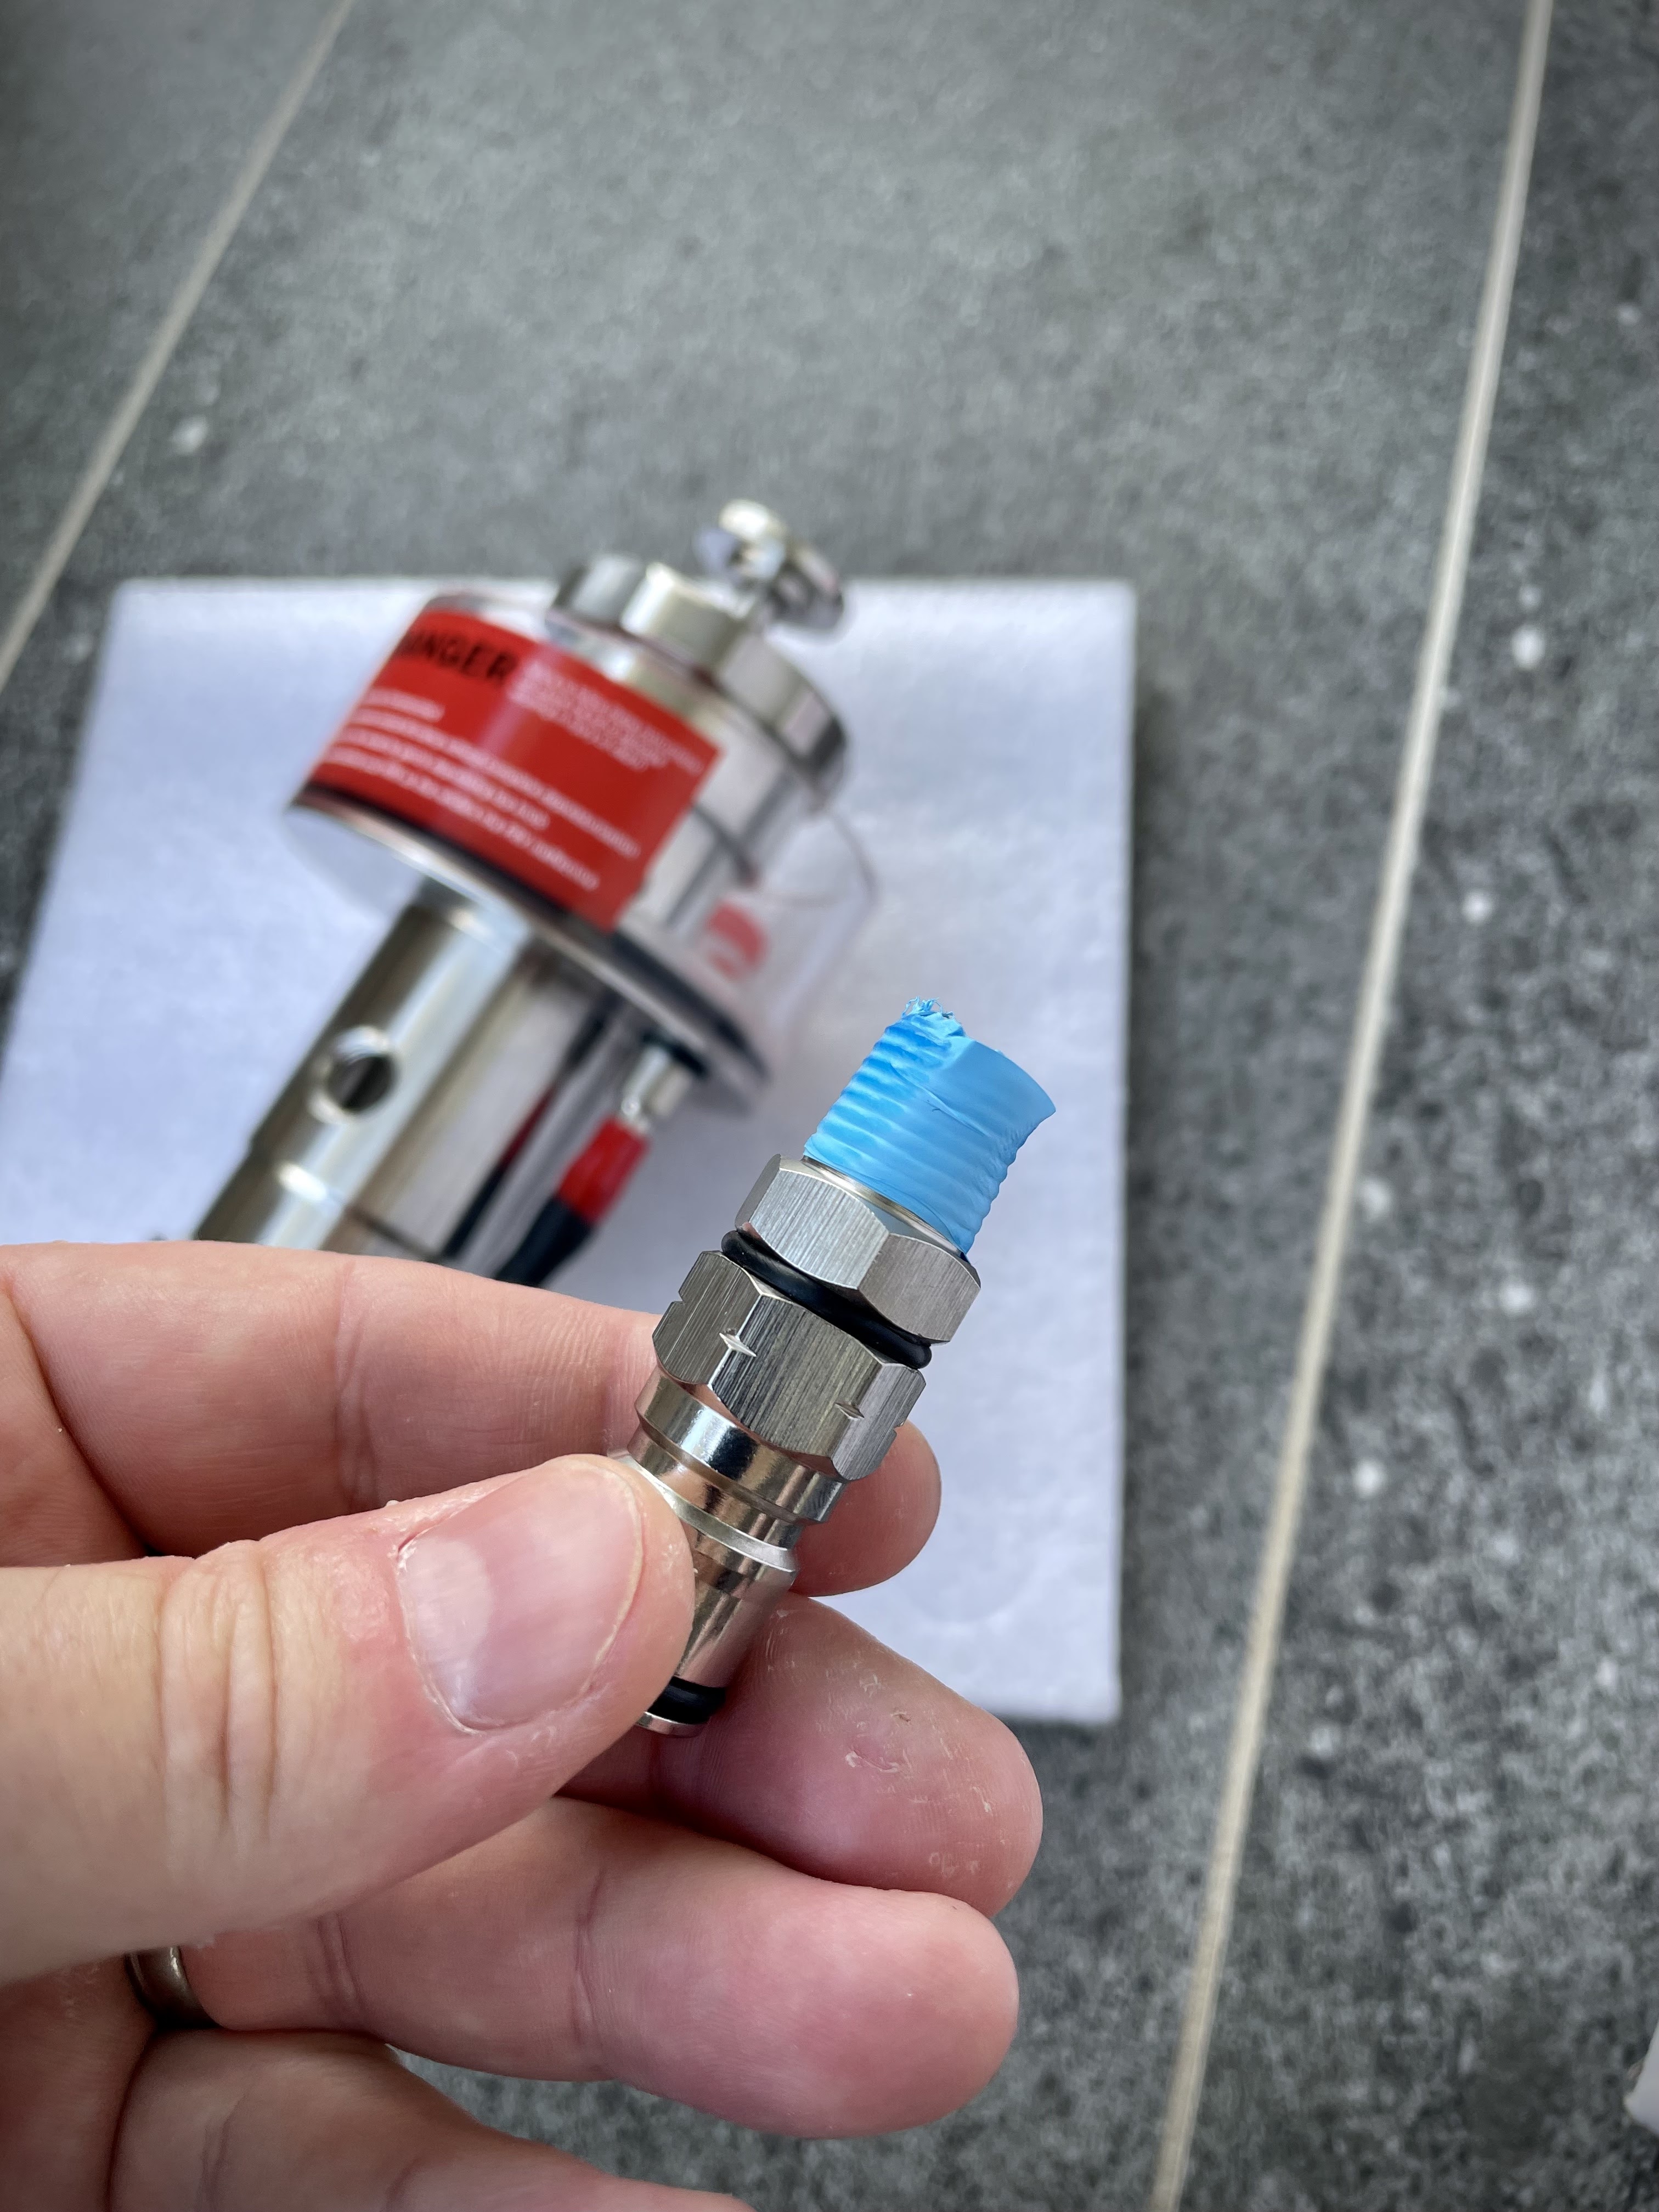
For assembly, Spike recommend wrapping the 1/4" NPT threads of both the gauge and the ball lock gas post with some pipe/teflon tape and tightening with a wrench or spanner to ensure a good seal and leak free operation. We used some blue tape as you can see below and after attaching both components we had zero leaks.

Thread tape around the gas ball lock post prior to installing

Thread tape around the gauge thread prior to installing

You can see straight away the design is made almost entirely of stainless steel, giving it a sturdy look and feel and a nice weight to it. It's compact, looks great, and boasts plenty of well thought out features. 

At the base of the All-in-One PRV we have a standard 1.5" tri-clamp connection meaning it's compatible with any 1.5" tri-clamp ferrule - a common feature on almost all pressure capable fermenter lids, so you can use it on any fermenter lid with a 1.5" opening, not just those made by Spike.

On the front we have a pressure gauge, with a ball lock gas post on the opposing side of the main body with both being connected using a 1/4" NPT thread.

There's an integrated cup for filling with sanitising solution and a drain port for easy drainage/removal of said sanitising solution.

Finally at the top there's an adjustment knob as well as a quick release plunger for quick and easy venting of pressure.

That's a lot to pack into a single unit, and there isn't another PRV or spunding valve currently on the market that boasts all these features. Let's go through them all now in a little more detail.

The Spike All-in-One PRV fully assembled

First we have the large 1.5" opening that is used for coupling the PRV to the fermenter lid. Although 1.5" tri-clamp PRV's are not new, there aren't any that feature the same large diameter port opening where the diaphragm resides as the Spike All-in-One. Spike intentionally made this port and diaphragm as large as possible to all but eliminate the possibility of the port becoming blocked or clogged, or the diaphragm/spring becoming stuck by krausen or hop debris making it's way in there.

Cross section of the Spike All-in-One PRV showing the large opening and diaphragm style design

Clogging is a major risk when looking at some of the spunding valves and PRV's available that feature smaller port openings, but especially on those that utilise spring and poppet designs or connect to the fermenter using ball lock disconnects which also leverage a spring and poppet design.

Under side shot showing the large diameter diaphragm

The nature of spring and poppet designs is that the surface area of the poppet is quite small, meaning they can be easily blocked which is particularly problematic if you have a spring and poppet based spunding valve working in combination with a spring and poppet based PRV. Since both your spunding valve and PRV are typically situated on the lid of the fermenter, if a large krausen were to occur that reaches that high up, then there's a good chance that both could become blocked and result in no way for gas to escape and lead to an excessive and unregulated build up of pressure in the fermenter. Such an event would inevitably be catastrophic for the fermenter.

An example of a 1.5" PRV

1.5" PRV with small opening that can be easily clogged/blocked

The small surface area of poppets results in them having quite a large hysteresis too - meaning the difference in the amount of pressure required to open and then subsequently close the poppet are quite far apart. This in turn results in less accurate regulation of pressure when compared to diaphragm style designs like the Spike All-in-One PRV has.

The large format pressure gauge reading from 0-30psi is also a great inclusion. The large face and crystal clear increments and numbers allow you to accurately determine and set the amount of pressure being controlled by the All-in-One. Many spunding valves have small format gauges built-in which are good for giving an indication that pressure exists but are not known for being easy to read or particularly accurate at measuring exactly how much pressure there is. 

The included pressure gauge is a great size, liquid filled and crystal clear

The Spike gauge is liquid filled too, meaning it's more robust and better able to deal with pressure spikes, humidity and moisture without wearing out the delicate gauge components.

All the other 1.5" PRV's we've seen available don't have an integrated gauge either, meaning a separate gauge needs to be purchased and attached to the fermenter by using an additional 1.5" port on the fermenter or by connecting "T" or "Y" style adapters to allow multiple items to be connected to a single 1.5" opening - adding complexity and cost.

Complexity by adding multiple attachments off single ports is rarely a good idea, especially when you start adding shut off valves into the mix. Inadvertently putting your PRV on the wrong side of a closed valve renders it useless and is a sure way to over pressurise your fermenter.

The integrated ball lock post is a great inclusion

An integrated ball lock gas post is another key feature that allows a gas source to be connected directly to the All-in-One so that pressure can be added back into the fermenter. This is useful if you like to add positive pressure to the fermenter head space at the beginning of fermentation after pitching your yeast, or for performing pressure transfers from your fermenter. Where you would otherwise have to remove your spunding valve if attached to the gas ball lock post before you could connect your gas source, having the gas ball lock post integrated on the PRV negates this and is a simple yet clever idea to make the brewers life that little bit easier and simpler.

Next up we have a reservoir designed for filling with sanitising solution (such as Star San) which means the All-in-One essentially acts like an old-school air lock. As pressure within the fermenter causes the diaphragm to move, gas will escape out through the vent holes and then pass through the sanitising solution to the atmosphere. This creates a bubbling effect giving a crystal clear visual indicator of yeast activity within the fermenter, but also prevents any airborne microbes or other contaminants from entering the fermenter through the vent holes whilst they're open.

There's also a drain hole with a red and black silicone cap over it that can be removed to quickly and easily drain the solution cup without having to disconnect and remove the All-in-One from the fermenter. The diameter of this drain port has been intentionally made quite small so a length of silicone tubing (1/4" or 6mm internal diameter) can be quickly attached to make draining as mess-free as possible. Alternatively you could just stick a glass directly underneath to drain into, but you'd need to be quick and the space between the drain port and the PRV is a little tight. 

The black part of the silicone cap is textured as well, allowing it to be more easily gripped for quick removal without slipping through your finger tips. Little details like this really highlight the level of thought and attention to detail that has gone into engineering this design.

The adjustment knob on the top of the main body is used to adjust the set pressure for the All-in-One. Turning it clockwise will increase the set pressure, and counter-clockwise will reduce the pressure. When fully tightened in the clockwise position, the PRV will vent at 15psi which is the maximum rated working pressure for Spike pressure capable fermenters, as well as many other brand stainless pressure fermenters. 

This maximum pressure setting of 15psi is another reason why this unit is a true "All In One" as it negates the need for a secondary "safety net" PRV like what is required with other spunding valves that can be tightened or fully closed off, which if left unchecked could allow the maximum rated working pressure for any pressure fermenter to be exceeded.

There aren't any graduation markings when adjusting the pressure either to give you an indication of what pressure the All-in-One PRV is currently set at. This is because Spike recommend to using the integrated gauge when calibrating/setting the pressure as it will provide more accurate results.

Spike All-in-One PRV - adjustment knob and quick release plunger

At the very top of the All-in-One we have the quick release plunger which allows for some or all of the pressure within the fermenter to be rapidly purged. This is a great way to quickly ensure your fermenter is safe to open and avoid lids, caps and clamps flying off and causing injury or damage - simply press the plunger prior to undoing anything to be certain the vessel isn't currently pressurised. Depressing the quick release plunger requires minimal force to operate which is great, especially compared to other PRV's that utilise a pull type mechanism where you have to pull against the full force of the spring to open the valve for quickly venting pressure. A word of warning though - make sure the sanitising solution has been removed from the cup prior to depressing the plunger or you'll end up with sanitising solution everywhere, as the plunger opens the same venting ports used during normal operation. As you could imagine, any amount of pressure being rapidly vented through whatever liquid is in the sanitiser cup will result in a lot of spray and mess.

Cleaning is simple too, with only the gauge needing to be removed before the entire PRV unit can be submerged in your cleaner of choice like powdered brewery wash (PBW) and/or sanitising solution. Another huge benefit of the stainless steel construction compared to plastic is it's resilience to withstanding the harsh chemicals sometimes used in breweries, which can often cause discoloration or brittleness in plastic components like with other PRV's or spunding valves.

At approximately 16cm in height, the All-in-One PRV does add a bit of height to the fermenter when attached, so it's worth double checking you've got the vertical clearance if you're using a fermentation chamber or fridge that is tight on space

The Spike All-in-One fitted to our Nano-X Fermenter

Currently retailing on the Spike Website for US$150, it's certainly more expensive than many of the other PRV and spunding valves available on the market. We feel this can be easily justified though, given the premium stainless steel build quality and rich feature list. By the time you bought a standard 1.5" PRV, tee piece(s), gas ball lock post and large faced gauge and put them together with clamps and seals, you'd be unlikely to do it for less than the cost of the Spike All-in-One, and it certainly wouldn't look as nice, or be as compact.

Let's also not forget that you're using your PRV and potentially spunding valve to not only pressure ferment your beer, but also protect the significant financial outlay you've made for a quality pressure capable fermenter to ensure you don't damage it by over-pressurising it.

Unfortunately at the moment Spike only ship to the US and Canada, but we'd strongly encourage anyone interested in their products to reach out to them anyway - we've found them great to deal with and would strongly recommend the All-in-One product to any homebrewer in the market for such a device.


Related Articles


What Pressure Should I Pressure Fermenent At?