
.png)
Introduction
Homebrewing beer is a rewarding and enjoyable hobby that allows you to create unique and personalized brews right in the comfort of your own home. However, achieving consistently high-quality beer can be challenging, especially for those new to the craft. Over the years, we've experimented with various techniques and learned valuable lessons that have significantly improved the quality of our homebrews.
In this article, we'll share some of the most effective tips and tricks we've discovered to help you elevate your homebrew game. From controlling fermentation temperature to exploring advanced brewing methods, these insights will guide you towards brewing beer that rivals even the best commercial offerings. Let's dive in and explore how you can take your homebrew to the next level!
1. Temperature Control for Fermentation
The Importance of Temperature Control
Probably one of the most important things you can do and net the biggest improvement in your brews is control the temperature of your fermentation. Active fermentation is an exothermic process - ie. it creates heat. If there isn't some kind of mechanism to control the fermentation termperature it will continue to increase rapidly. Yeast fermenting in an environment that is too hot will often produce off flavours that will ruin the flavour of your beer.
 |
| A dedicated beer and brew fridge is a great way to control fermentation temperature. We use ours for fermenting and for serving kegs |
Methods for Controlling Temperature
The easiest and most common method for controlling this is using a dedicated fridge for fermentation. You can then hook up a temperature probe to your fermenter to monitor the temperature and switch the fridge on and off accordingly. Fridges can be had relatively cheaply in the second hand market, but this option isn't for everyone because of cost, but also space requirements.
Thankfully there are other options to help control your fermentation. You could put your fermenter in a bathtub full of cool/cold water - thus increasing the thermal mass of your wort which means more energy is required to increase or decrease the temperature - leading to a more stable temperature. You can then add ice as required to help bring the temperature down if required.
Other methods include wrapping the fermenter in a wet towel and having a fan blow air on it.
Another option to consider if you don't have something like a fridge to control the temperature is using a high-temperature tolerant yeast, such as a kveik strain. These yeasts perform well at higher temperatures (as high as 30°C or even more) without producing the same off flavours that other traditional yeast varieties would.
2. Avoiding Air/Oxygen when Packaging
Impact of Oxygen on Beer Quality
Nothing will ruin your beer more effectively than oxygen - and the most common time oxygen is introduced to your beer is during packaging - especially if you're bottling. Even the tiniest amount of oxygen coming into contact with your finished beer will lead to the staling effects of oxidation - causing discoloration, loss of hop aroma and flavour, and usually resulting in either a wet cardboard or sherry like flavour taking over your beer.
Techniques to Minimise Oxygen Exposure
If you're bottling using a bottling wand, one method you can use to reduce this is to squeeze the air out of the bottle before placing the cap on. Check out this YouTube video from The Home Brew Network which demonstrates the process.
You can also rest the caps loosely on the top of the bottle after filling for 30 minutes or so before sealing. The theory is that some carbon dioxide (CO2) will come out of solution and 'push' the oxygen/air left floating on top out of the bottle.
Don't shake the beer after bottling to help 'mix' or dissolve your priming solution. This will only help any oxygen in the headspace be absorbed directly into the beer.
You can also use oxygen scavenging bottle caps to help absorb any oxygen in the air left in the headspace of the bottle after filling.
 |
| A bottling gun like this one is a great way to fill bottles - you can connect them to a CO2 source to help purge them of any oxygen before filling |
If you want to go all out, you can even purchase a CO2 bottle and beer gun, then purge the bottle with CO2 gas before filling. This is much easier if you're working with bottling from kegs (or pressure fermenters) instead of from a regular plastic fermenter though.
The best method though would have to be a counter pressure bottle filler - like the UltraFill from Keg King. It's similar to a beer gun but works under pressure by pressurising the bottle you're filling first with CO2 in order to ensure it's completely oxygen free.
3. Avoid Extract Brewing
Limitations of Extract Brewing
In our experience, brewing using malted extract (dry or liquid), also known as "kit and kilo" brewing just doesn't taste good. Sure, it's beer - but if you want to make something akin to what you would be served at a bar, or could buy from a bottle shop, you'll never achieve it with kit and kilo brewing.
The next step would be to move to 'unhopped' malt extracts - which gives you more control as you add hops when boiling the extract for bitterness and aroma/flavour. You can then move onto partial boils where you steep a small amount of specialty grains and add them to your malt extract.
 |
| Malt extract products like this are convenient but don't create an authentic tasting beer in our experience |
It's well known and documented that the process of dehydrating 'wort' to make a malt extract significantly reduces it's quality. If you want to make the best beer you can, the only way is to use grains - also known as all grain brewing. This can be quite daunting when starting out, but there's plenty of information out there, and equipment can be had relatively cheaply. Take a look at Brew In A Bag (BIAB) brewing, or all in one brewing vessels such as the BrewZilla or Guten which are aimed as entry level equipment for all grain brewers - especially those starting out.
All Grain Brewing and Fresh Wort Kits
We've made beer using all of the above methods and nothing compares to all grain brewing. Some are happy with the results they get from kit and kilo or using malt extracts and that's fine - but if you're looking to improve this is the way to go. Also check out our suggestion on Fresh Wort Kits further below.
4. Water Chemistry Adjustments
Importance of Water Chemistry
Water chemistry seems to be one of the last things homebrewers look at, which is ironic as it can make a huge difference to the end result of your beer. It was certainly one of the last things we started to look at because it's quite daunting. Not all of us are chemistry majors which makes diving into the world of water adjustments somewhat overwhelming.
The most important part of water chemistry in brewing would have to be the pH - in particular, making sure the mash pH falls into the 5.2 - 5.6 range. Most drinking water has a pH higher than this which can lead to undesirable tannins being extracted from the grains during the mash. Acids like phosphoric or lactic are typically used to lower the pH and make it more acidic.

Tools & Resources for Water Adjustments
Thankfully it's not as hard as you probably think to adjust your water profile - especially when you can use free brewing software such as BrewFather to do all the hard work for you. Check out our blog post on Brewing Water Chemistry for Beginners to get started!
5. Try a Fresh Wort Kit (FWK)
Benefits of Using Fresh Wort Kits
Fresh Wort Kit's are large volume (approx 15L) kits of wort, or unfermented beer, shipped directly from professional breweries. The wort hasn't been further processed or dehydrated like they do to make malt extracts meaning you've essentially got an 'all grain' brew.
This makes you more of a 'fermenter' than a 'brewer', however, we strongly recommend giving one a try to see the difference for yourself. You'll probably be surprised. They're also a great way to check your fermentation and packaging processes are sound.
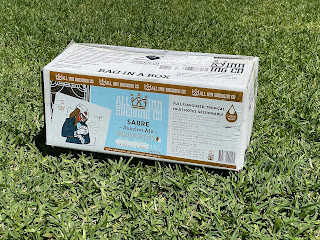 |
| An example of a Fresh Wort Kit (box) |
How FWK's Can Improve Beer Quality
FWK's are a great option for time poor brewers to quickly get a batch of tasty, fresh, quality beer. We've made a few of them ourselves with excellent results. Check out our blog post for more information on Fresh Wort Kit's.
6. Stop Bottling & Start Kegging your beer
Obviously this is easier said than done, however, kegging your beer has so many benefits that it's seriously worth considering. As we previously mentioned, the process of bottling your beer makes it very susceptible to oxygen contamination, which can lead to off flavours developing (in the bottle) very quickly. A lot of these problems are easily circumvented when you get into the world of kegging, not to mention the reduced time and hassle of cleaning all those bottles!
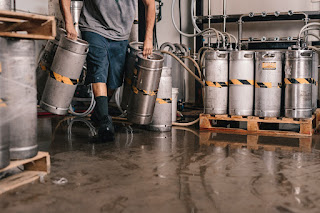
Equipment is getting cheaper and more accessible, and there's usually a decent amount of used gear available for sale on buy, swap, sell sites.
You can of course still bottle from a keg quite easily using a bottle filler beer gun or counter pressure bottle filler.
7. Look into Pressure Fermenting
Pressure fermenting is the next big thing that is growing in popularity very quickly amongst home brewing. You can get affordable pressure fermenters made of PET plastic such as the FermZilla that work incredibly well - but there are of course more expensive stainless steel options as well.
There's a whole range of benefits to fermenting under pressure, but a key point is that your fermenter essentially acts like a keg when your beer has finished fermenting. You can then easily do a Closed Transfer from your fermenter to a keg or even serve directly from your fermenter!
 |
| An example of a closed, oxygen free transfer from a FermZilla pressure fermenter to a 19L cornelius keg |
Check out our blog post on The Benefits of Pressure Fermenting for more information.
8. Cold Crash Your Beer
Cold Crashing your beer means cooling it rapidly (usually to 1-4°C) and is done after primary fermentation is completed. Dropping the temperature of the beer causes most of the yeast to drop out of suspension and will settle into the trub at the bottom of the fermenter. If you dry hop your beer, it will also help any hop debris floating on the top of your beer to settle to the bottom.
We wish we'd known about this one sooner as some of our early beers had small amounts of hop debris floating in them - and we also battled with hop debris clogging up our bottling wand!
Less yeast in your packaged beer also leads to a clearer finish which is something alot of homebrewers strive for.
9. Clean and Sanitize Everything
Sanitation is key when it comes to making beer - any kind of infection will quickly ruin any batch of beer. All homebrew shops will sell cleaning and sanitizing solutions and chemicals - use them on everything your beer comes into contact with!

No comments:
Post a Comment